


Tips & Tricks for getting started with origami
Origami, or the Japanese art of paper folding, is a creative hobby accessible to everyone! I very often meet clients who tell me “I'm not at all manual, but I can always do origami!” » and I'm not surprised. Origami is ideal for getting started with crafts because it requires few materials and you only need to follow a few steps to make a pretty fold (which can be put in a frame, mounted as a garland, etc.).
So I'm meeting with you today to tell you more about origami and above all to give you some advice for getting started in this creative hobby!
Before going any further, I wanted to tell you a little more about this ancestral art. The Japanese term origami comes from the Japanese ori , folding and kami , paper. It designates both the technique, the final folding and the square of paper used.
One of the most popular folds is the crane (or tsuru , in Japanese)! A symbol of good fortune and longevity, it is linked to the tradition of the 1000 cranes, senbazuru , which I tell you about in our article “TUTORIAL Folding the origami crane” .

One of the main advantages of this activity is that it requires very little equipment! The supplies you need to get started are available in store and on the e-shop, “Origami Paper” section.
First, I advise you to practice with plain paper squares , especially those from the Japanese brand TOYO . With a colored side on the front and white on the back, they are perfect for practicing origami because they allow you to fully understand each step and memorize the folding. This type of paper, which can be compared to machine paper, marks the folds well and therefore lends itself perfectly to learning origami before starting out with the beautiful squares of patterned Japanese paper .
Many origami foldings are available on the blog ( keyword “origami” ) but if you want to learn more, I invite you to discover my book “ Origami as by magic ”, published by Marabout editions. It brings together more than 50 folds which are detailed step by step in a very visual way! It was really important to me to also provide explanations that were as simple and clear as possible.

If you wish, you can also equip yourself with a folder which will help you in marking the folds, even if generally, this is done perfectly with the strength of your fingers. It’s above all a story of comfort! For my part, I find it more useful when the folds reach a certain thickness, after having carried out a certain number of steps or when you make an origami in a small size and it becomes difficult to mark the folds with your own fingers.

Once you are more comfortable with origami and you know the folding you want to make, you can tackle Japanese paper. I wrote an article “Japanese WASHI paper” if you want to learn more about it! It is a paper that is ideal for making origami, thanks to its flexibility and resistance. It supports many folds without tearing and also allows great precision, essential for making very small folds.

Most of the time, origami requires a square sheet of paper. Certain figures and geometric shapes require rectangular paper (like the origami tree ) or even thin strips of paper (like the origami volume star ) but this remains rarer. Other folds will require several papers to create the final origami (like the small origami cube ).

The format of the basic square is, most often, 15cm by 15cm . It allows you to carry out and visualize your first folding on a fair scale. It corresponds to a result, of standard size, for classic figures. This is the one we generally use to make origami garlands (except for the elephant, for example, which involves many steps and whose folding consumes and greatly reduces the surface area of the paper).
Then, you can gradually reduce with squares of 10cm side then 6cm side and so on… By going up to 3cm side, you can obtain mini origami for making jewelry for example.

It sometimes happens that certain origami figures need to remain flat for a precise aesthetic effect. To do this, I equip myself with an iron and two pieces of cotton fabric. I place the fold in a “sandwich”, between the 2 coupons, and I iron (without steam and above all at low heat). The paper will iron very easily and this tip will allow you to flatten your fold as you wish.

If you liked one of the folds presented throughout this article, here is the list of corresponding tutorials:
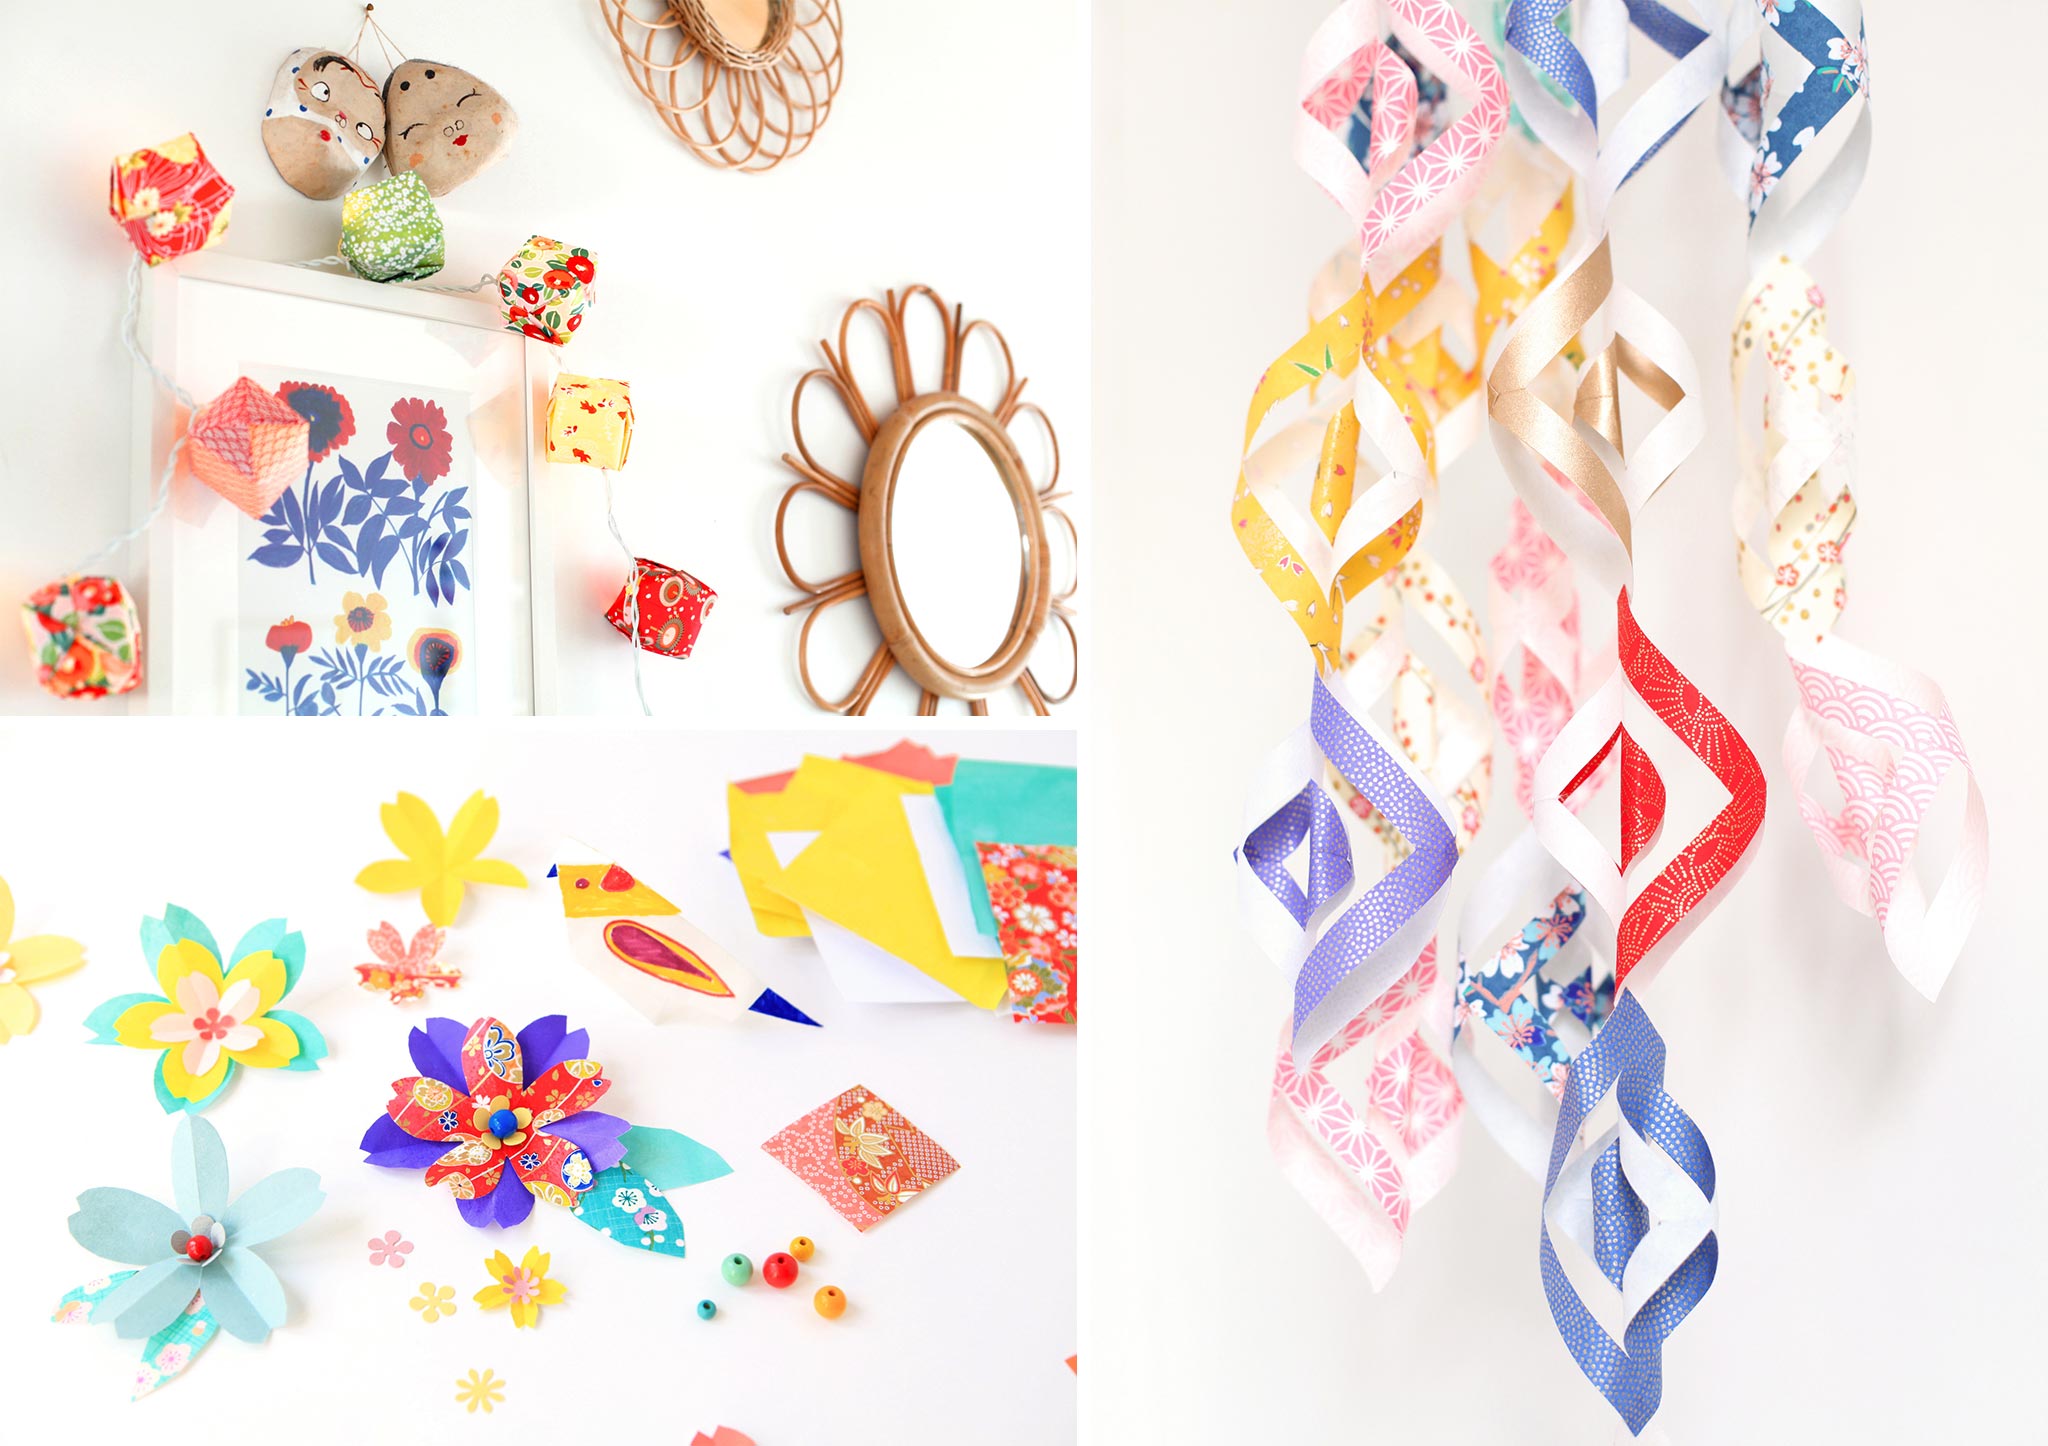
- 1ST IMAGE - Folds of the origami light garland , the origami cherry blossom and the origami tanabata scroll
- 2ND IMAGE - Folds of the small hanging origami cube , the flat origami tree and the square origami lidded box
- 3RD IMAGE - Folds of the flat 5-pointed star in origami , the volume star in origami and the small tattoo pouch in origami
- 4TH IMAGE - Folding of the mini origami photo frame , the Japanese paper koinobori and the origami sheet
- 5TH IMAGE - Folding of the origami ballotin , the origami “ koinobori ” chopstick holder and the origami heart
- 6TH IMAGE - Folding of the origami crab , origami coasters and the “ koinobori ” card in Japanese paper
- 7TH IMAGE - Folding of the cherry blossom into an origami branch , the origami crane and the “pop-up” card in Japanese paper
- 8TH IMAGE - Folding of the cherry blossom into a branch in origami , the titmouse placed in origami and the “cherry blossom” cup in Japanese paper
- 9TH IMAGE - Folding of the small hanging origami cube and the origami hedgehog
- 10TH IMAGE - Folding of the origami house and the origami hen


I hope you enjoyed this article and perhaps shed some light on certain points! If you have any questions, don't hesitate to ask us in the comments. We will be happy to answer them.
I'll see you again very soon for new blog posts!
Nice summer,
Adeline
Did you know origami?


CATHERINE BANCELIN > Merci beaucoup pour votre petit mot Catherine (et désolé pour cette réponse bien tardive). Effectivement ! Ce pliage de sapin en origami est simple et rapide à réaliser et il peut être, en plus de ça, décliné sur différents supports. Nous sommes ravis d’apprendre que cet article vous donne plein d’idées et d’envies et que vous appréciez tout particulièrement notre livre ! N’hésitez pas à venir nous voir à la boutique lorsque vous êtes de passage à Paris. Nous serons ravis de vous accueillir ! À très vite :)
Merci merci pour toutes ces nouvelles idées. Le sapin en origami pour carte de voeux ou à suspendre me paraît extra. Et tout ce que vous venez d’envoyer me donne plein d’envies. Je ne connais pas le papier washi, il faut que je vienne à la boutique. Votre livre, Adeline, est merveilleux,je viens de le conseiller à une jeune Maman. Cordialement
Leave a comment