


TUTO The square box with origami lid
The tutorial that I'm sharing with you today is ideal for wrapping small gifts (sweet treats, colorful brooches, Japanese lucky charms, etc.) placed on a festive table for your guests!
Folding the square lidded box is easier than it looks! In just a few minutes, you will have created pretty gift wrapping.

In order to make a pretty Japanese paper lidded box, you will need, depending on the final size desired for your box:

- 1 square of japanese paper of 22 x 22 cm (for the box cover)
-
1 square of japanese paper of 20.5 x 20.5 cm (for the bottom of the box)
- 1 square of japanese paper of 19.5 x 19.5 cm (for the box cover)
-
1 square of japanese paper of 18 x 18 cm (for the bottom of the box)
- 1 square of Japanese paper 17 x 17 cm (for the box cover)
-
1 square of japanese paper of 16 x 16 cm (for the bottom of the box)
- 1 square of japanese paper 15 x 15 cm (for the box cover)
- 1 square of japanese paper 14 x 14 cm (for the bottom of the box)
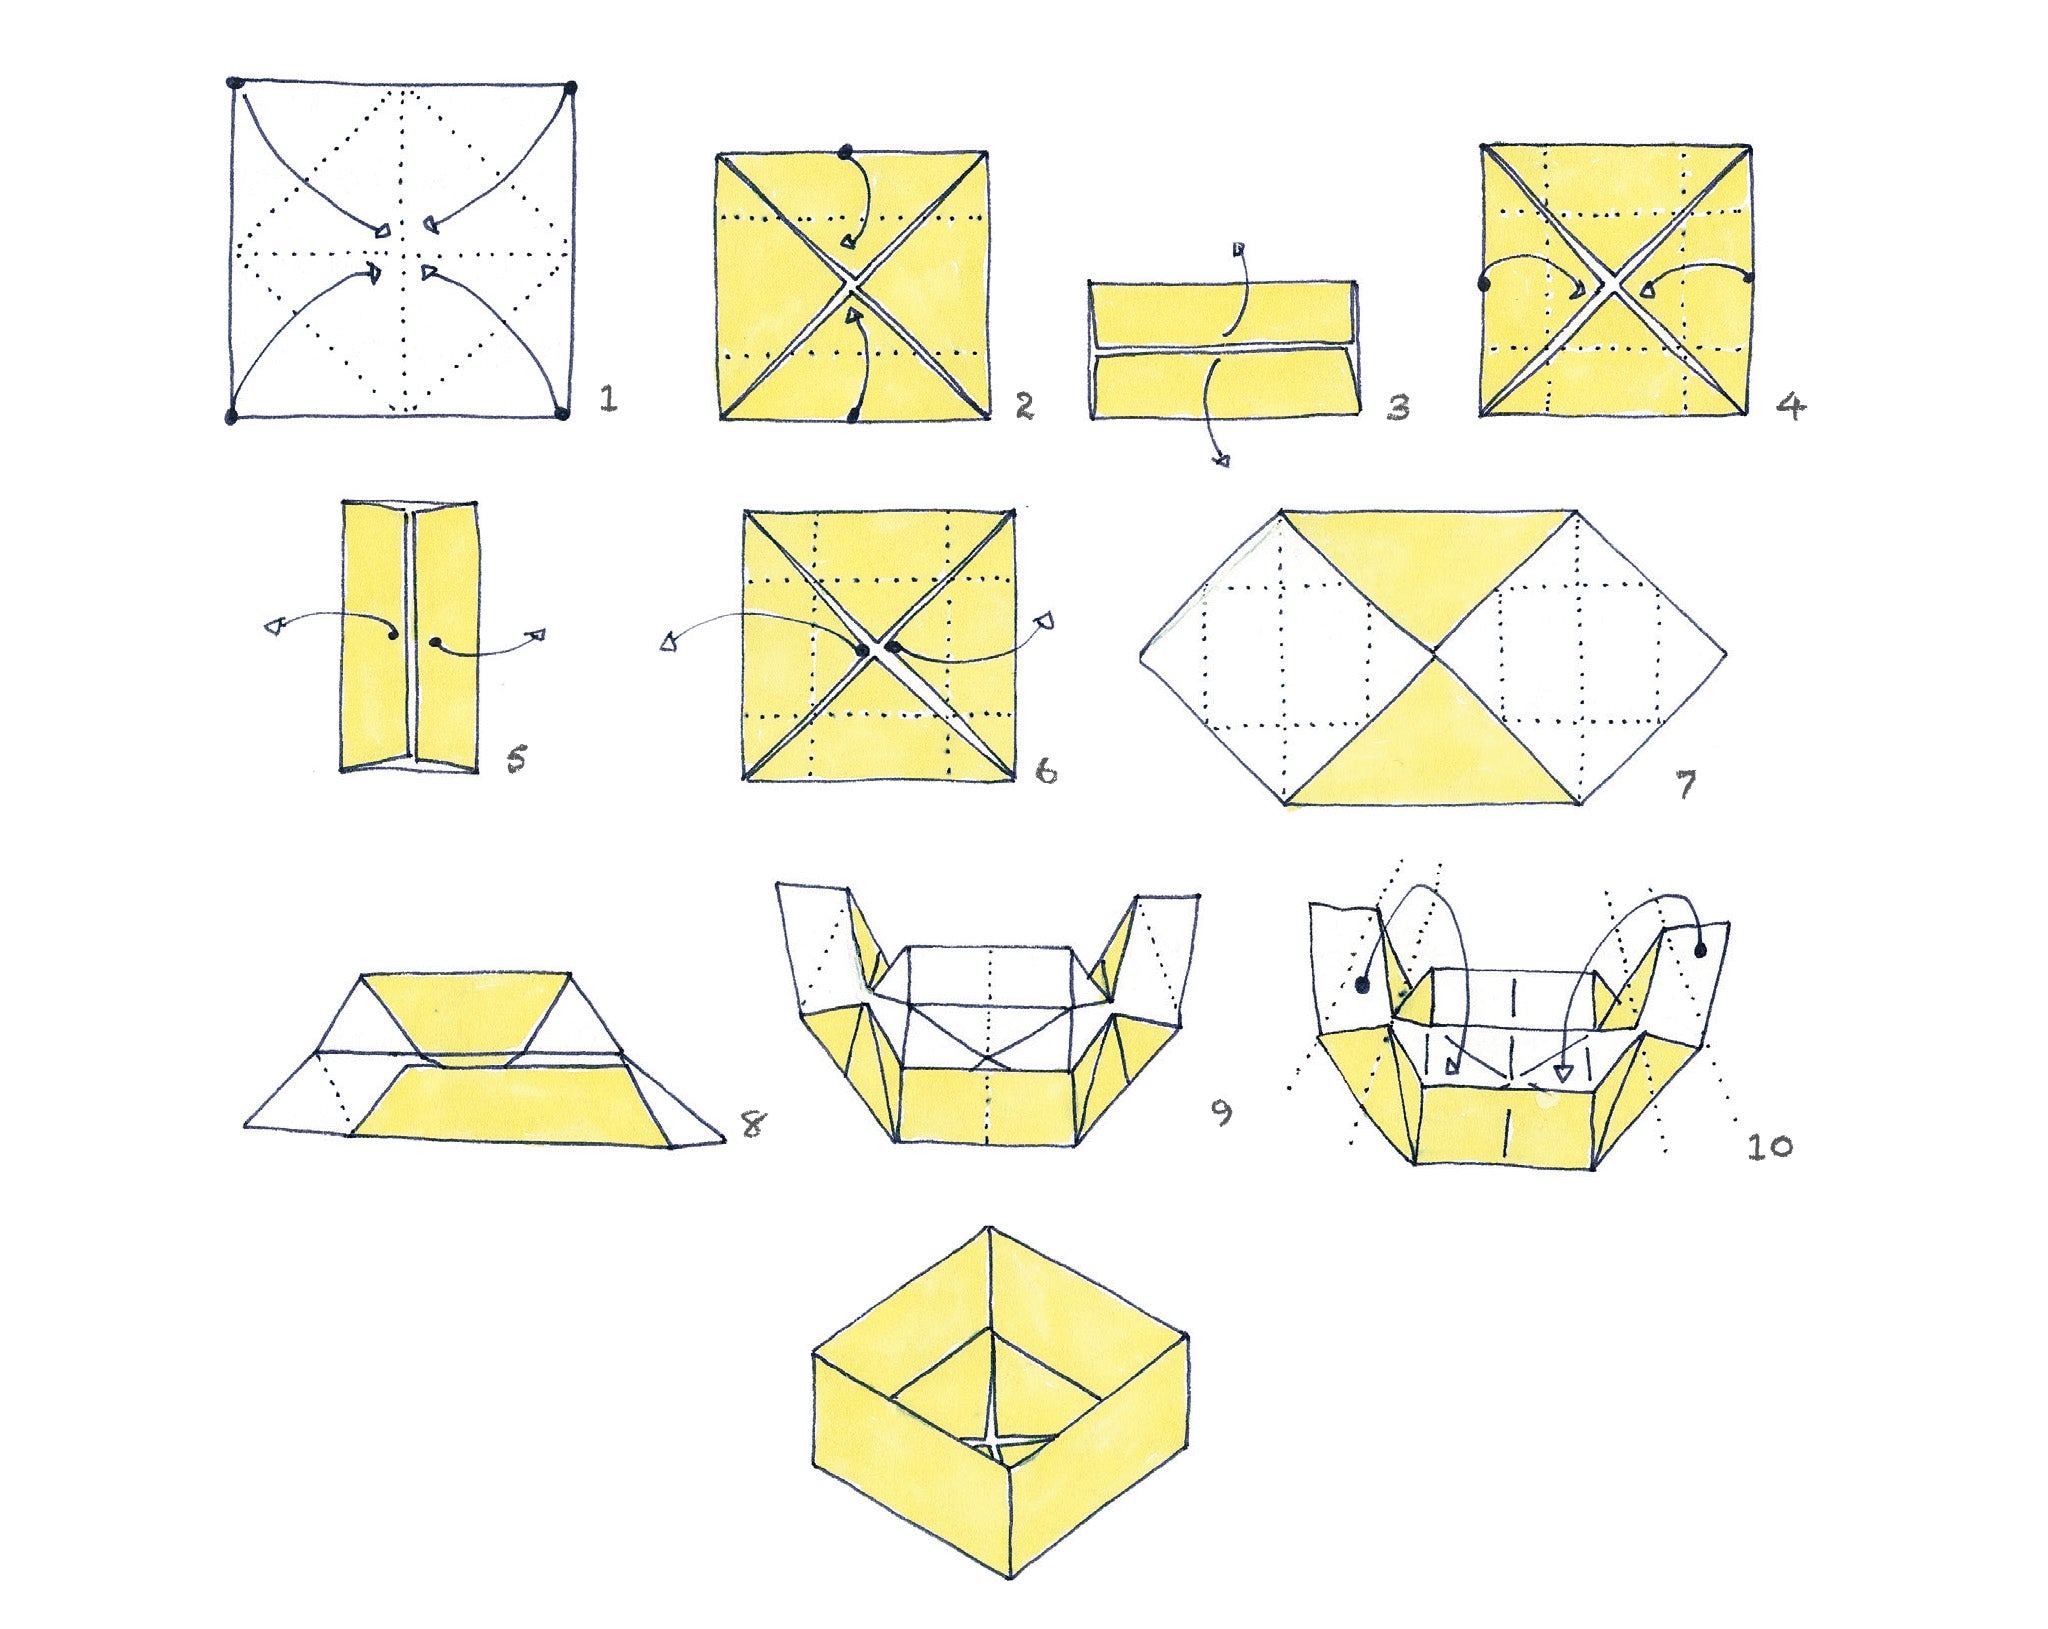
- Mark the central horizontal and vertical folds of the square of paper, white side facing you. Fold the four corners of the square into the center.
- Turn the figure a quarter turn and fold the top and bottom in the center following the dotted lines.
- Unfold.
- Fold the sides of the figure into the center following the dotted lines.
- Unfold.
- Unfold both sides.
- You get this figure.
- Raise the top and bottom of the figure vertically by folding at the marked creases.
- Bring up the sides, taking care to use the folds marked previously.
- Fold the top of the sides toward the inside of the box.
You have completed the first part of your box.
Follow the same steps for the 2nd part.
TADA! Your origami lidded box is ready!

To complete the decoration of your festive table, discover the following tutorials:
- colorful Japanese paper tealight holders to bring a soft light to your table
- an origami vase to welcome your bouquet of flowers
- a bowl in the shape of a cherry blossom to place some sweets
- a pointed crepe paper flower to compose a pretty bouquet
- origami cutlery holders to add an extra colorful touch to your table
I hope you enjoyed this article. In a few days, new articles around Christmas will be published on the blog!
Take good care of yourself,
Adeline.
--------------------
Did you know this folding?
What type of gifts would you wrap in a box like this?
Tell us more below in the comments!


DÉBORAH > Merci à vous pour ce commentaire ! Quel plaisir de savoir que ce pliage a plu à votre jeune public :)
Merci pour ce tutoriel bien illustré. Les jeunes avec qui j’ai fait cet origami ont adoré… ils en redemandent!
JEAN-MARIE MARION > Merci à vous pour d’avoir pris le temps de nous écrire ce petit mot :) Quelle jolie idée ! Nous sommes ravis que ce pliage convienne à l’usage dont vous aviez besoin.
Bonjour ,,,,, merçi pour la façon de faire une petite boîte est juste de la bonne grandeur pour 3 mini figurines en bois que je peint avec de l’acrylique et de ce fais fabrique de mini
cadeaux pour enfants ( figurine de 2’’1/2 ou 6,5 cm ) celle qui sont comme un tube avec une tête comme une boule en bois ). Mes petits enfants vont adorer et aussi comme cadeaux à des plus démunis enfants. un gros merci Jean-Marie
Leave a comment