April mobile: TUTO fish in Japanese paper
The arrival of spring and the return of sunny days inspire a fresh and aquatic atmosphere in me. And what could be better than small Japanese paper fish to satisfy a desire for the ocean?
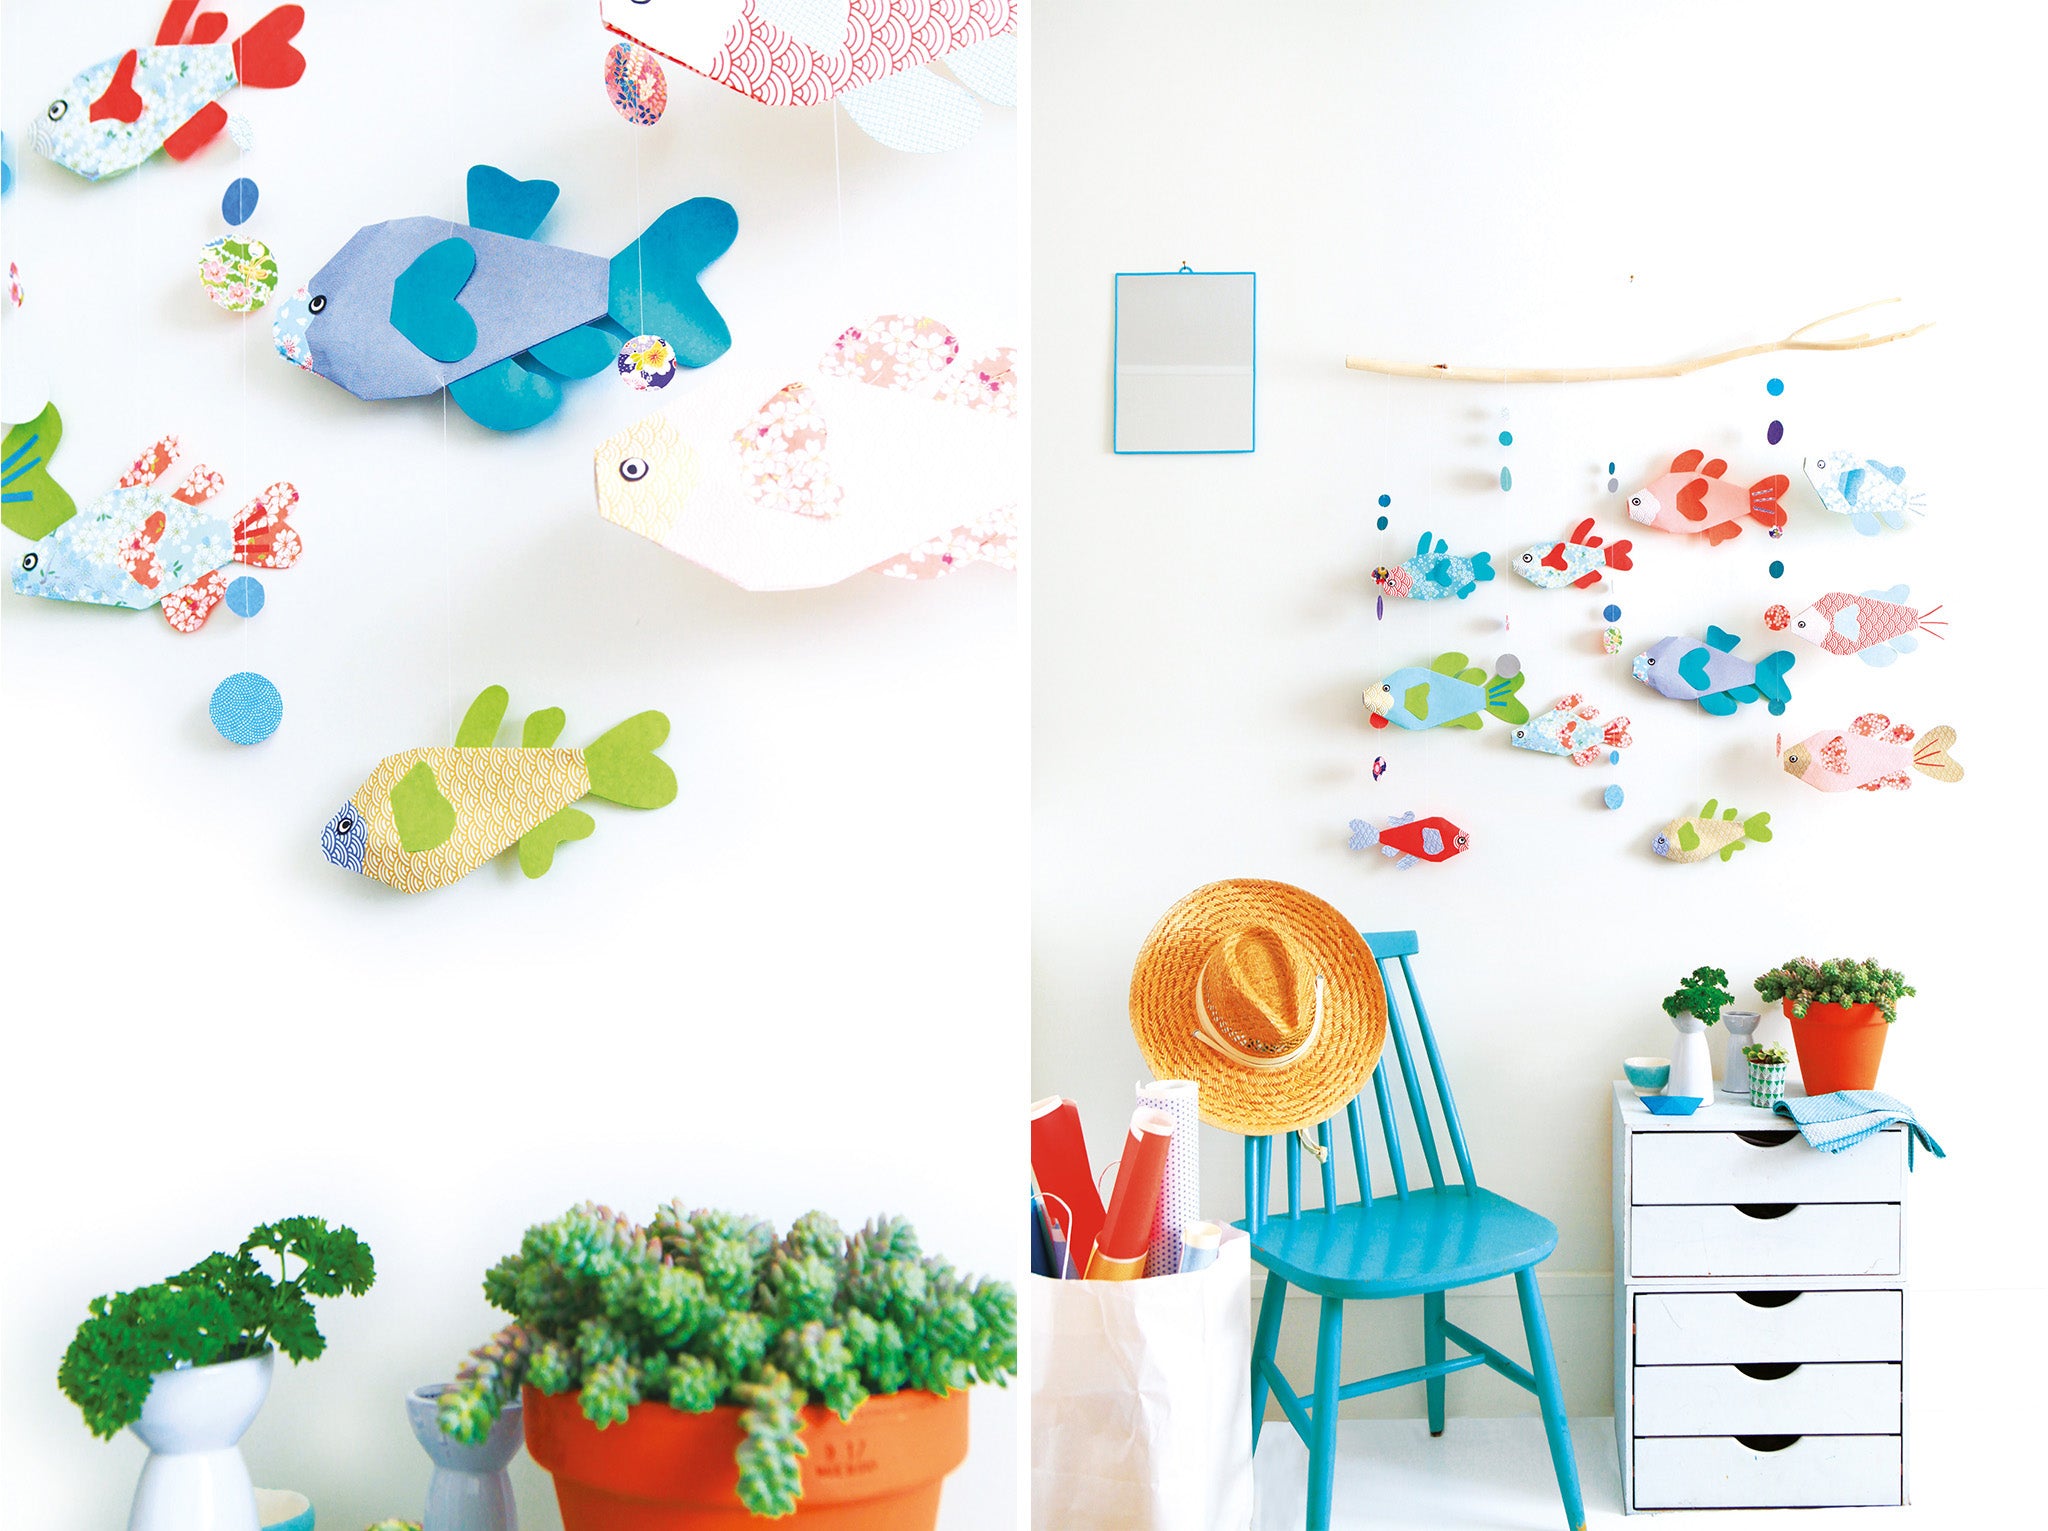
Simple, fun, colorful: I imagined a pretty marine mobile. Perfect for decorating a room, accompanying an April 1st joke or simply sharing a lovely moment of creation... This mobile with tangy shades will delight lovers of Japanese paper!
I share with you the explanations of this DIY: a branch of driftwood, a swell of flying fish with multicolored scales, a few rainbow bubbles and that's it... Get your papers!
To make your mobile, you need:
- of japanese papers in the colors of your choice,
- a thick sheet of white paper;
- of thread ,
- with a needle ,
- a branch or a driftwood stem,
- of white vinyl glue ,
- of a paintbrush ,
- a pair of scissors or a cutter ,
- a pencil,
- and a black marker.
To make your Japanese paper fish:
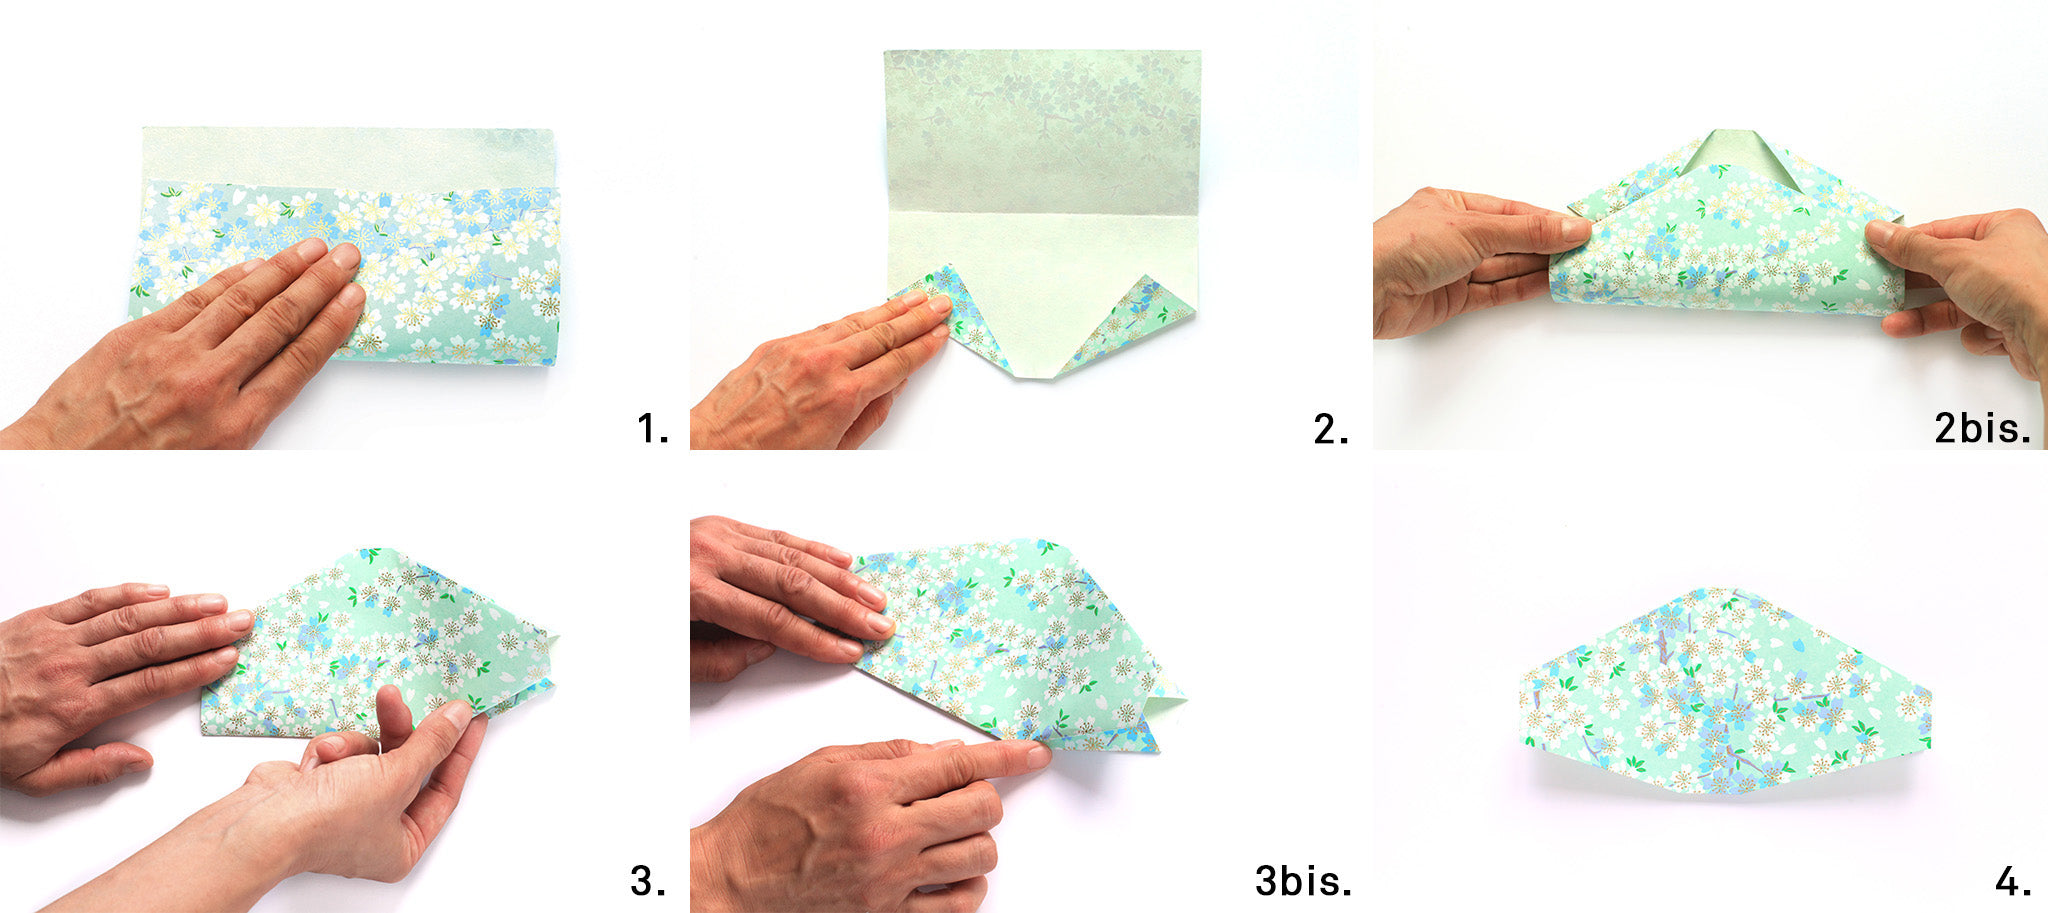
- Fold your square of Japanese paper in half, in the center, then unfold it (to mark the fold).
- Bend the bottom two points of the square at an angle randomly.
2bis. Fold the two points at the top of the square at an angle, making the ends of your fold join together. - and 3bis. Fold the edge placed at the bottom right so as to form an inward fold. This fold is random like the previous ones.
- Repeat steps 3 and 3bis on the edge placed at the bottom left. The fish silhouette is finished!
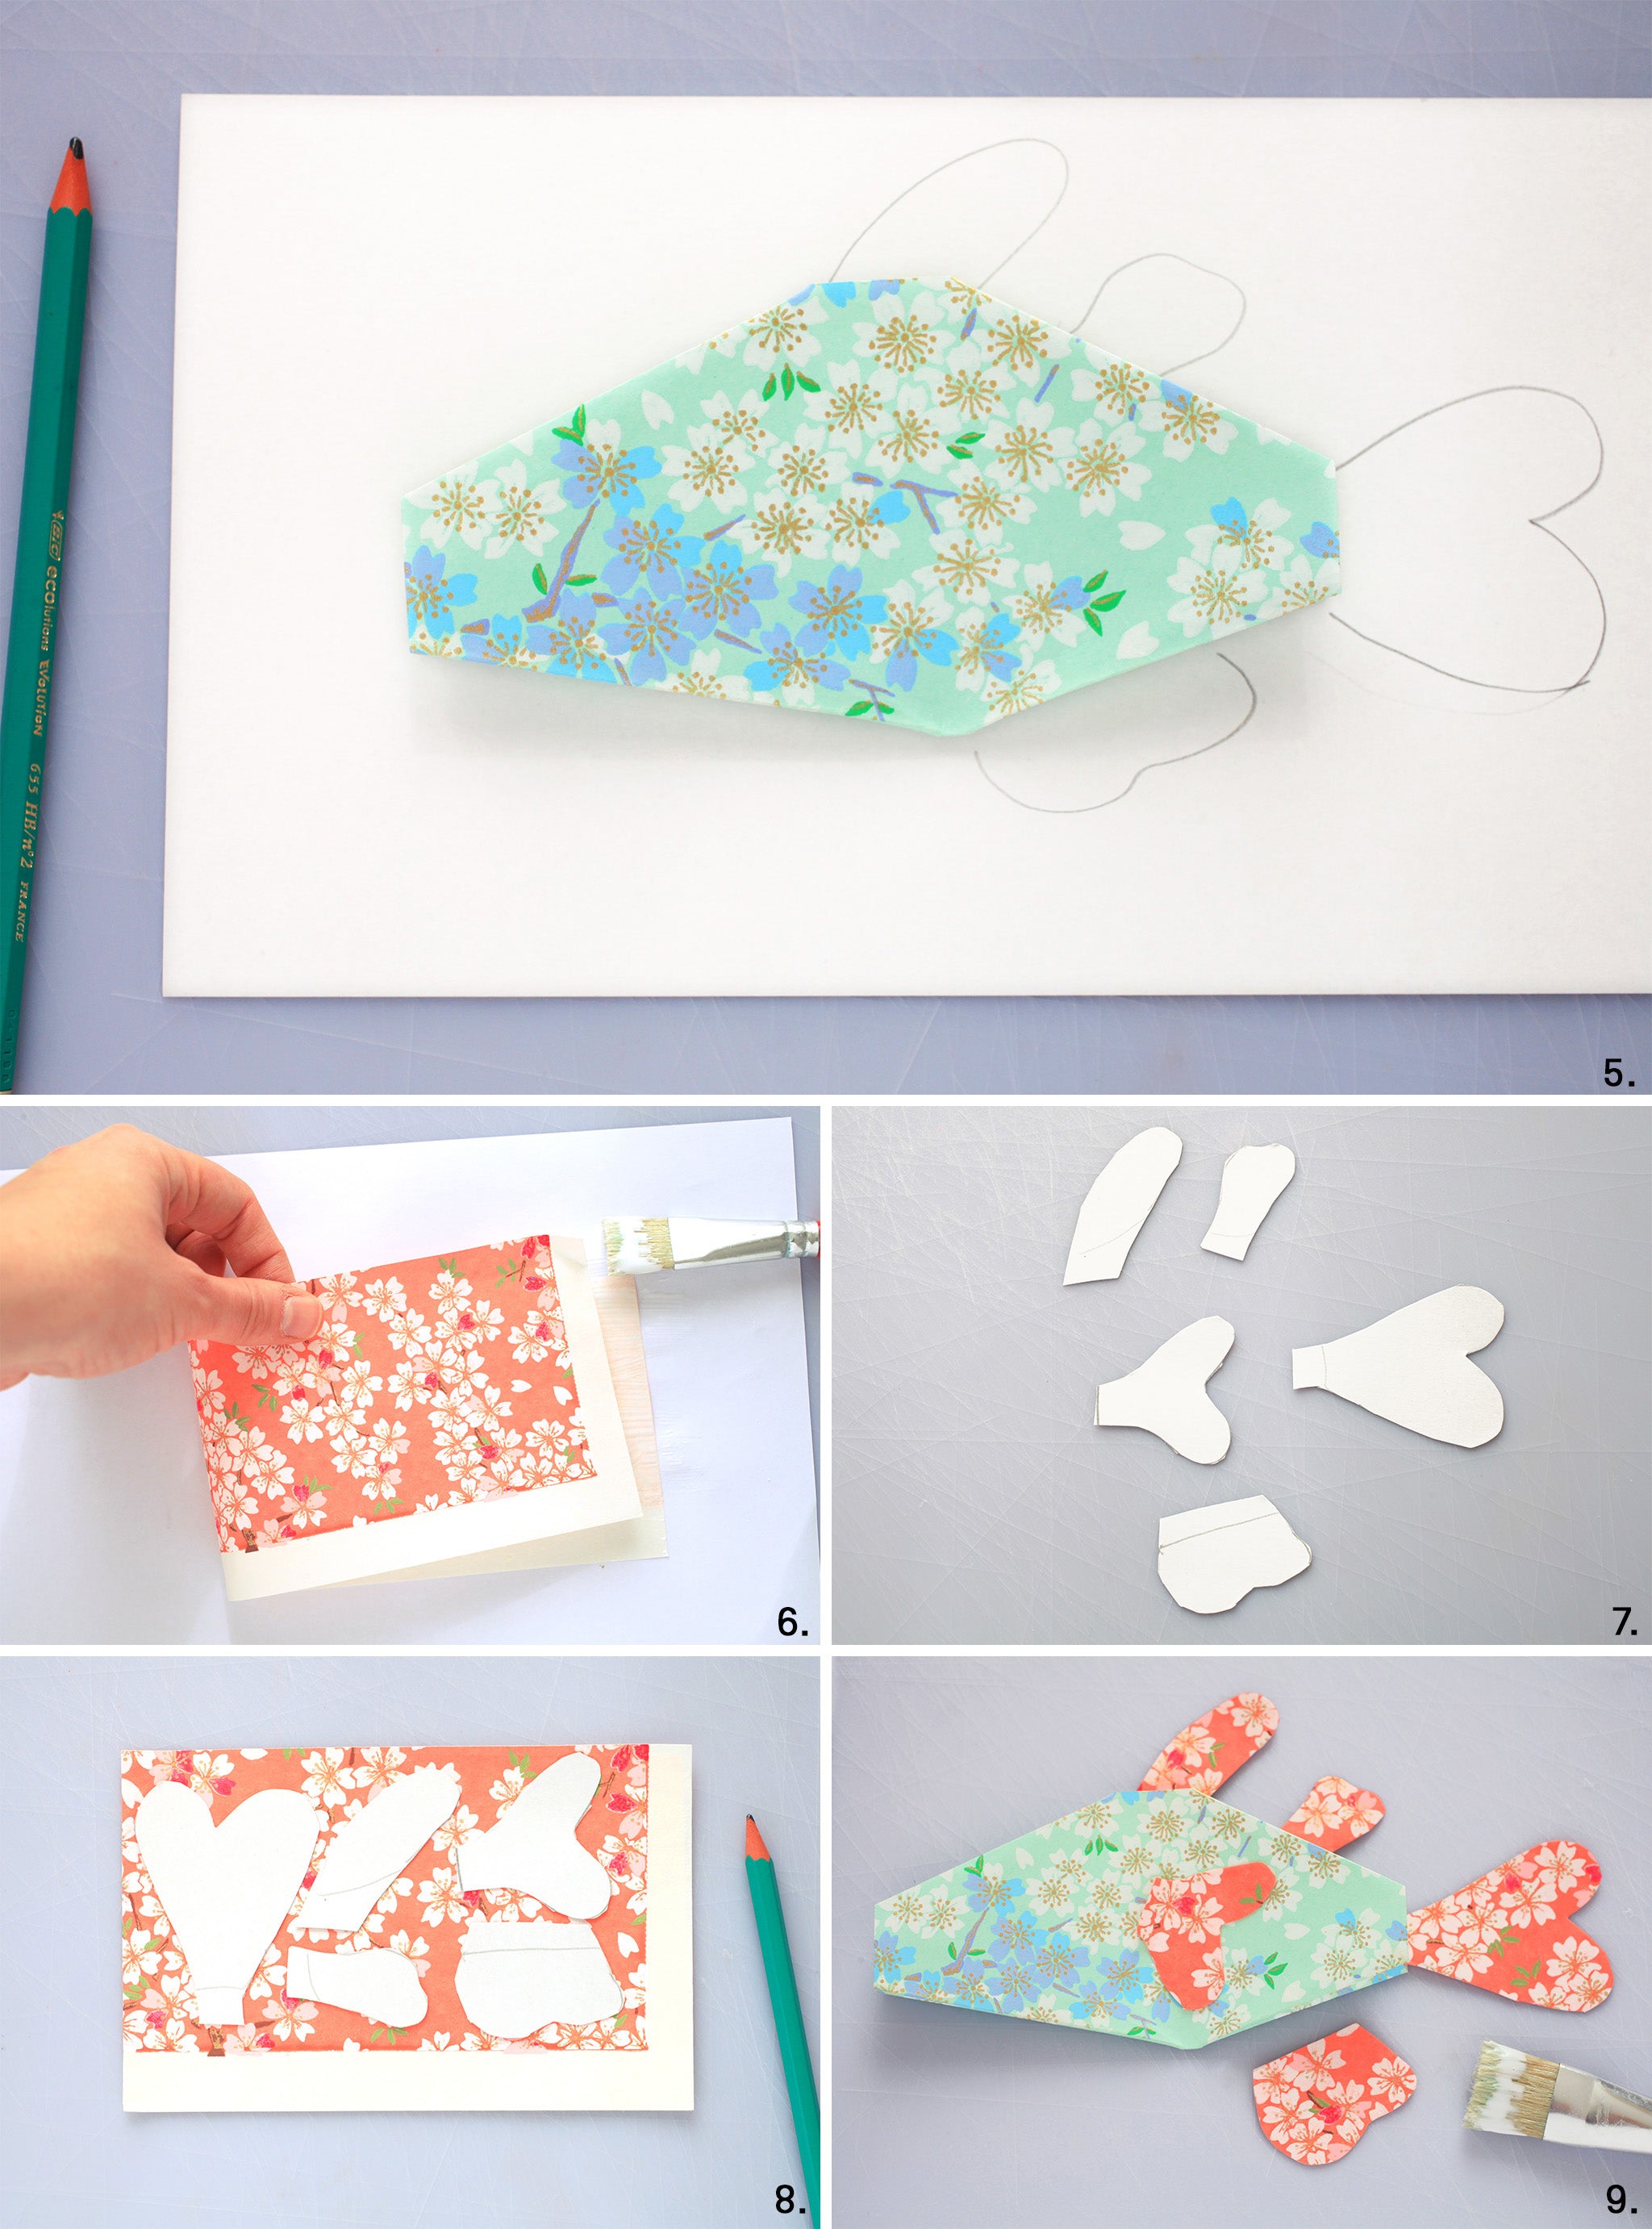
- Now take your white paper. Using the marks from your previously made shape, draw the fins of your fish in order to make the future templates.
- Take a rectangle of Japanese paper. Apply glue evenly to the white side of the paper and fold it over itself.
- Cut out the fin templates drawn in step 5.
Be sure to cut your templates a little longer on the "sides" which will be "attached to the body" of the fish (pencil line seen in photos 7 and 8) . - Place the templates on your folded and glued rectangle in step 6 and trace the outline of the fins with a pencil. Cut out your fins.
- Slide and stick the fins inside the fish, making a “sandwich”.
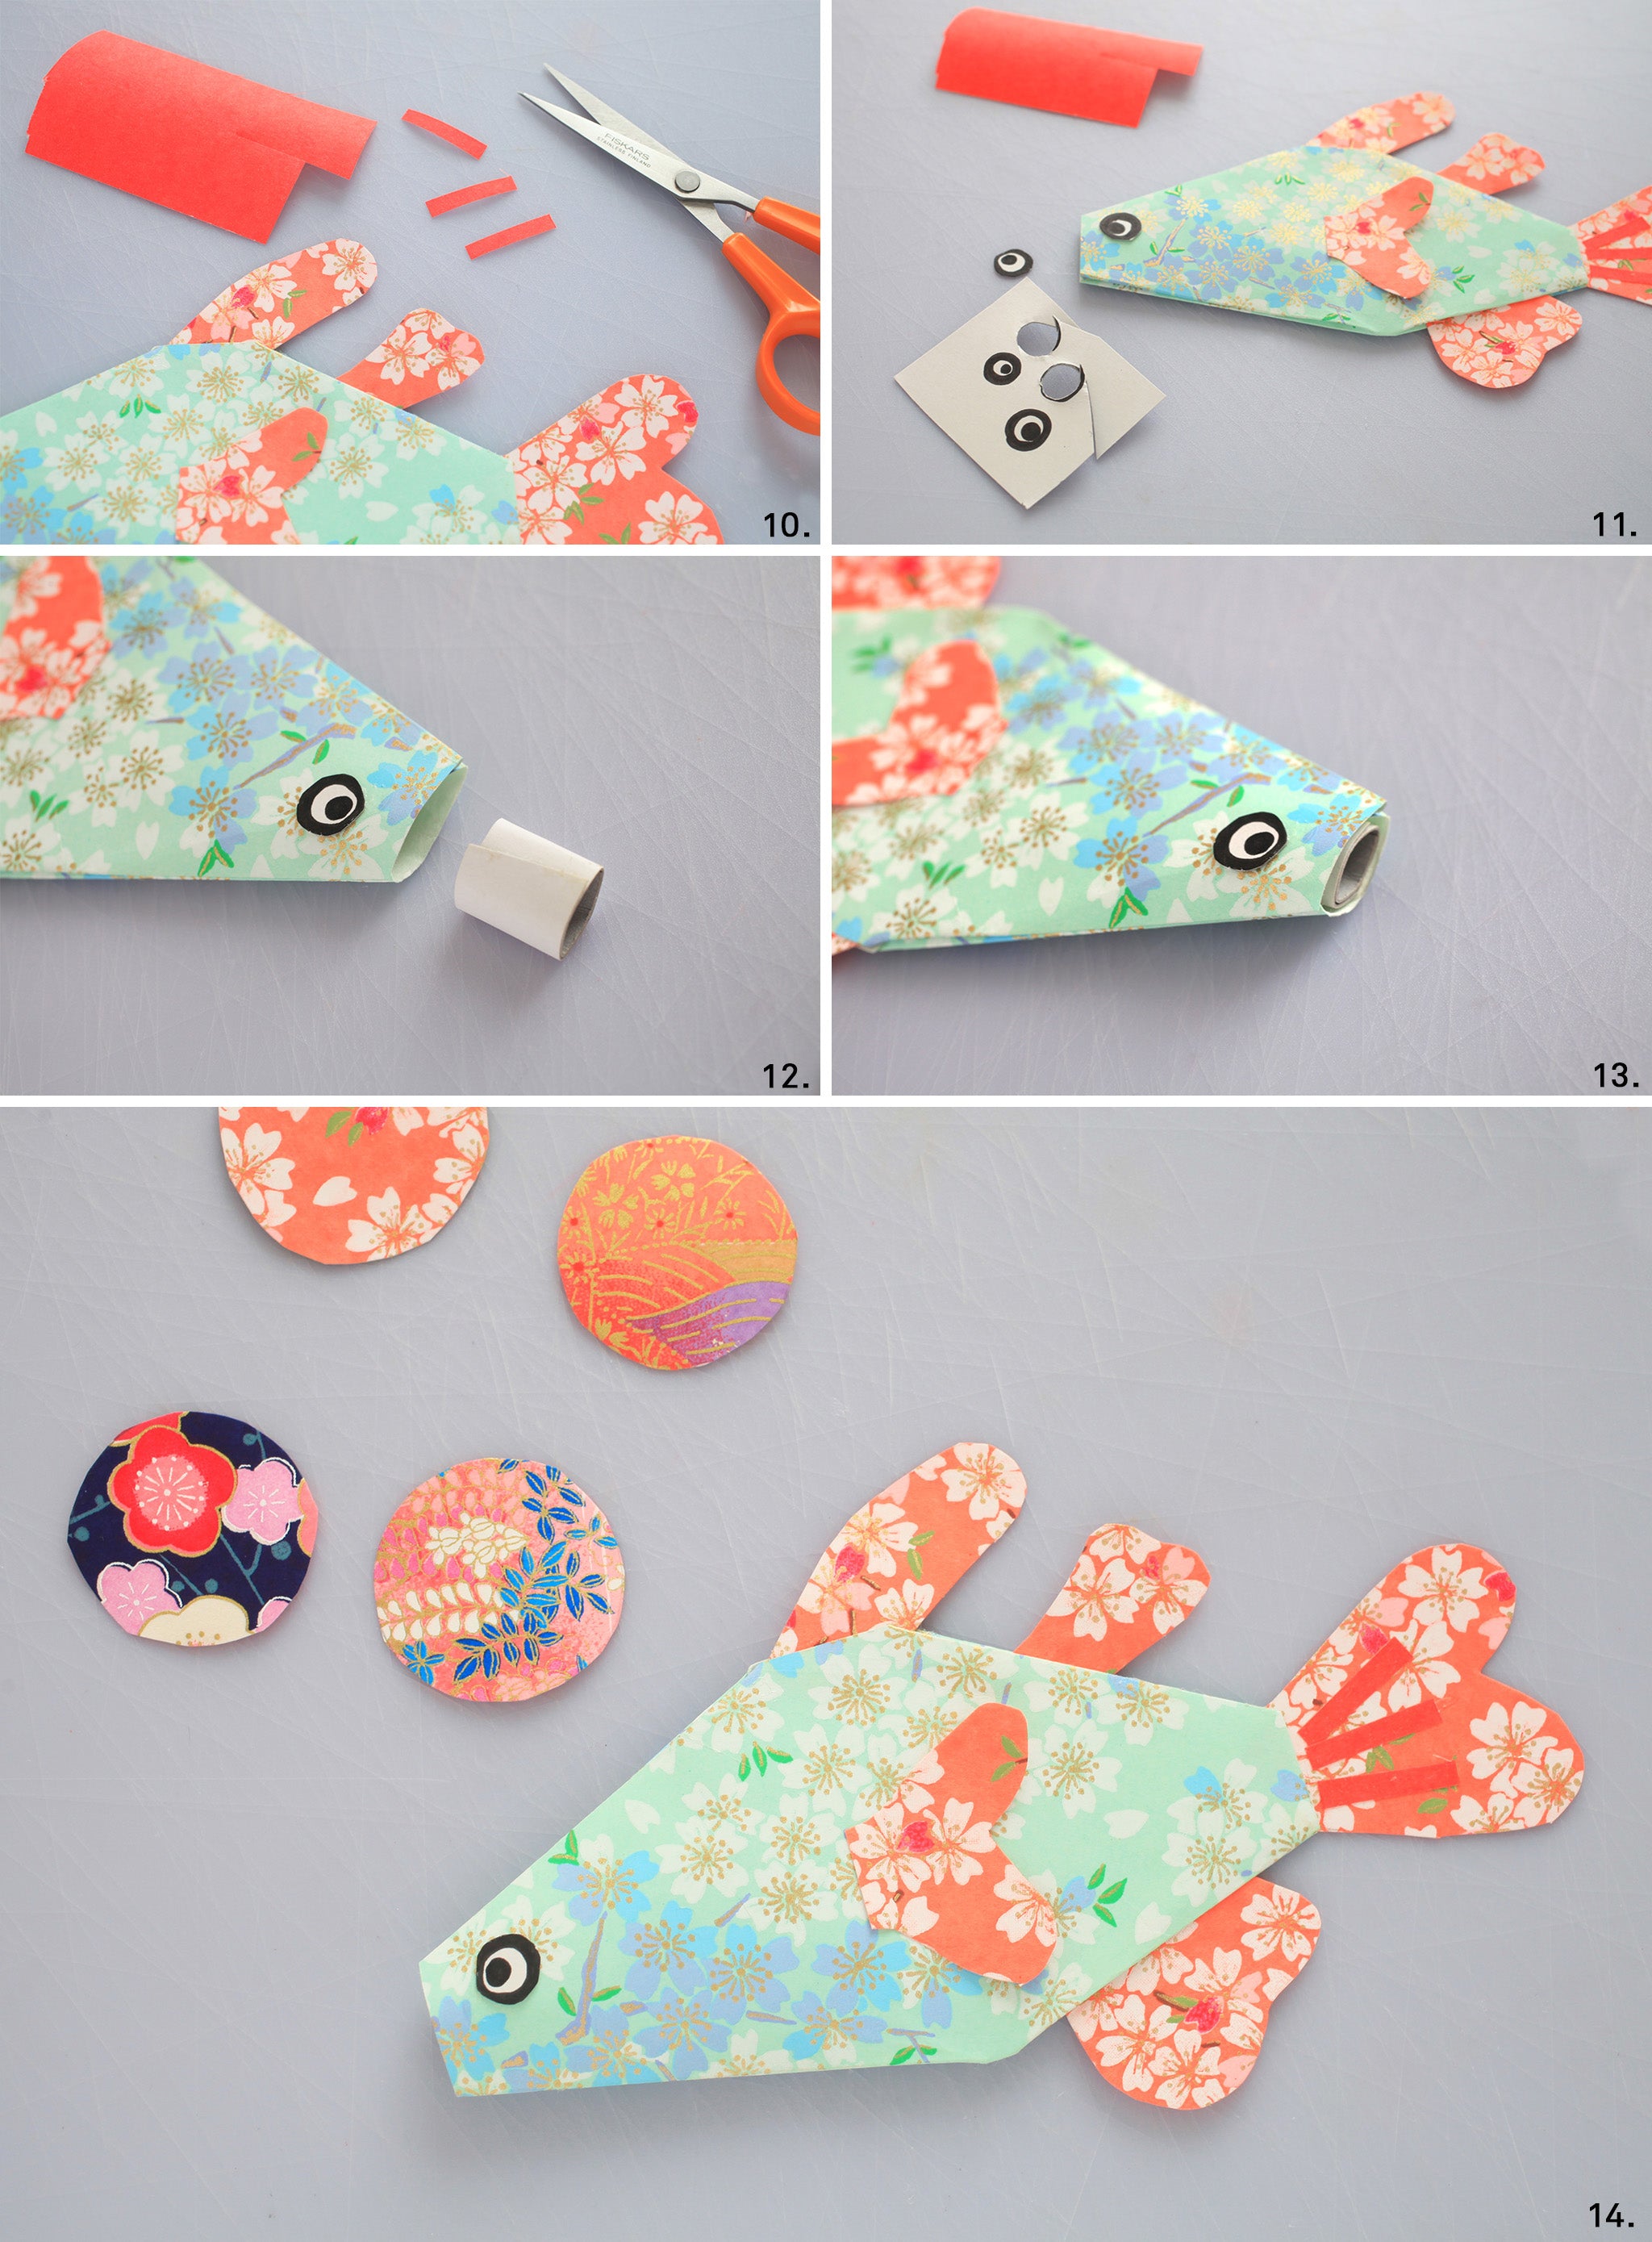
- From a scrap of Japanese paper, cut out small rectangles and glue them to the tail of the fish.
- On a sheet of slightly thick white paper, draw small black eyes and glue them at the level of the fish's head.
- With a small piece of white cardstock, make a mini tube and insert it into the “mouth” of the fish.
- This will give volume to the fish's body.
- TADA! Your fish is finished!
Make as many fish as you want to create your mobile.
To make your Japanese paper bubbles: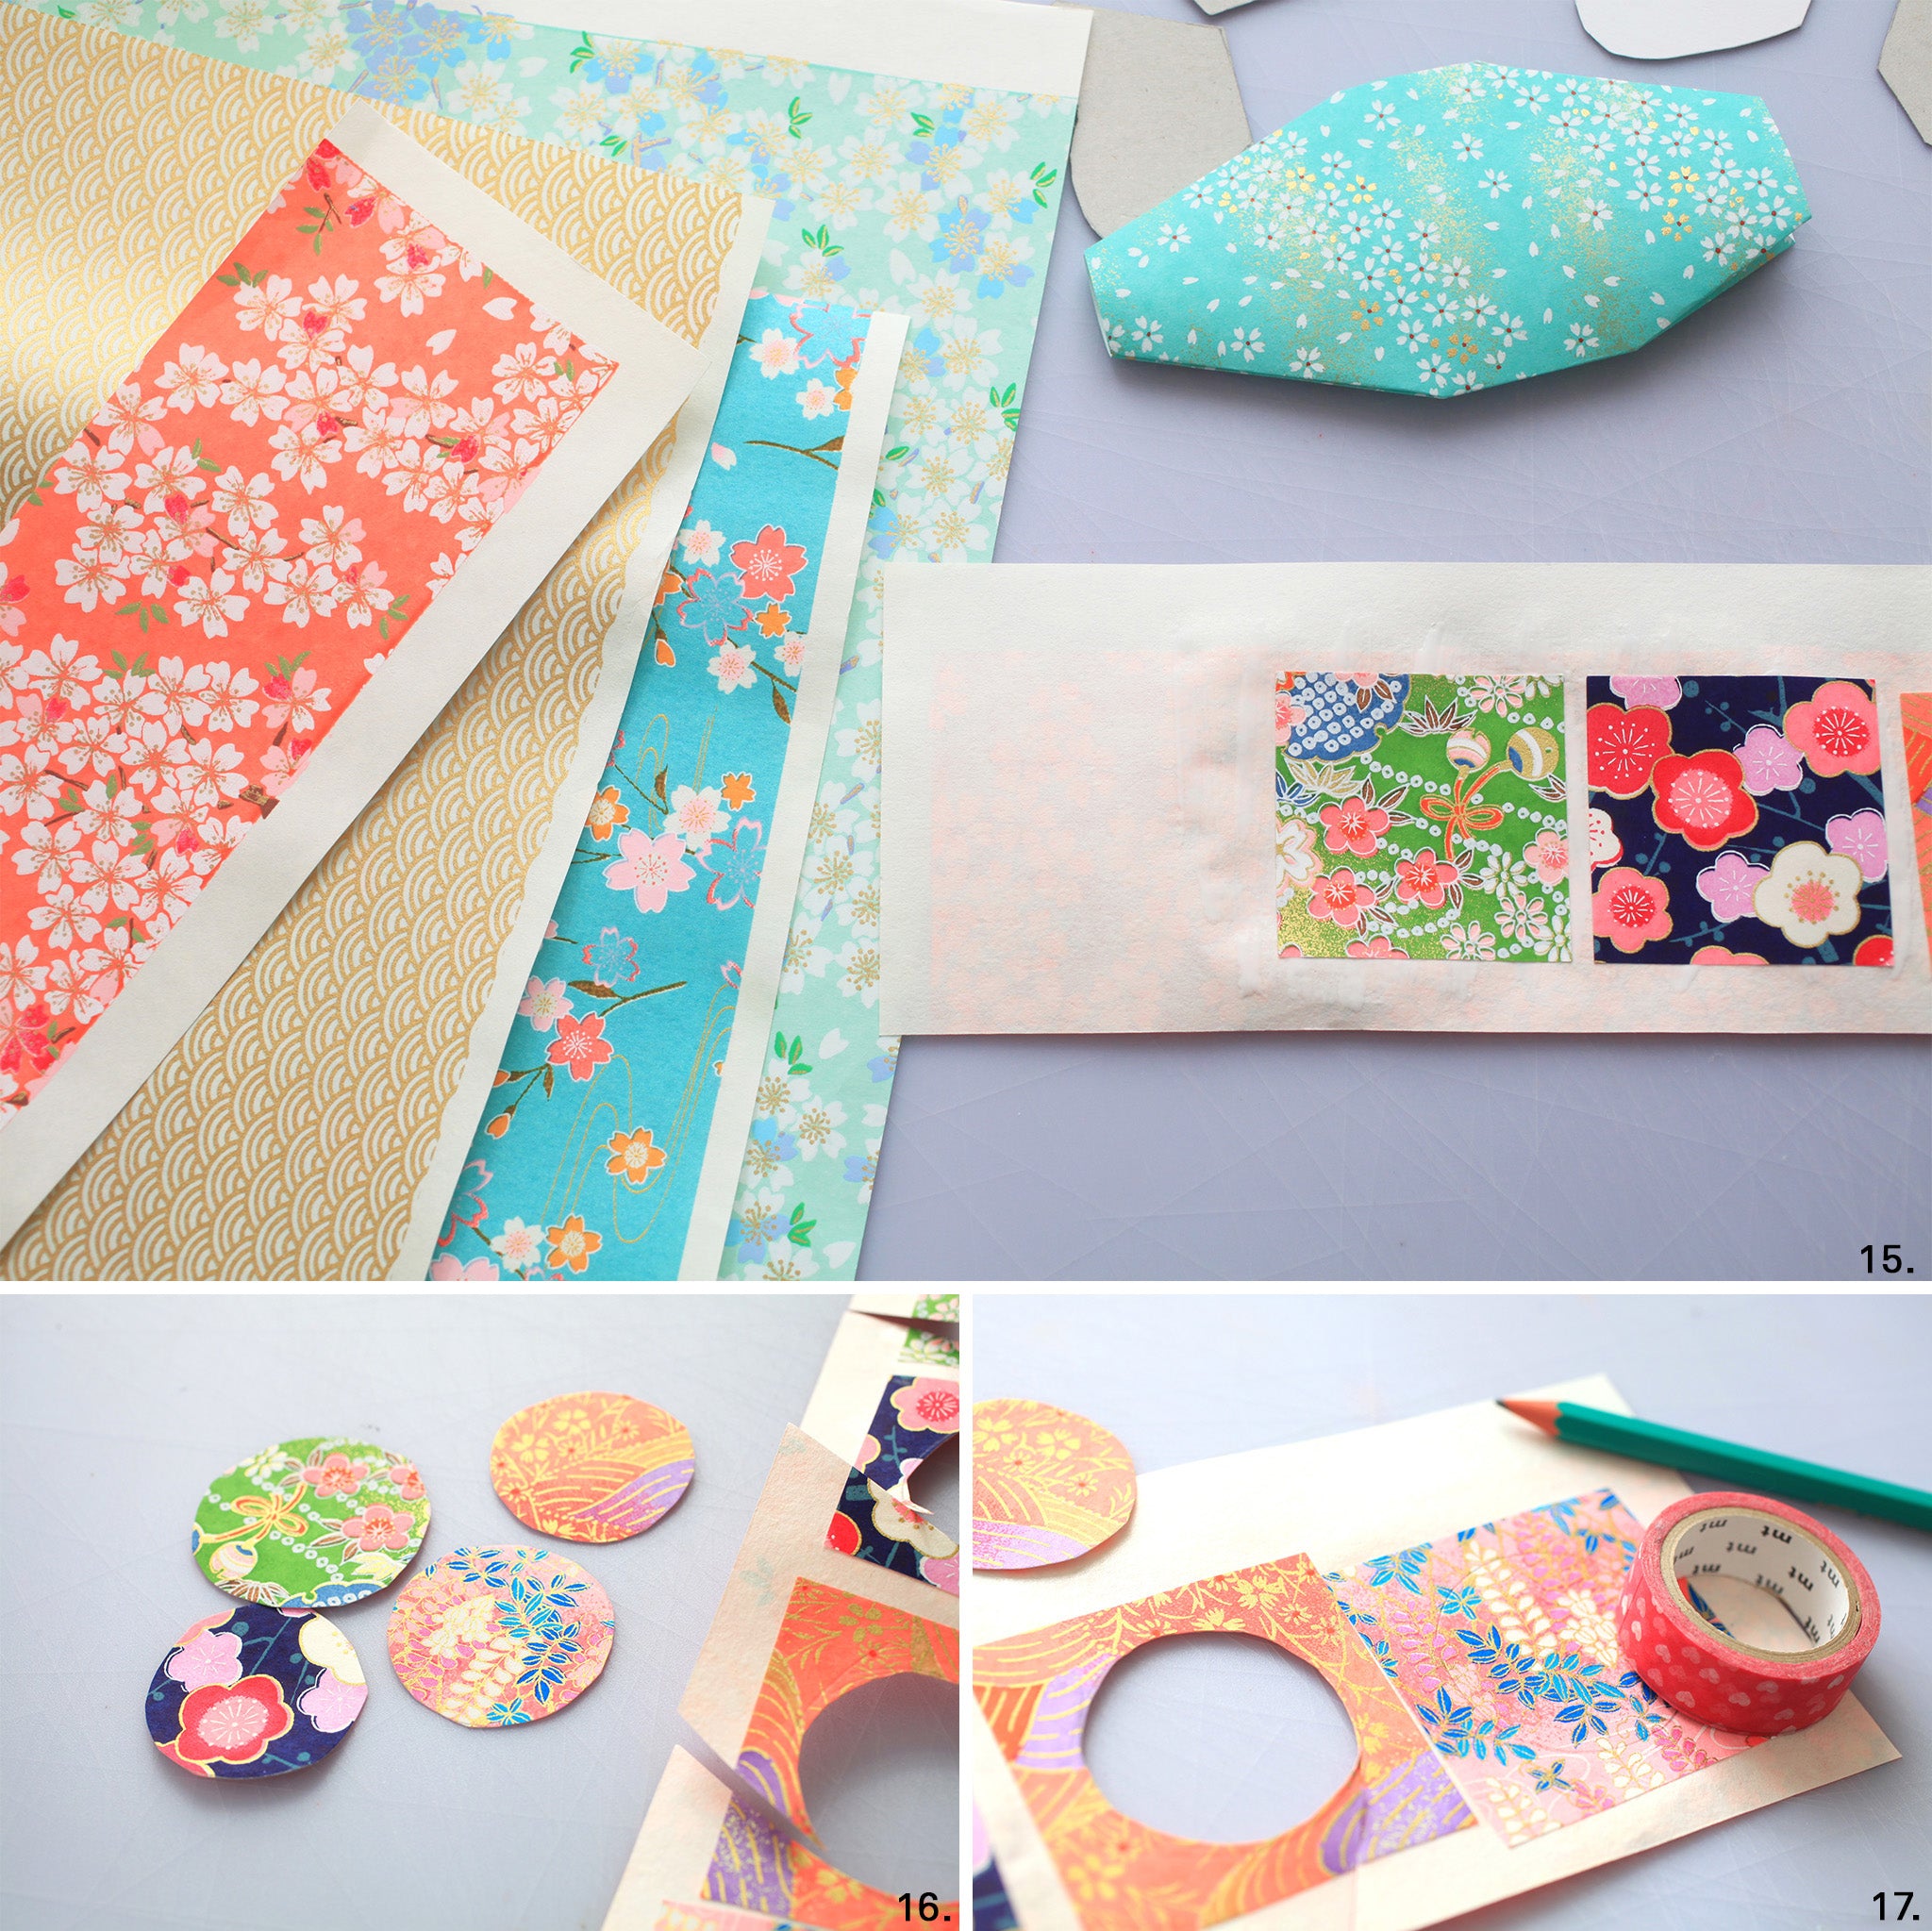
- On the back of a rectangle of Japanese paper, glue small squares measuring approximately 5x5 cm.
- Using a round template or an object with a round base (here a roll of masking tape), draw several circles with a pencil.
- Cut them out with precision scissors. You can cut larger or smaller circles.

To mount your fish and bubbles on the branch: - Place your mobile flat on a large surface (on the ground or on a table). This will help you distribute the fish and bubbles evenly. Compose vertical lines of fish then others of bubbles to create a rhythm.
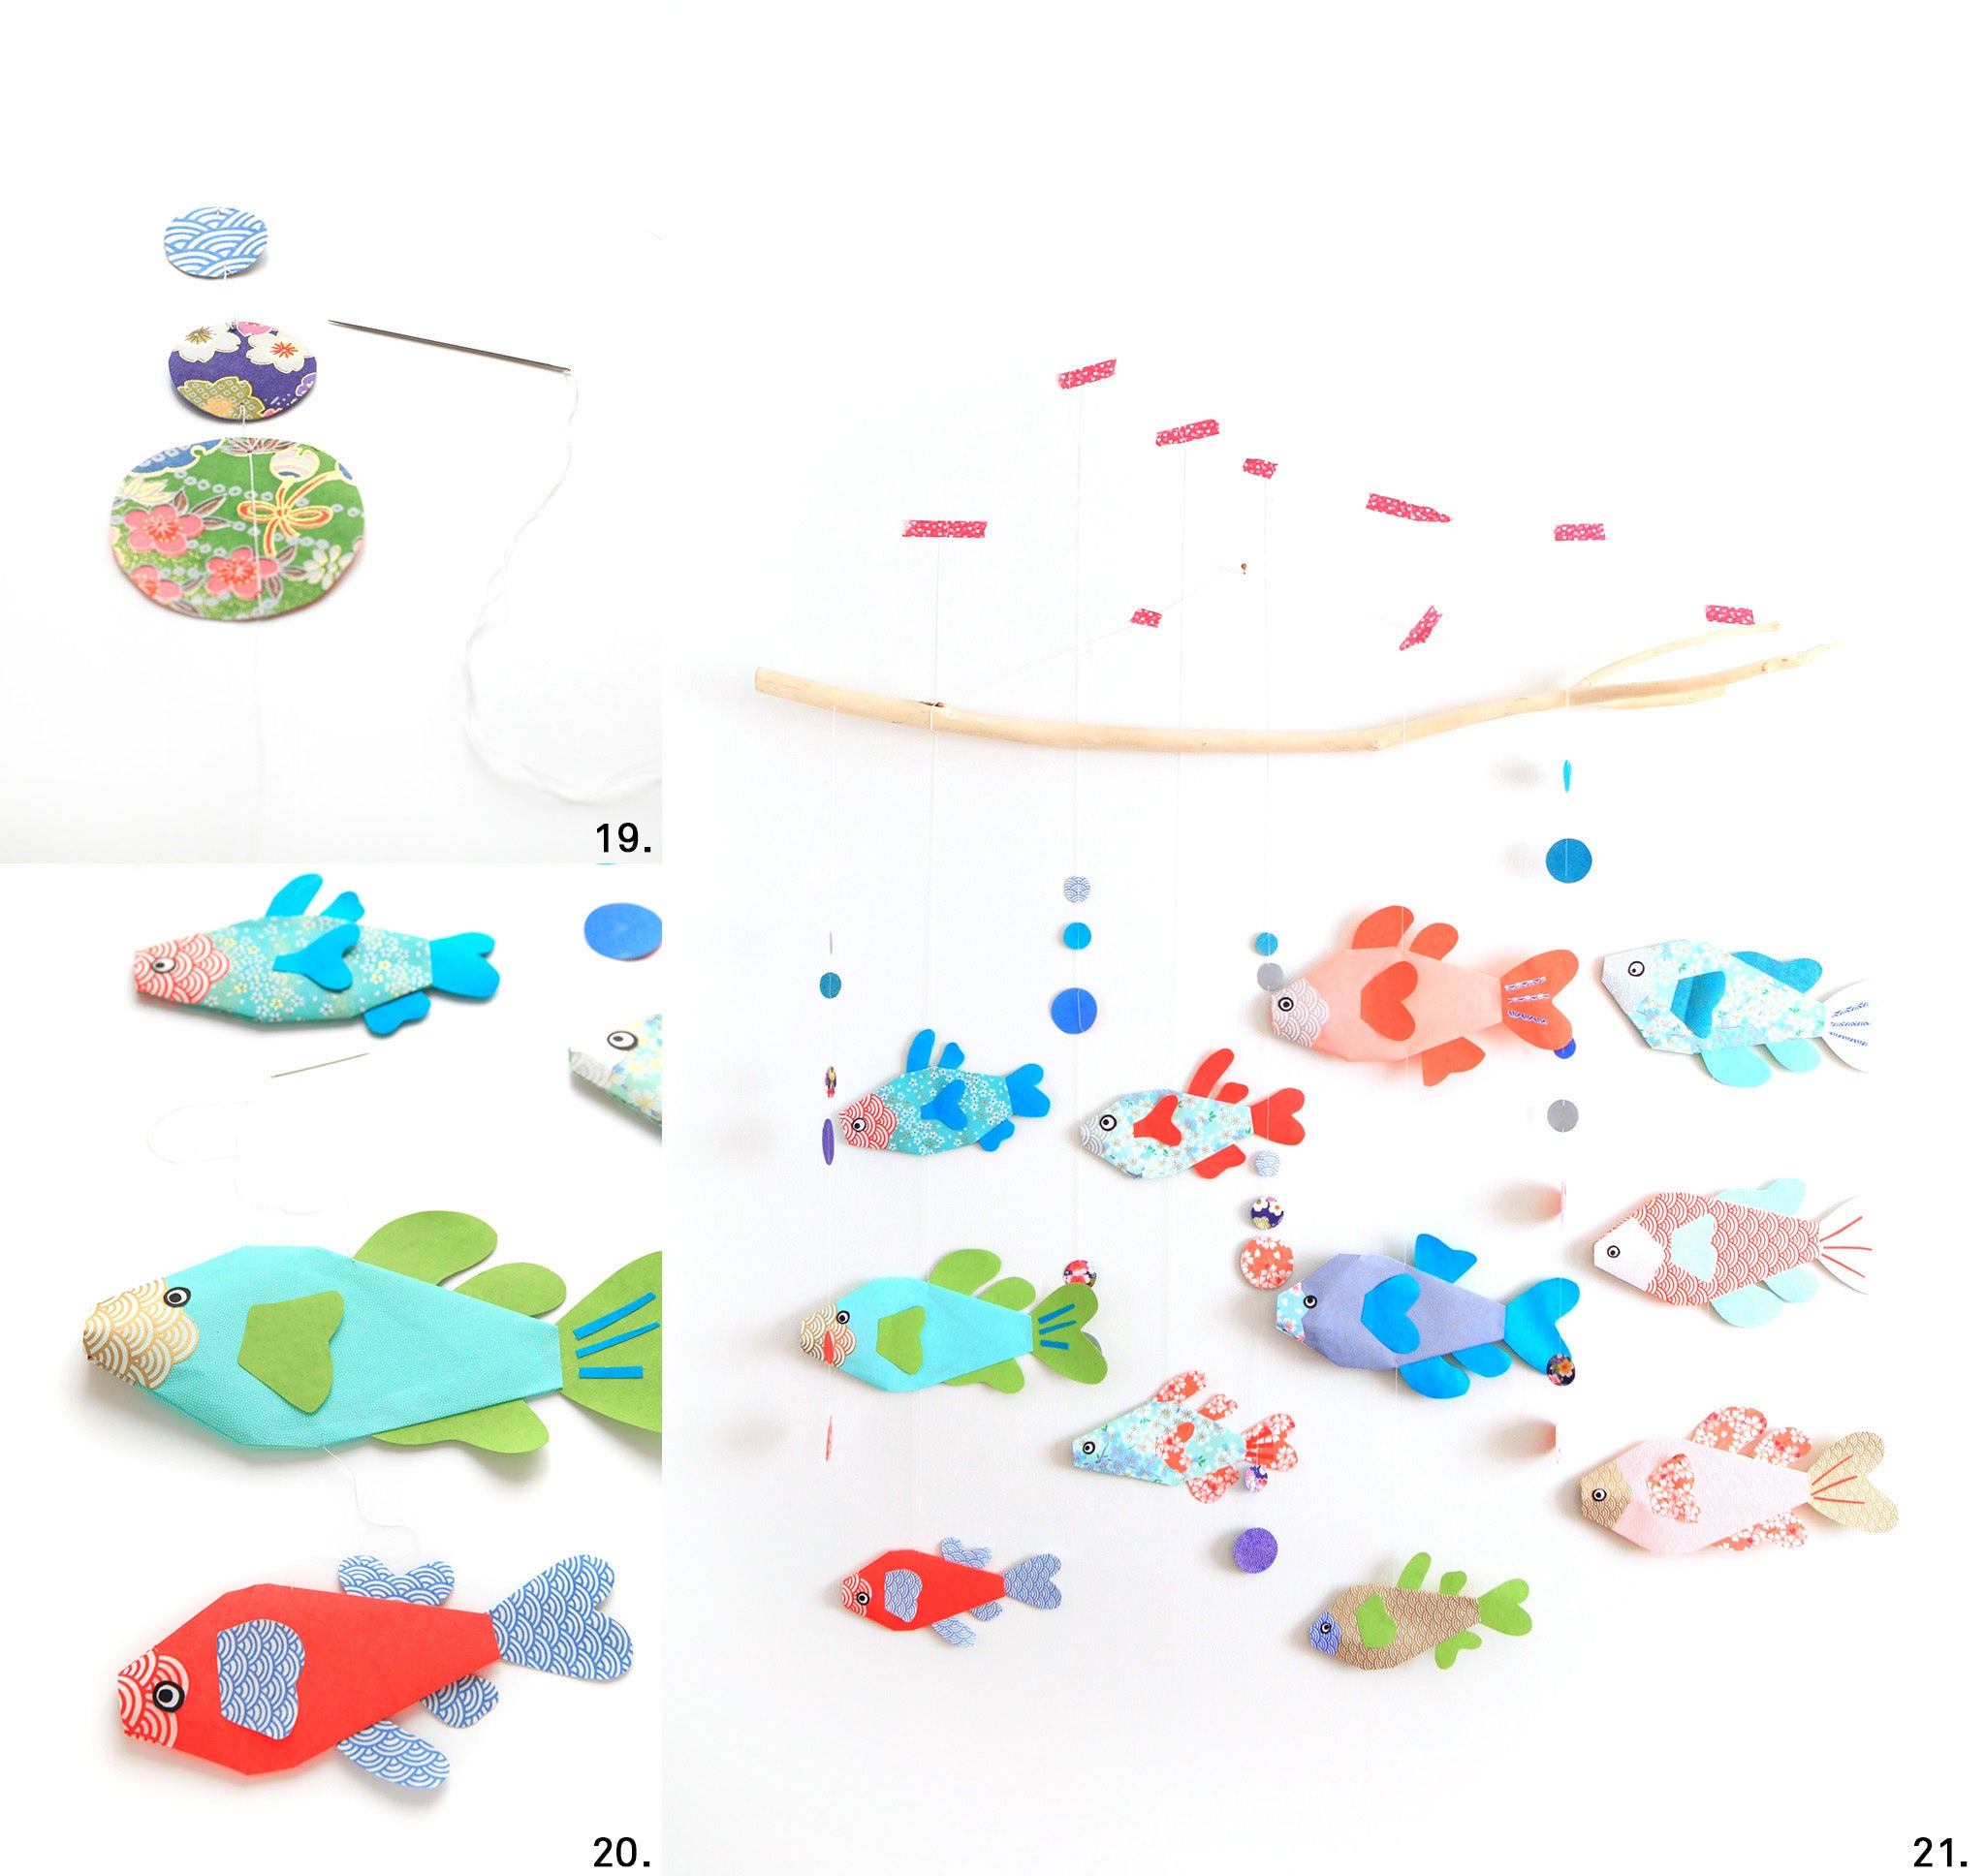
- Thread your thread onto a needle to assemble your garland of bubbles, starting from the bottom and finishing upwards: take a round of paper and stitch about 1cm from the edge. Stitch in the other direction at the other end of the circle and pass the thread through this same hole to make a loop and secure the paper circle.
- To assemble your fish garlands: choose the one at the bottom and stitch in its back (at the horizontal part). Secure the wire by making a loop and check the level by hanging it. With the same thread, stitch into the bottom of the second fish and secure with a loop. Change the line and repeat the operation on the back of the second fish, check the level. Repeat this operation until you have the desired number of fish.
- Fix your branch to the wall, position your garlands at the desired height (you can use tape to find the right heights). Then tie them to your branch.
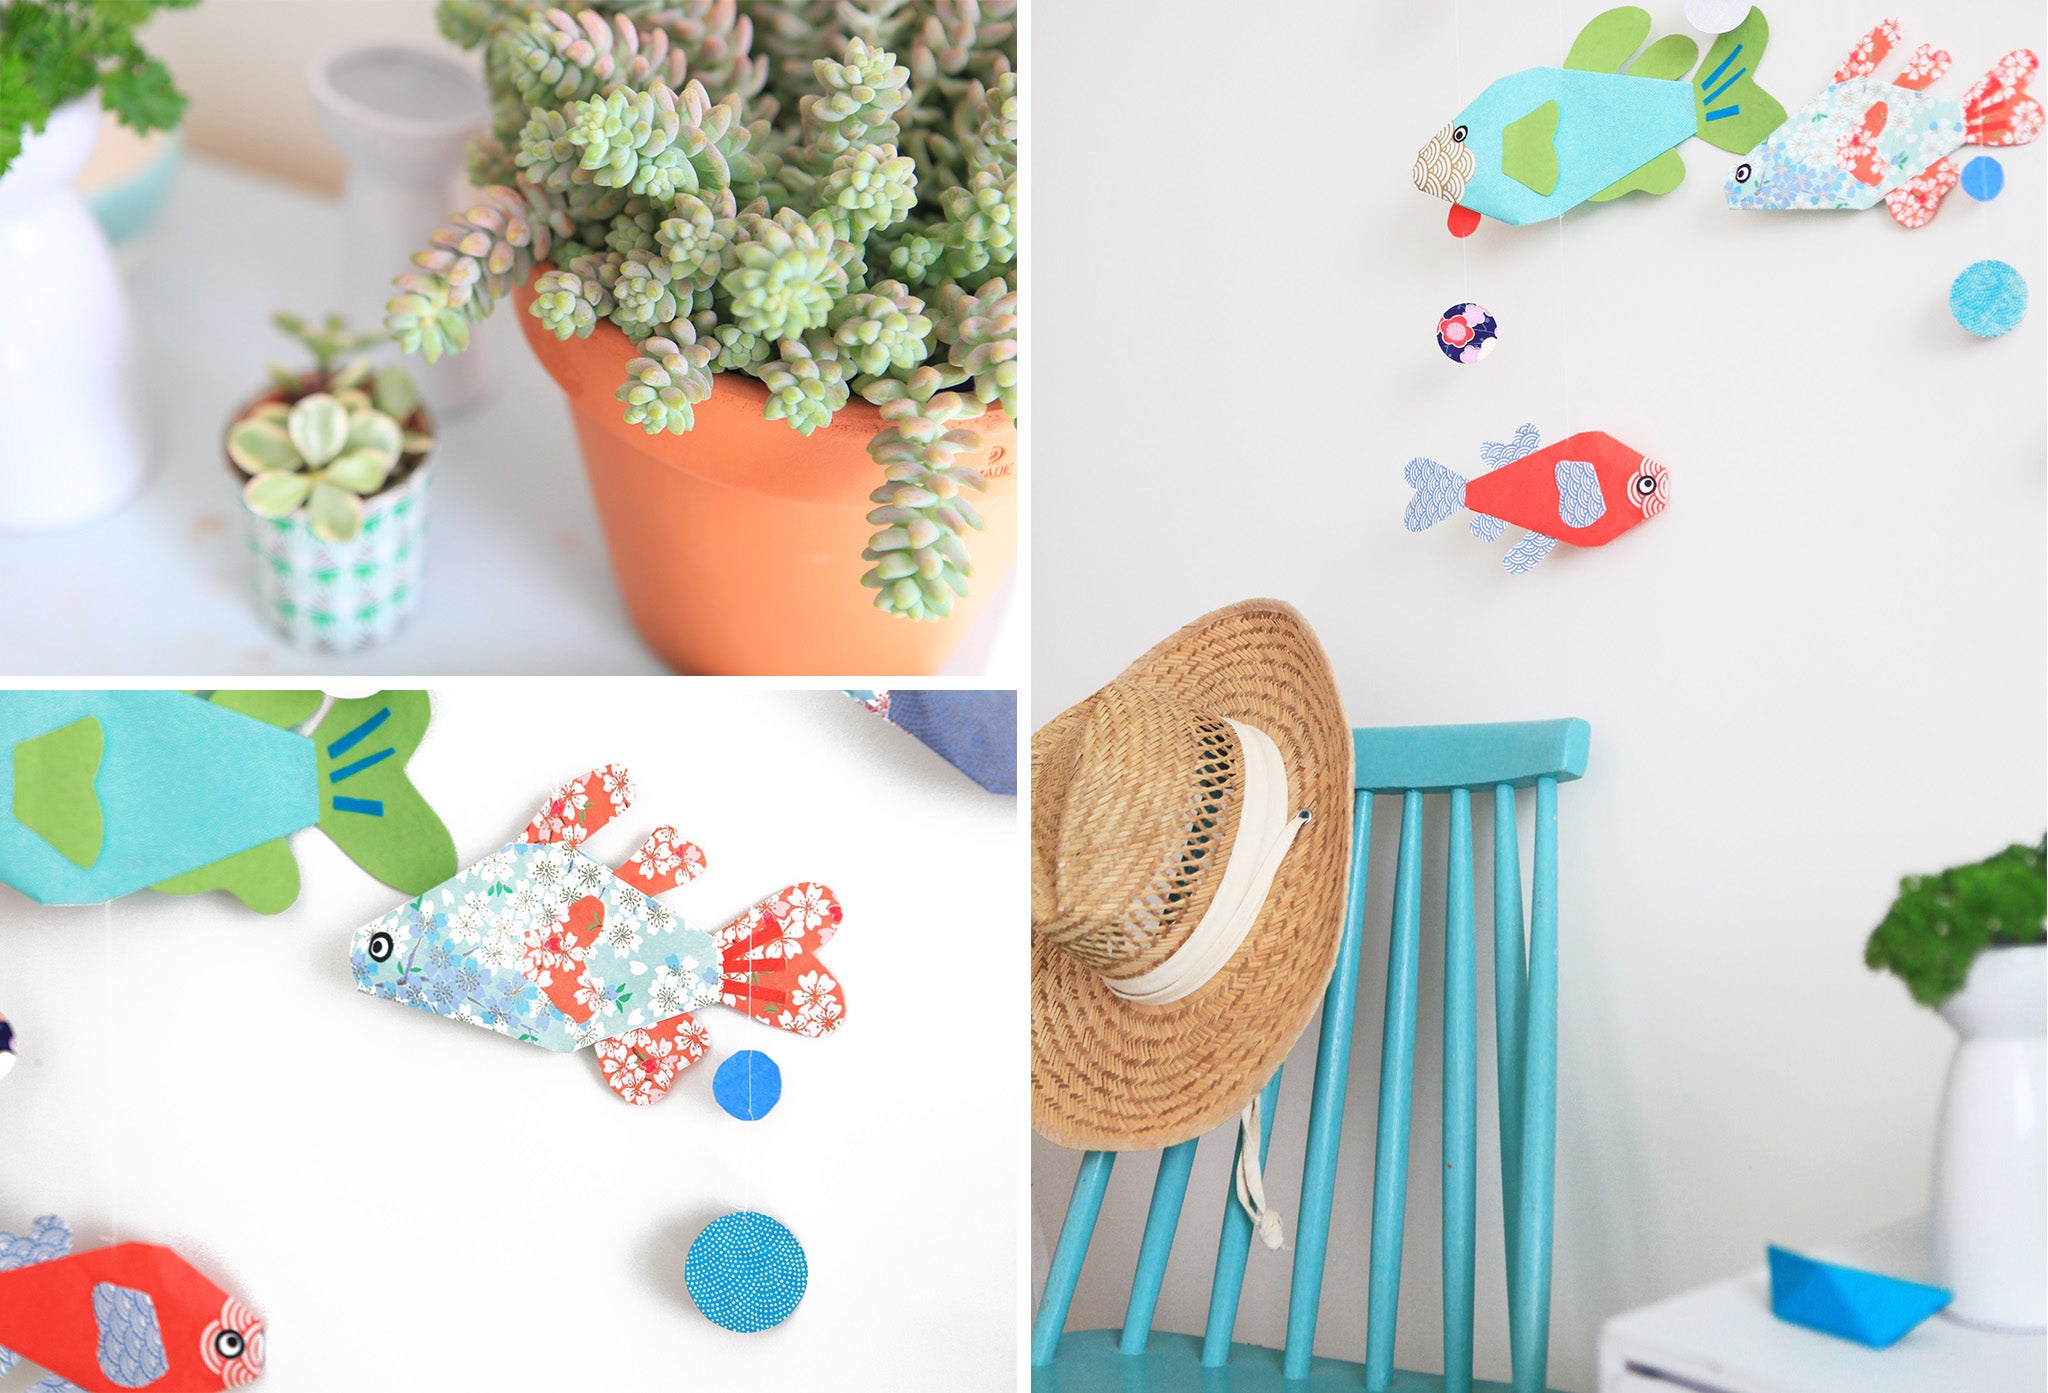
For a little “decorative” touch, I wanted to add succulent plants not far from my mobile, it reminds me of the seabed, algae and corals
For the Japanese papers used in this “Japanese paper fish” tutorial, here are some of the references:
- Japanese Paper - Waves - Blue - M472
- Japanese Paper - Big Waves - Red - M612
- Japanese Paper - Big Waves - Gold - M611
- Japanese Paper - Cherry Blossoms - Water Green, Blue and Mauve - M626
- Japanese Paper - Cherry Blossoms - Coral - M622
- Japanese Paper - Flowers in the Wind - Turquoise - M515
- Japanese Paper - Fish - Pearly white - M613
See you soon,
Adeline


Leave a comment