


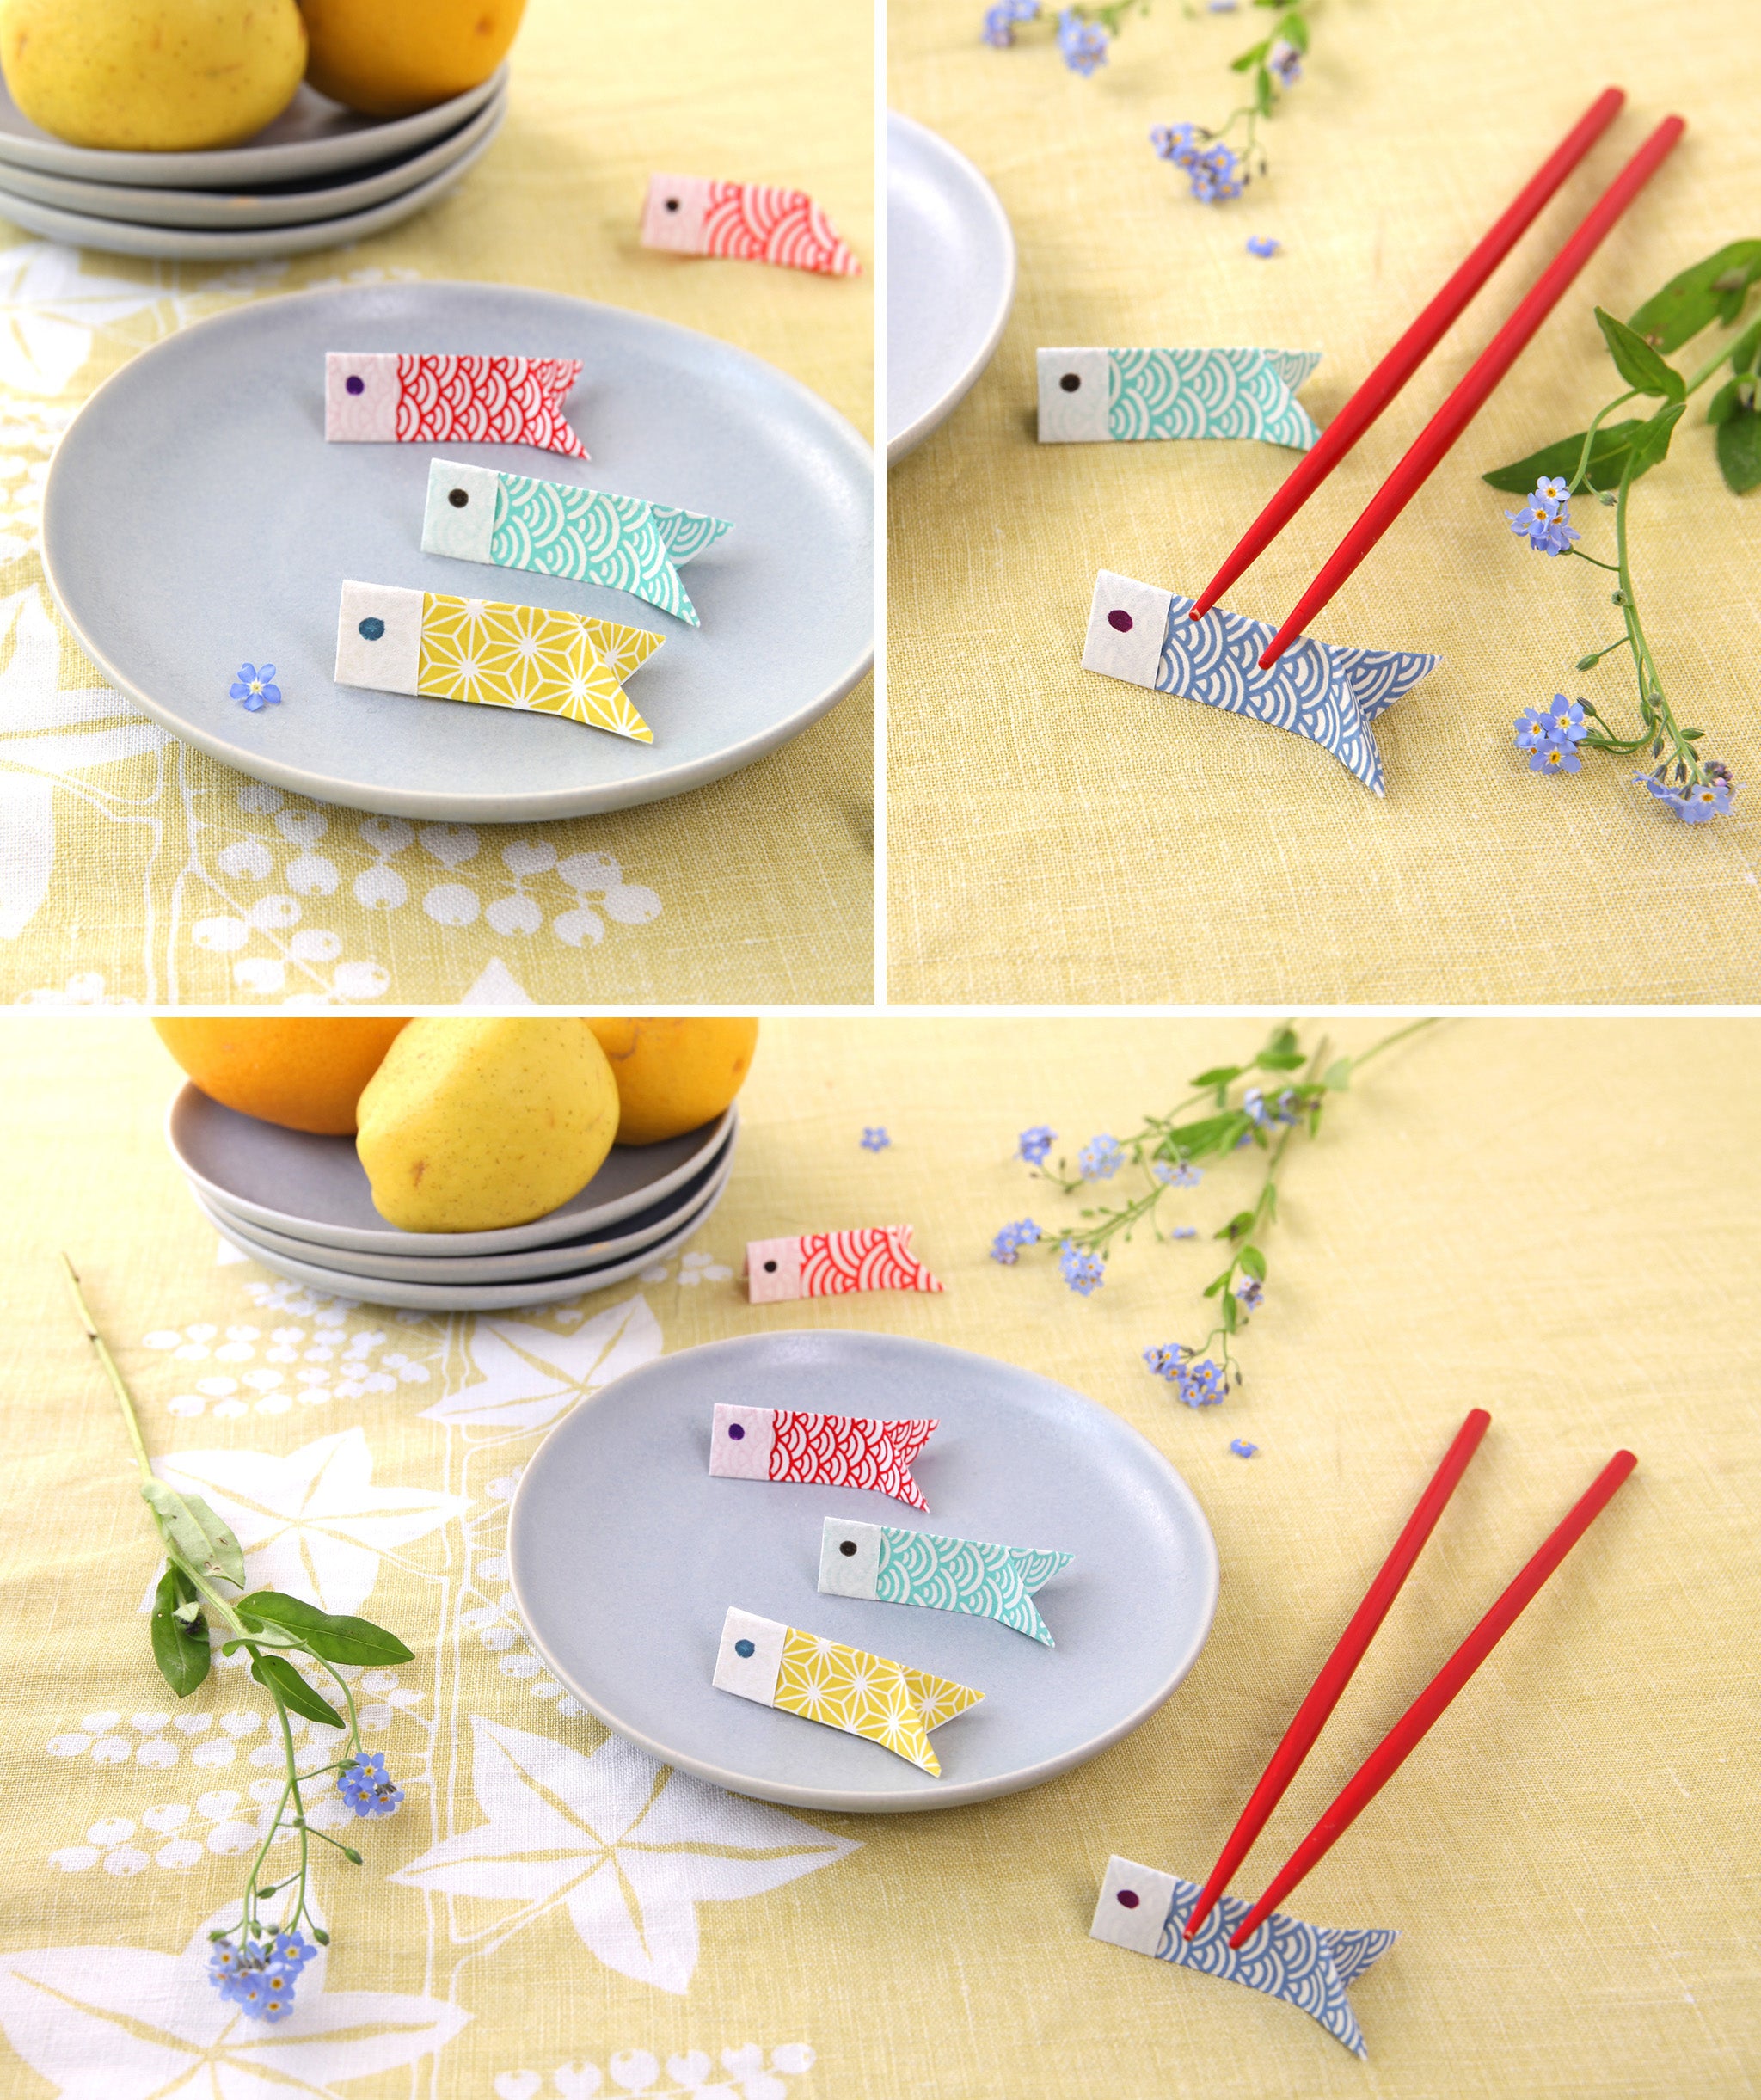
DIY The origami “koinobori” chopstick holder

For this first article, I will show you how to make adorable origami chopstick holders, in the shape of koinobori , which will allow you to create a pretty table with a summer spirit for the arrival of sunny days. Without further ado, here is the tutorial:
THE “KOINOBORI” ORIGAMI Chopsticks Holder

In order to make an origami “koinobori” chopstick holder, you will need:
- a square of origami paper measuring 7.5cm per side - Here we used a square of origami paper measuring 15cm per side which we cut into four smaller squares measuring 7.5cm per side. To make a chopstick holder , you will need a square with a side of 7.5cm , which will give you a chopstick holder of approximately 1.8cm wide by 5.5cm long.
- a small piece of slightly stiff paper
- a pair of scissors
- a little glue
- a black marker

- Take a square of paper, colored side facing you. Fold the top of your square of paper down by a quarter. Turn your folding over.
- Fold it in half, folding the right towards the left.
- You get this. Rotate your fold so that the fold opening is facing down and open it, as shown in the photo in step 4.
- Fold a quarter over, the bottom of your fold towards the center.
- Fold down a quarter, the top of your fold towards the center.
- Fold it in half again, as shown in the photo.
- You get this, a small rectangle of paper. Fold the top right tip down to form a small triangle. Mark the fold well.
- Unfold the fold marked previously and fold the triangle thus formed inside the fish, as shown in the different photos.* (a detail of this step can be found below).
TIP - form a small triangle of paper with a piece of stiff paper and slide it under the chopstick holder to keep it straight.
- Your chopstick holder is now complete. It should look like this, once the triangle formed in step 7 is folded inside. Slightly unfold the bottom of your koinobori to form its body and rear fins.
- On the white part of your fold, on either side of your fold, draw the eyes of your koinobori using your black marker.

TADA Your origami “koinobori” chopstick holder is ready!
I hope you enjoyed this quick and simple little tutorial and made you want to celebrate the beautiful days to come with your family!
I will see you very soon for new DIYs around kodomo no hi . If you would like to learn more about the origins of this holiday, I invite you to read our article “Kodomo no hi: children’s day!” »
Until then, take good care of yourself.
Warmly,
Adeline
Have you already done this folding?


VÉRONIQUE > Merci pour votre petit mot et cette autre astuce ! Il est vrai qu’il ne faut pas un trop grand morceau de carton sous le porte-baguette pour le faire tenir en place. Un point de colle peut aussi aider, par ailleurs :)
j’ai trouvé difficile de faire tenir un carton sous les portes baguettes, alors j’ai utilisé un masking tap assorti qui donne de l’unité à l’ensemble je ne peux pas joindre la photo mais ça rend bien, merci !
MARIE > Merci pour votre petit mot Marie :)
C’est ravissant ! Bravo !
Leave a comment