


TUTO Cylindrical Metal Tea Box to Personalize
What's more comforting than a steaming cup of tea at the start of autumn? With the air getting cooler as the days go by, this season is perfect for cozy moments shared around a hot drink. For this new article, I wanted to teach you how to customize a cylindrical tea box with Japanese paper. This DIY is much simpler than it seems and actually requires very little material!

Tea (and more specifically green tea, ryokucha in Japanese) is an integral part of Japanese culture. It is notably linked to the way of tea ( sado in Japanese) conceived by the monk Sen no Rikyu in the 16th century. This ceremonial practice corresponds to a series of codified gestures, carried out by a master of ceremonies, for the preparation and tasting of a matcha (a finely ground green tea) for his guests.

This DIY project essentially consists of two steps: cutting and gluing. The instructions I'm going to give you below can easily be adapted for other cylindrical box models, such as display boxes, for example.
To personalize a Japanese paper tea box, you will need:
- a cylindrical metal tea box to decorate,
- a quarter sheet of Japanese paper (in the colors and patterns of your choice),
With 1 quarter of a leaf , you can decorate 2 cylindrical tea boxes with medium size and 2 cylindrical tea boxes small size
- To decorate 1 medium-sized cylindrical tea box, you will need to cut : 2 strips, one 27cm wide by 3.2cm high and the other 27cm wide by 7.8cm high as well as a circle approximately 10cm in diameter.
- To decorate 1 cylindrical tea box of small size , you will need to cut : 2 strips, one 21cm wide by 2.3cm high and the other 21cm wide by 8.6cm high as well as a circle approximately 7.4cm in diameter. - A cutter or a pair of precision scissors,
- a cutting ruler ,
- white vinyl glue ,
- A brush brush ,
- a pencil,
- a few sheets of white paper which will serve as a support for the collage.

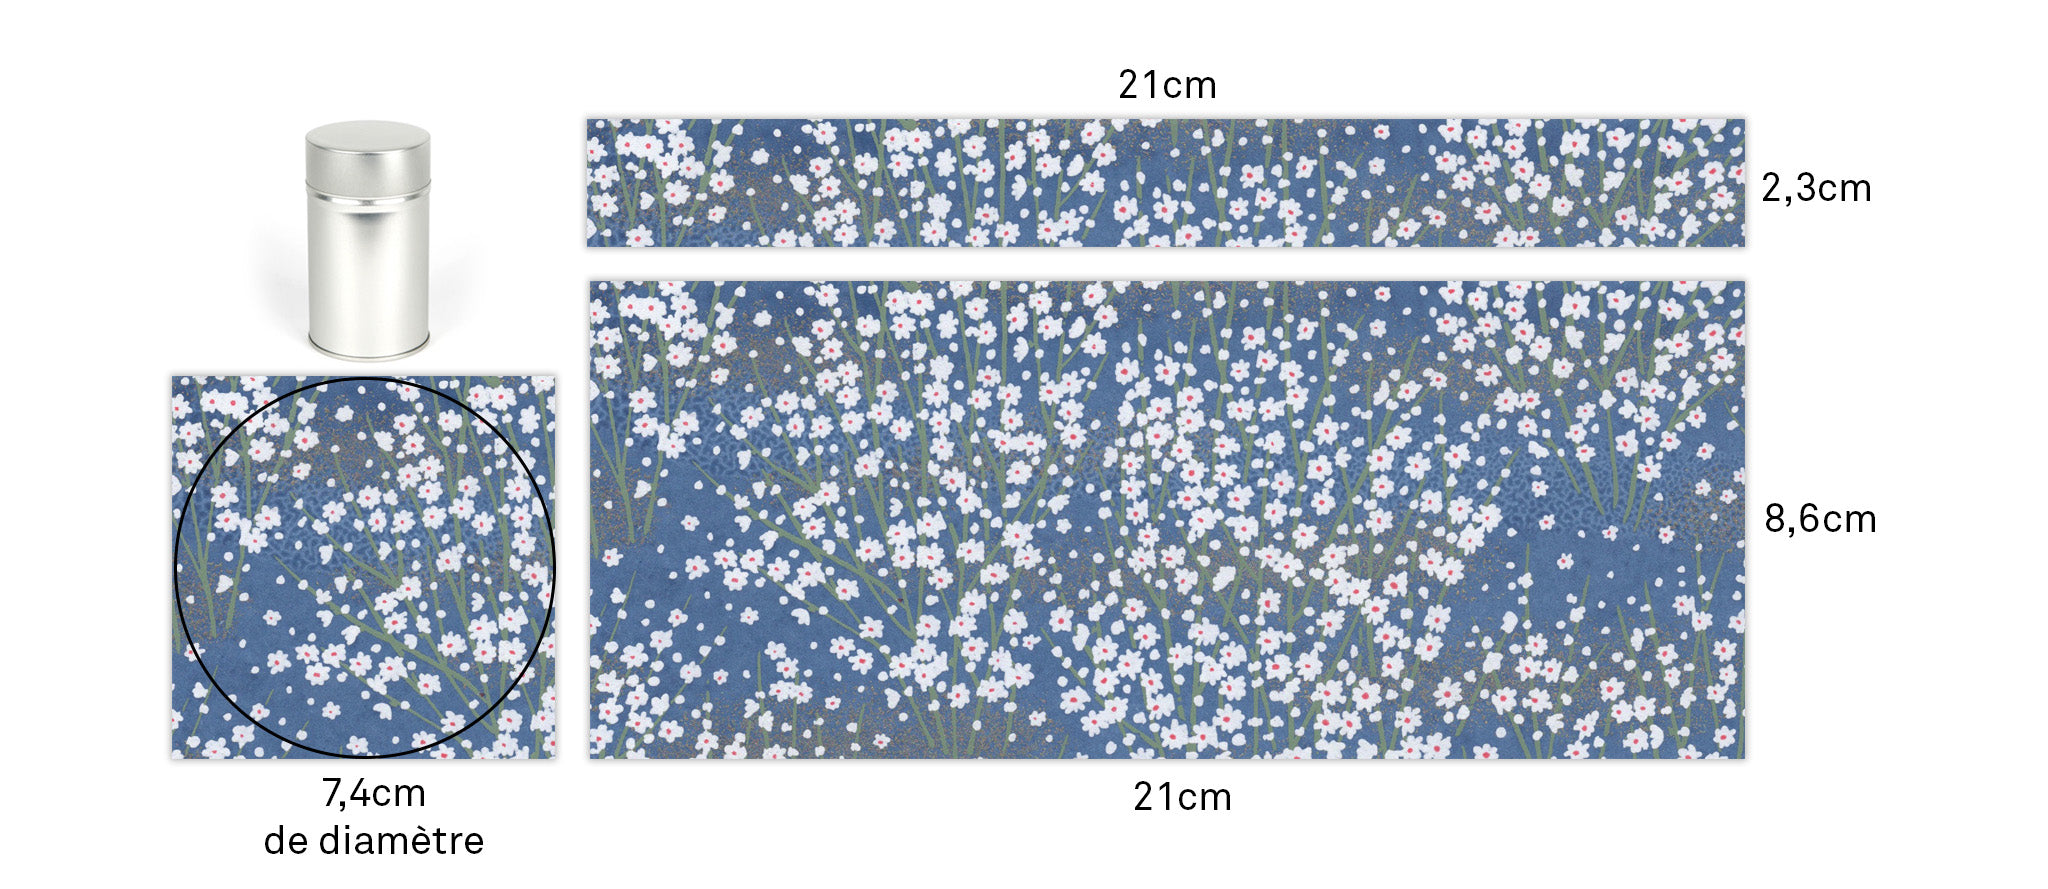
NB: Depending on the paper chosen, make sure to cut your strips of paper in the correct direction so that the pattern is placed correctly on the tea box.
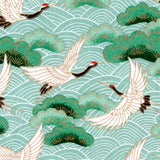
Here are some examples of our Japanese papers that you can combine together to create a beautiful, colorful range!
|

|

|
 |
TIP: To optimize adhesion, keep a small wet towel handy to dry your hands regularly.

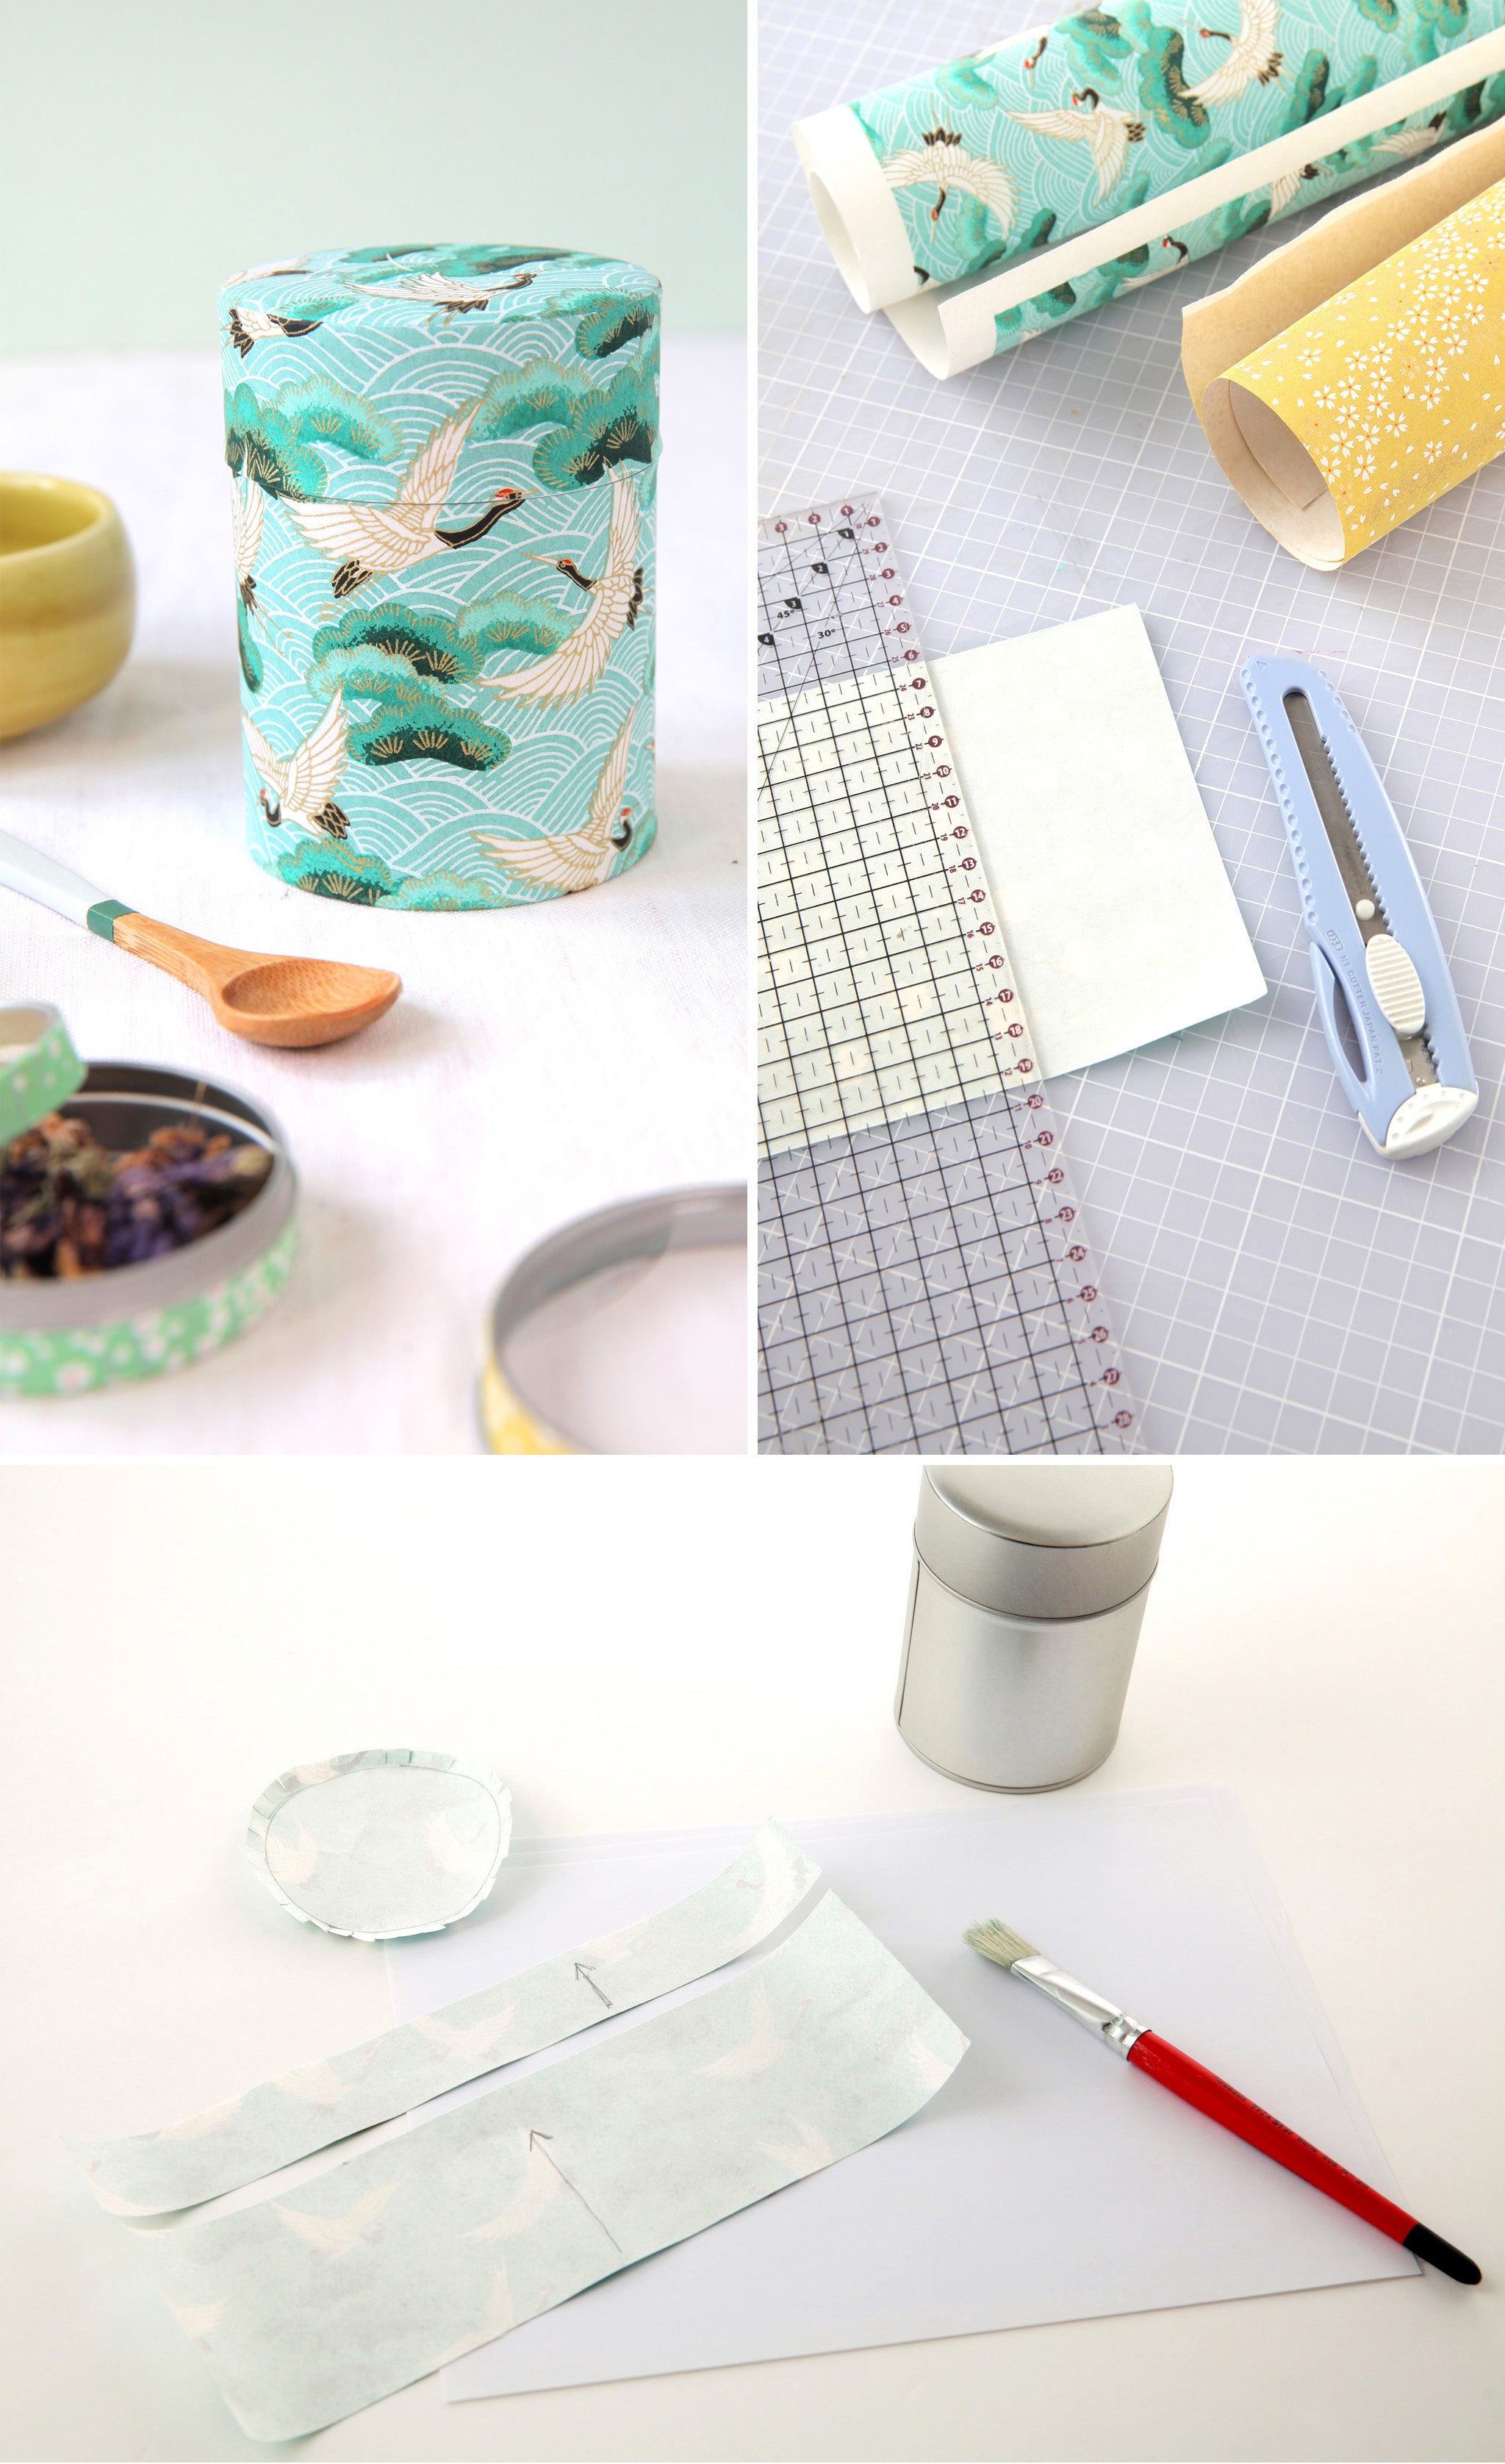
- First, equip yourself with a pencil, a square of Japanese paper at least 10cm square, and your bare tea box. We'll see how to cut out the piece of Japanese paper that will cover the top of the lid.
- Draw a circle using the base of your tea box (lid side - approximately 8.3cm in diameter) on your paper using a pencil.
- Then cut around your circle, leaving a margin of about 1cm (or about 10cm in diameter).

- Hatch the 1cm border of your circle using a pair of scissors.
- You get this.
- Cut out the 2 strips of Japanese paper that will cover the base of the lid (27cm wide by 3.2cm high) and the body of the tea box (27cm wide by 7.8cm high).
CAUTION - Depending on the pattern chosen, some papers have a cutting and gluing direction!
Now get your circle of Japanese paper, your 2 strips of Japanese paper, your bare tea box, a brush and a little glue.
- To begin, we'll take care of gluing the top of the tea box lid. Prepare a few sheets of paper that will serve as a support for applying the glue.
- Apply glue evenly using your brush, extending it outwards from your paper circle.
- Place your box, head down, on the circle of glued paper, making sure to center everything.

- Once the lid has set, carefully lift the tea box and its circle of Japanese paper.
- You get this.
- Fold all the small “fringes” of your paper circle over the sides of your tea box lid.

- You get this. Make sure all the little "fringes" are folded down properly and adhere well to the backing.
- Apply glue evenly to your narrowest strip of paper.
- Carefully peel your strip of paper off your collage support.

- Place your glued strip of paper on the base of the tea box lid...
- ...and gently wrap it all the way around the lid. Pay attention to the direction of gluing, according to the pattern of the paper!
- Using your finger, smooth the top of your strip of paper tape as shown in the photo.

- Apply glue evenly to your widest strip of paper, stretching it outward.
- Place your glued strip of paper on the body of the tea box at the steel joint and gently wrap it all the way around the body.
- You get this. Replace the lid and body of the box so that the pattern is correctly aligned.
TADA! Your tea box, decorated with Japanese paper, is finished!
You can now store your tea in your new personalized tea box!

If you want to customize small boxes with Japanese paper, you will need:
- a small view box or medium view box
-
half a sheet of Japanese paper (in the colors and patterns of your choice)
To decorate a small display box, you will need to cut: 2 strips, one 21cm wide by 0.8cm high and the other 21cm wide by 1cm high.
To decorate a medium-sized display box, you will need to cut: 2 strips, one 24.5cm wide by 0.9cm high and the other 24.5cm wide by 4.6cm high. - a cutter
- a cutting ruler
- white vinyl glue
- a brush brush
- a pencil

- Depending on the size of the display box you wish to customize, refer to the measurement instructions above. Trace your two strips onto your sheet of Japanese paper, cut them out, and glue them.
- Wrap the thinner strip around the lid and the wider strip around the body of the box. Let it dry.
TADA! Your little storage boxes, decorated with Japanese paper, are finished!
I hope this article has inspired you to start customizing your tea box! If you have any questions, feel free to ask us in the comments. We'll be posting new articles in the coming weeks.
Until then, take good care of yourself,
Adeline
Which Japanese paper would you choose?


Bonjour, quelles sont les dimensions pour la petite boîte cylindrique, s’il vous plaît ?
D’avance Merci
Bonjour,
Dans ce tuto, vous donnez les dimensions pour une boite cylindre moyenne (ref: 9024), quelles sont, s’il vous plait, les dimensions pour une boite cylindre petite (ref: 19084) ?
D’avance Merci
EMMA > Bonjour Emma ! Est-ce bien du modèle de boîte à thé « dôme » dont vous me parlez ? Si c’est bien le cas, pour celle de 250g, il vous faudra découper une bande de 32cm par 8,7cm pour recouvrir la partie cylindrique :)
Bonjour, quelles sont les dimensions pour les boîtes à thé 250g ?
Leave a comment