


TUTORIAL - Pretty celestial map and little owl in Japanese paper
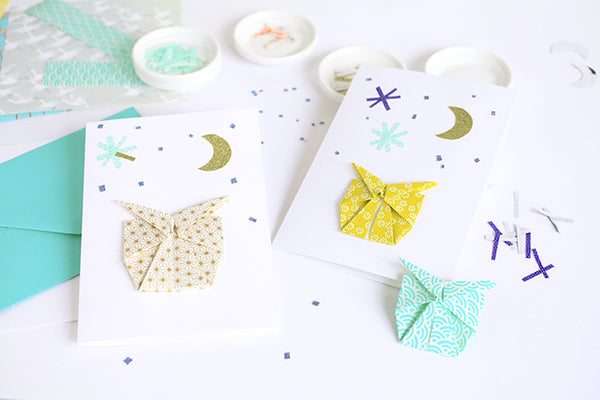
To celebrate the passing of the new year and share my wishes for happiness with poetry, I wanted a beautiful starry night sky. With great simplicity, I gathered together, in this DIY, some scraps of Japanese paper in a pretty range of celestial colors... A little golden moon, a few stars, glitter and this cute little night owl, the owl, invite us on a journey through the skies.
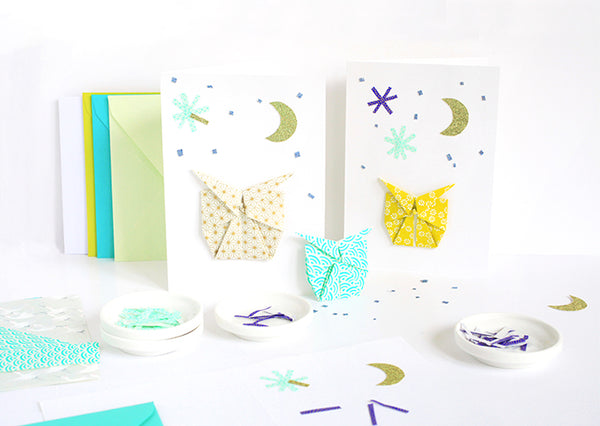
I sincerely hope that you enjoy this tutorial and encourage you to send sweet words. With its timeless universe, this card can be given for a birthday as well as to announce a birth...

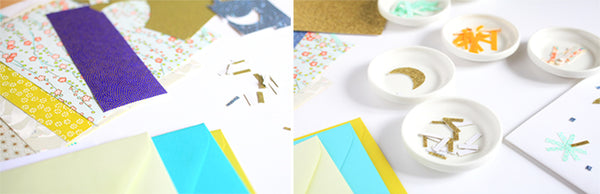
To make a card, have:
- 1 square of japanese paper 12 x 12 cm, (or 15 x 15cm to cut) for your origami owl
- falls of japanese papers for the stars
- white glue
- 1 paperclip
- 1 cutter and cutting board
- glitter paper sheets
- 1 envelope and 1 blank card

Draw a moon shape in slightly thick white paper to make a template and cut it out several times with a pencil on the back of a sheet of glitter paper. With a craft knife or precision scissors, cut out the moon from the glitter paper.
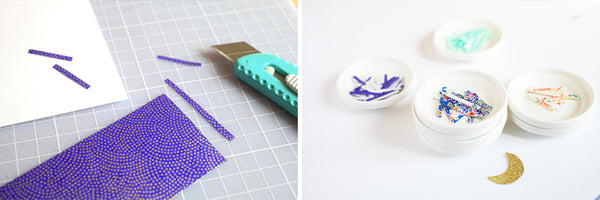
Grab the scraps of Japanese paper and cut out small strips. I like to prepare several small bowls to see the different color ranges and think about my composition.
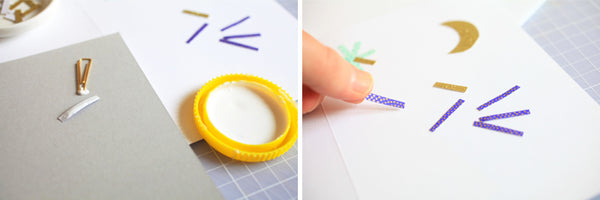
To apply the glue without too much smudging, use a small paperclip. Take the card and then glue the strips of paper to form stars. You can make as many as you want, but don't forget to leave room for your owl...


Once the stars and the moon are placed, you can cut and glue mini squares in your glitter paper to speckle the background and compose your starry night.
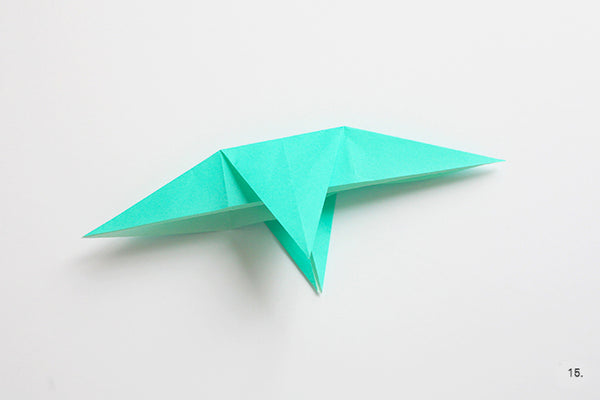
Your card is almost finished! Discover the tutorial for making the little origami owl. Take your 12 x 12 cm square of Japanese paper.
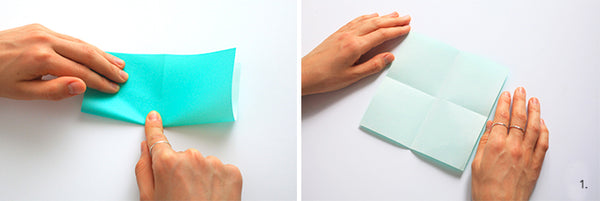

- With the printed side facing you, trace the folds of the medians.
- Turn your paper over and mark the diagonal folds.


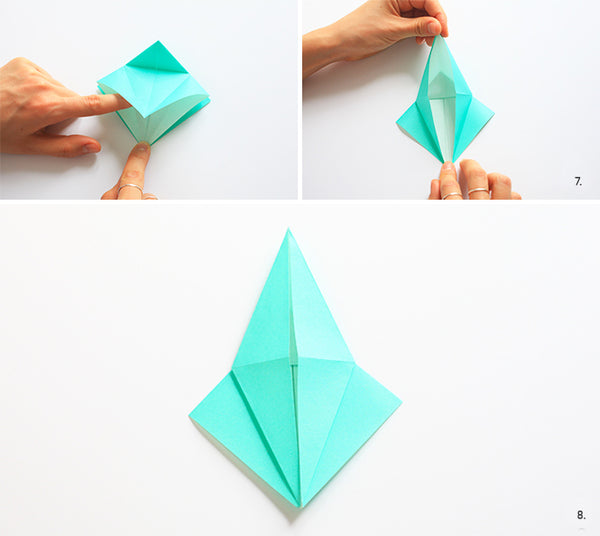
- Open your folding, you get this.
- Using these markings, fold the paper as in the photo: it should form naturally. You get a square shape.
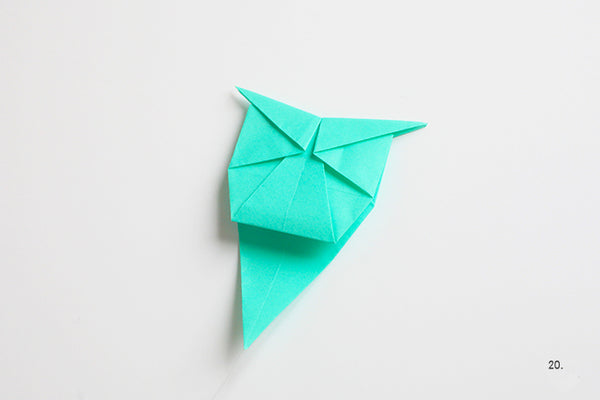
- With the tip of the fold facing up, fold the right part and the left part of the fold as in the photo.
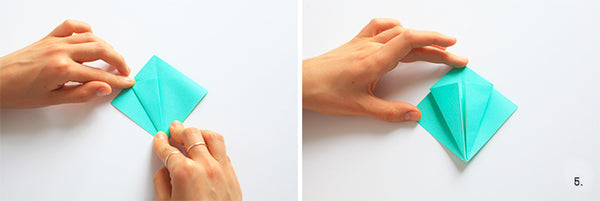
- Mark the fold of the top triangle. Unfold.
- Unfold step 5. Place the open part of the fold towards you and begin to slightly open your fold upwards...
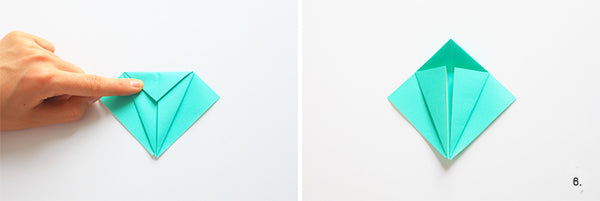
- ...and then a little more. Until you flatten your shape. You get this.
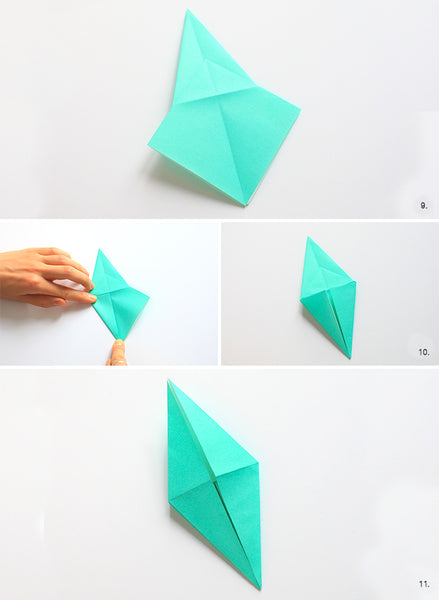
- Turn your folding over.
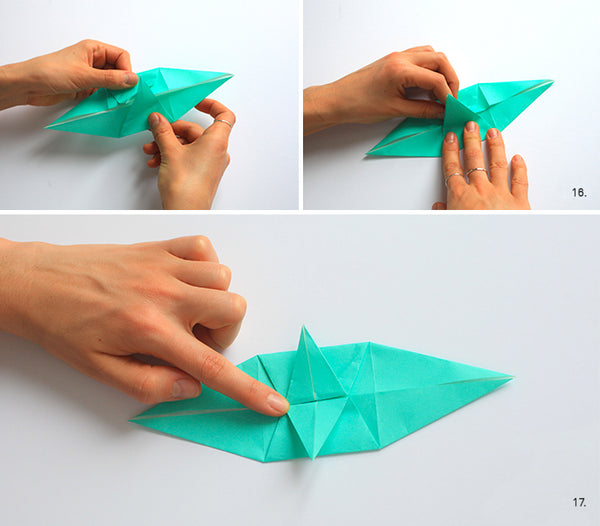
- Fold the right and left parts of the fold as shown.
- New ones, turn your folding over.

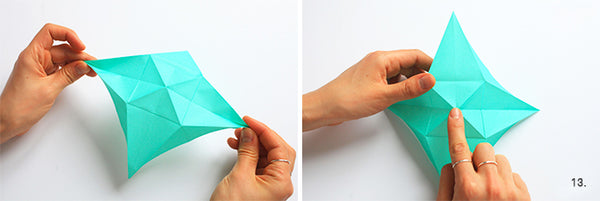
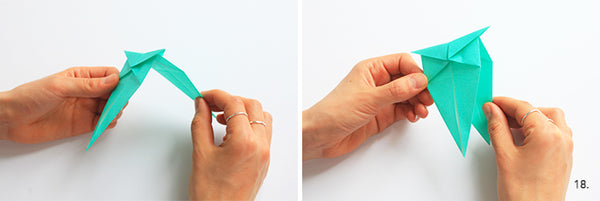
- Grasp the ends of the fold and pull points A and B outwards.
- Open enough so that you can push and reverse the center point of your fold.
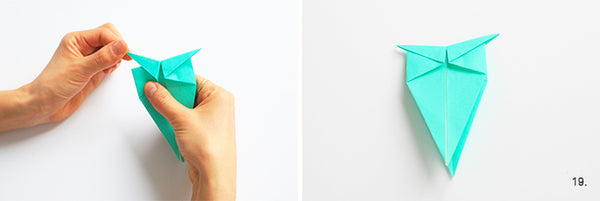
- Push again and close the fold on itself, as in the photo.
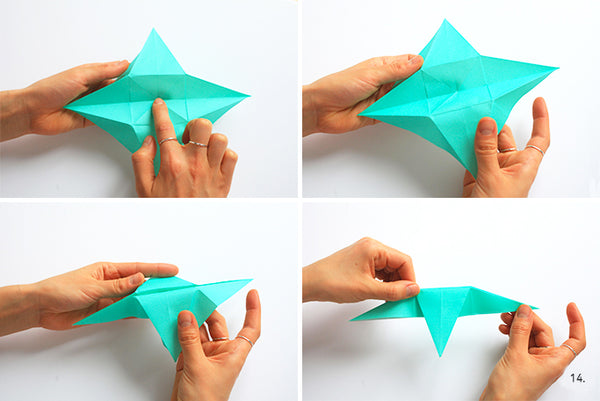
- Mark the folds of your Japanese paper fold well.
- Open your fold as in the photo. Lay your folding flat so that the two triangle-shaped parts touch each other at their ends. Make sure to flatten your entire fold.
- You get this.
- Fold your fold in half by folding the two opposite ends of your fold.
- Lift the ends slightly upwards. When marking the fold, be careful not to go too far beyond the angle underneath.
- Grab the part of your fold closest to you and slide it into the upper part of the fold. Flatten everything.

- Same principle as in step 20, this time, pinch the tip and fold it down so that the small beak is held in the opening. Well done ! Your origami owl is almost finished...

- If you feel like it, add two little eyes to personalize your Japanese paper owl!


For this DIY celestial map and little owl made of Japanese paper, we used the paper references:
- Japanese Paper - Half of flowers - Acid green - M479
- Japanese Paper - Small Stars - Gold - M510
- Japanese Paper - Samekomon - Ultramarine blue and gold - M635
- Japanese Paper - Inverted Waves - green - M519

I imagined this card inspired by the work of a talented origamist: Shoko Aoyagi . In his book “Kawaii (cute) Doubutsu (animals) Origami”, she presents adorable animals to make in origami. I really like his world full of poetry.
I invite you to discover other pretty creations by Shoko Aoyagi during our Easter workshops on 5 And 12 April taking place in our store!


Leave a comment