TUTORIAL: Customizable Pencil Holder
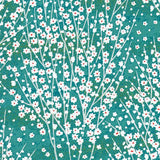
The DIY that I am offering you today is around our customizable pencil pots . They are very simple to assemble and customize with a few pieces of Japanese paper. Their geometric aspects, like prisms, make them original and unique at the same time!

Once covered in Japanese paper, these pencil holders add a nice touch of color to your desk corner or on your craft table. Stationery lovers, like me, will enjoy matching them to their colorful notebooks or their decoration.

----------
THE PRISM PENCIL POT TUTORIAL LINED IN JAPANESE PAPER

In order to make a pencil holder dressed in Japanese paper, you will need:
- a customizable pencil holder to assemble yourself (the set that we sell in store and on the e-shop includes 3 pencil holders)
- half a sheet of Japanese paper (in the colors and patterns of your choice) from which you will cut for 1 pencil pot: 2 squares of 13.5cm by 13.5cm and 1 square of 5cm by 5cm
- white vinyl glue
- a cutting rule
- a cutter
- a brush brush
- transparent adhesive tape
Some examples of our Japanese papers that you can combine to create a pretty colorful range for your office decoration!
TIP: To optimize bonding, do not hesitate to have a small wet towel on hand to wipe your hands regularly.
NB : To discover the steps in video, a story pinned to the front page is available on our Instagram account “DIY Pot à Crayons”

- First, using the cutter and the cutting ruler, cut 3 squares of Japanese paper in the following dimensions:
- 2 squares measuring 13.5cm by 13.5cm (for the “body” of the pencil pot)
- 1 square of 5cm by 5cm (for the "underside" of the pencil holder)

- Assemble the “body” of the pencil pot, black side inward.
- Secure the joining points of the pencil holder with transparent tape, first on the sides...
- ...and then attach the "bottom". If the bottom edges extend a little outside your pot, cut them to make a nice angle.

- Apply white glue, using your brush, to the back of a first square of paper with a side of 13.5cm.

- Take your pencil holder (opening downwards) and the 13.5cm square of paper that you have just pasted. Start applying the paper as positioned in the image on the left, in the center of one of the triangular faces of the pot (point upwards).
- Then stick it on the entire half of the pot by rotating it on itself. Smooth with your hand to remove any air bubbles.

- Apply white glue, using your brush, to the back of the 2nd remaining 13.5cm square of paper. Stick it on the pencil pot by superimposing it on the first square on the other half of the triangular face of the pot already dressed... (be sure to align the tops and bottoms of these 2 squares of paper with each other)
- ... then smooth with your hand to remove any air bubbles.
After gluing the two squares of paper to the pot, if one protrudes a little, cut the one that protrudes to have your two squares of paper aligned at the same height.
- On the top of your pot, cut the four corners as shown in the photo.
- Fold each tab, one by one, inside the pot.

- On the bottom of your pot, cut the four corners as shown in the photo.
- Fold each tab, one by one, under the pot.

- Apply glue to the back of your 5cm square of paper.
- Stick it on the bottom. Let dry.


I hope you enjoy this quick and simple little customization!
See you soon for new articles,
Adeline
--------------------
Which Japanese paper would tempt you?


CAILLAUD ELODIE > Merci pour votre adorable petit mot Élodie :)
Merci pour ce Tuto simple pour un rendu extraordinaire !!!
HENSSIEN ISABELLE > Merci pour votre retour ! Je vous contacte par e-mail dès à présent afin que nous puissions voir ensemble ce qu’il est possible de faire :)
j’ai acheté un lot de pot à crayons à faire soi même que je ne peux réaliser car les découpes et les pliages sont à l’envers( le côté noir se retrouve sur l’extérieur).
TACK FRANCE : Merci pour votre petit mot ! Nous espérons que ces pots à crayons trouveront leur place sur votre bureau :) Il n’y a pas besoin laisser sécher très longtemps car la colle blanche prend assez vite. 1h suffira amplement !
Leave a comment