


TUTORIAL The Origami Tassel
The pretty Japanese paper tassels! In a spirit of poetry and celebration, I am delighted to share this month the tutorial for this little hanging decoration, which will add charm to your Christmas tree or brighten up a child's bedroom for example.
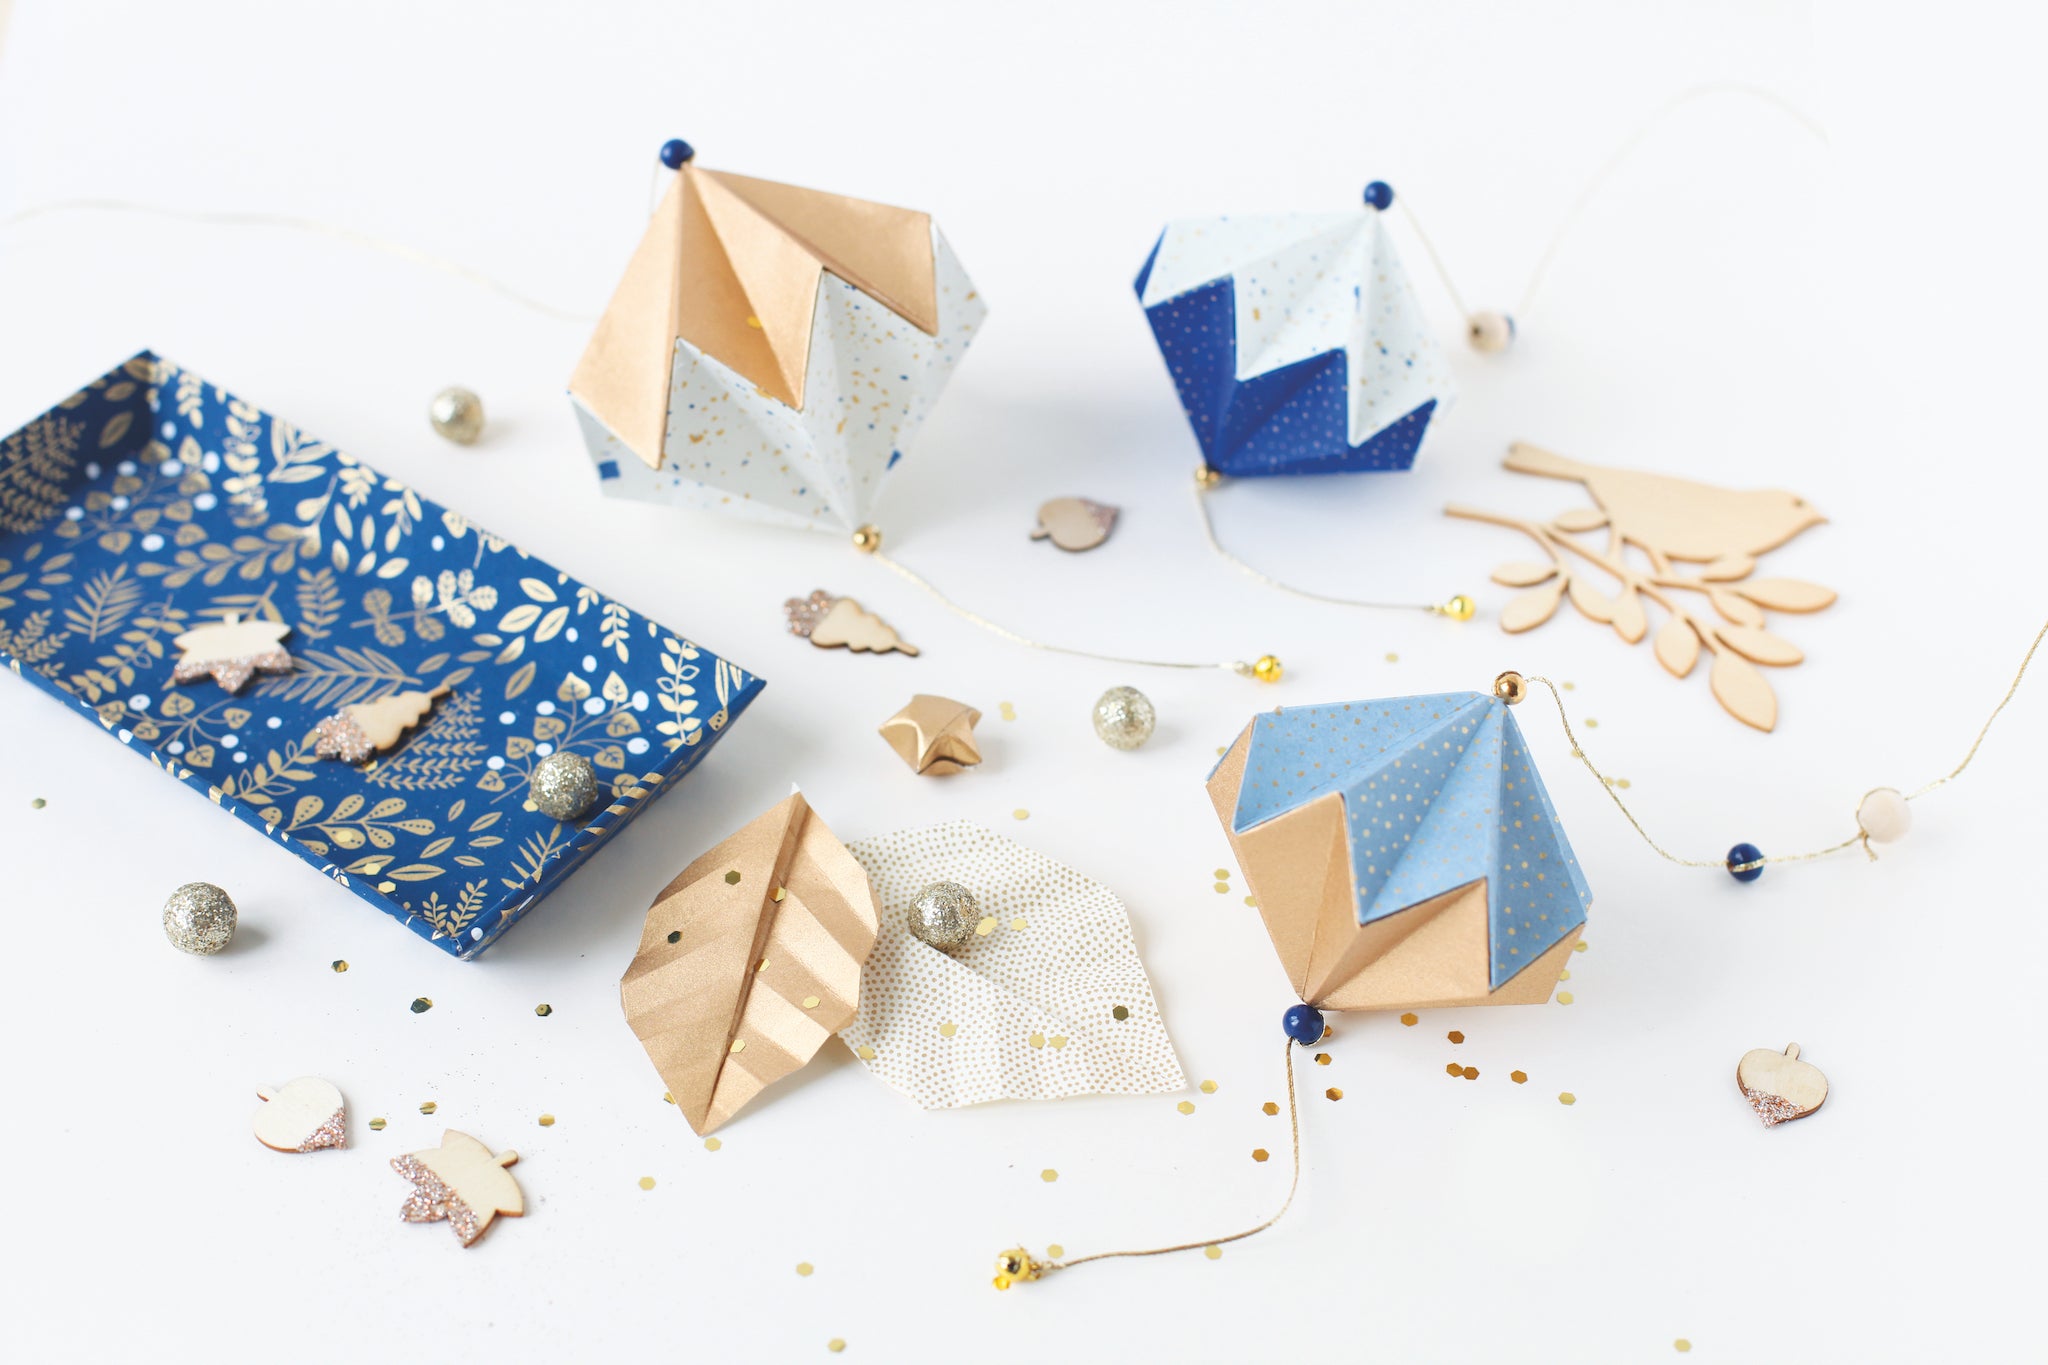
Simple to make, you can make them in several sizes and vary your colorful range!
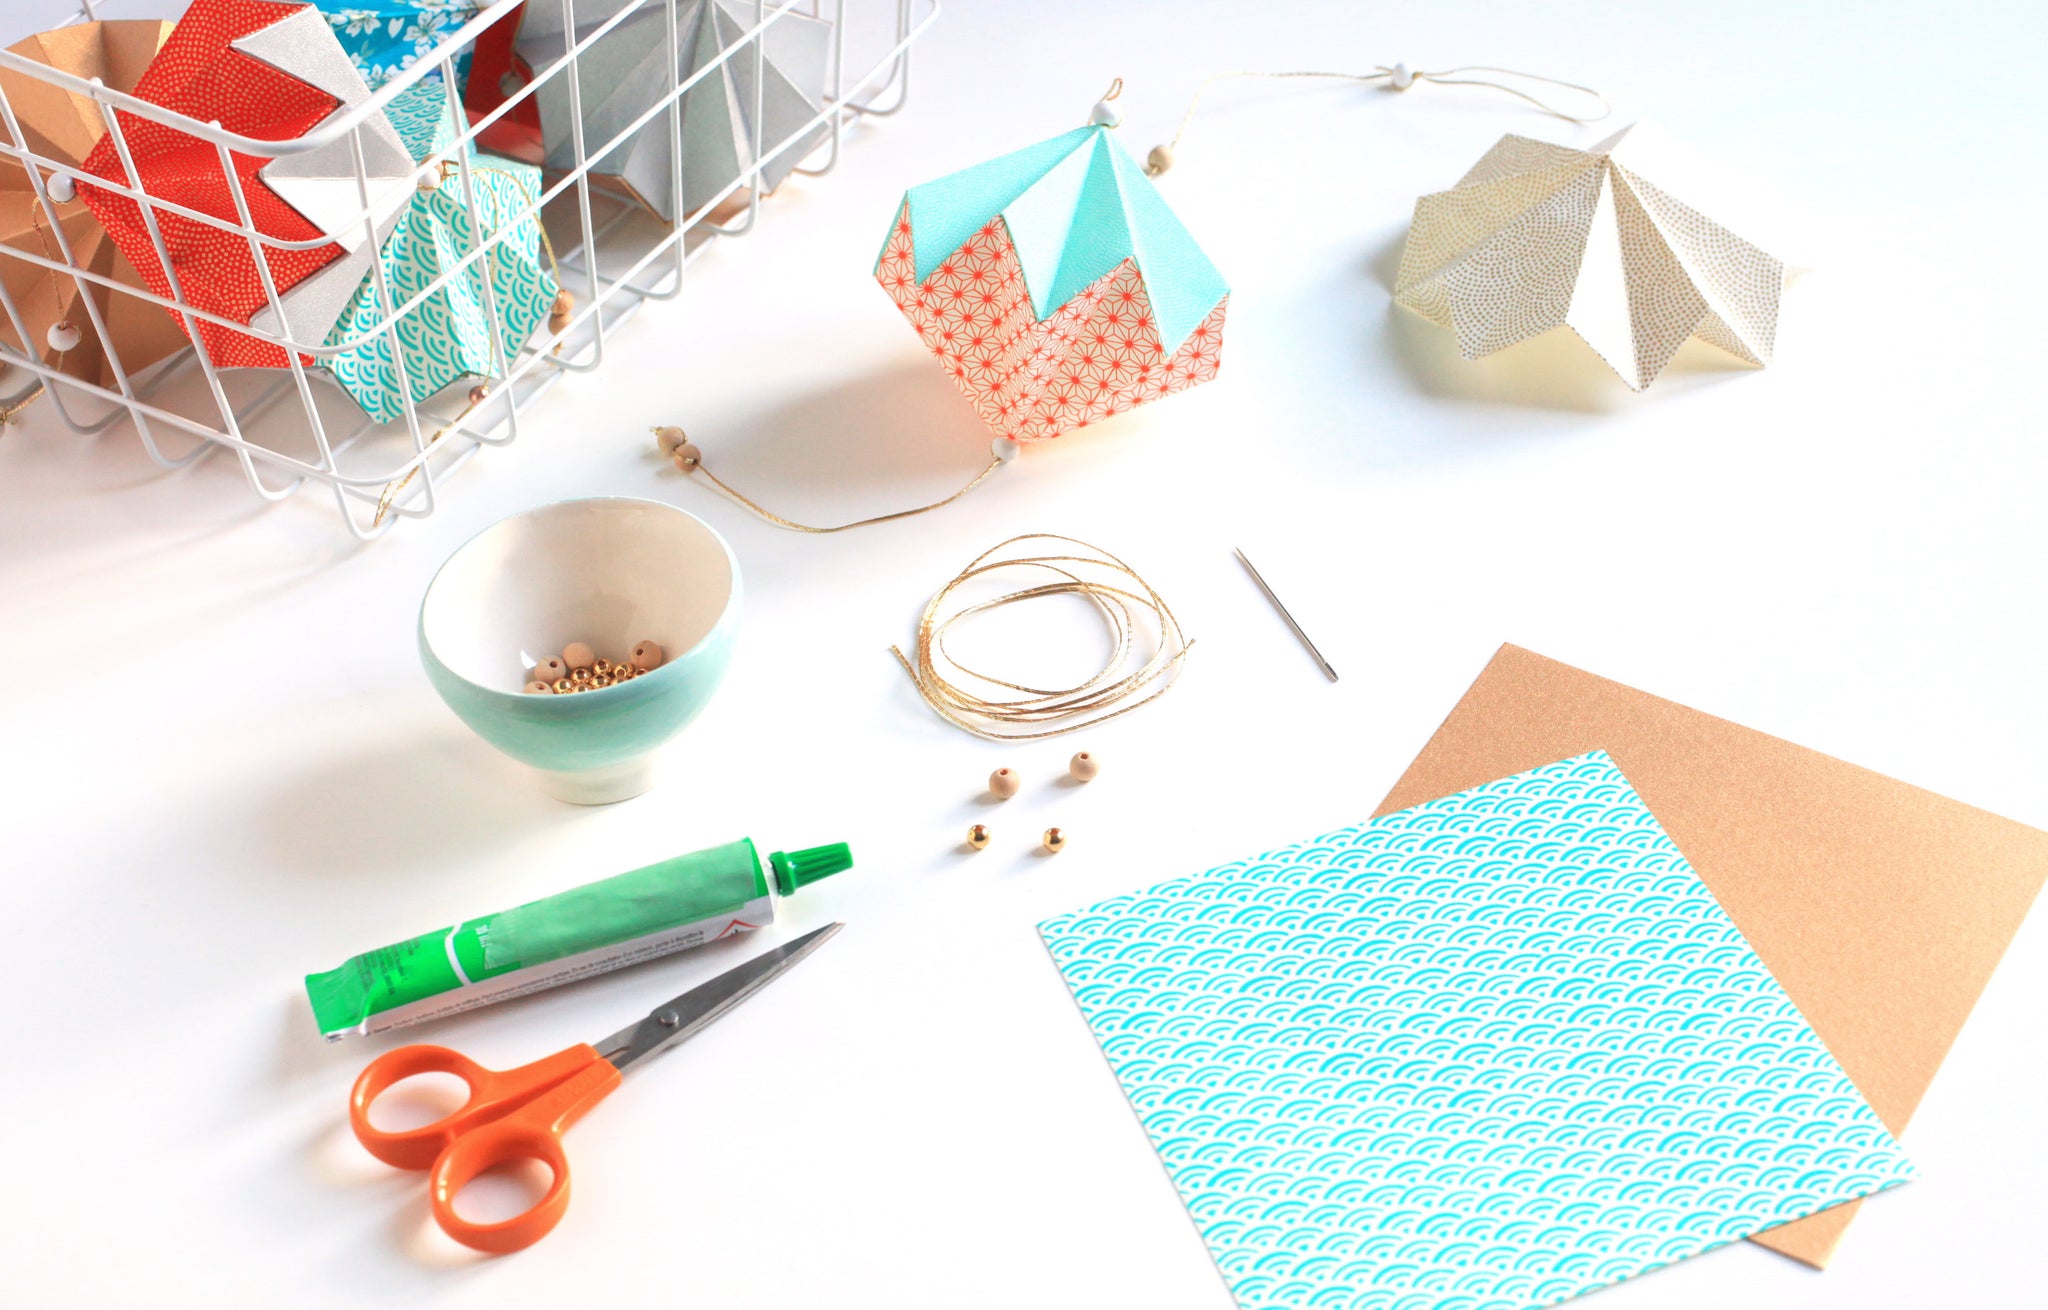
In order to make an origami tassel, approximately 10cm wide and high, you will need:
- 2 squares of Japanese paper measuring 15cm by 15cm in the patterns of your choice - 2 squares of Japanese paper will allow you to make 1 tassel ,
- a pair of precision scissors for cutting Japanese paper,
- of the gel glue for assembling the two parts of the tassel together,
- a needle (with a slightly wide eye) for mounting the tassels on thread,
- thread and beads (approximately 30cm of thread and 5 beads per tassel) to match your papers.
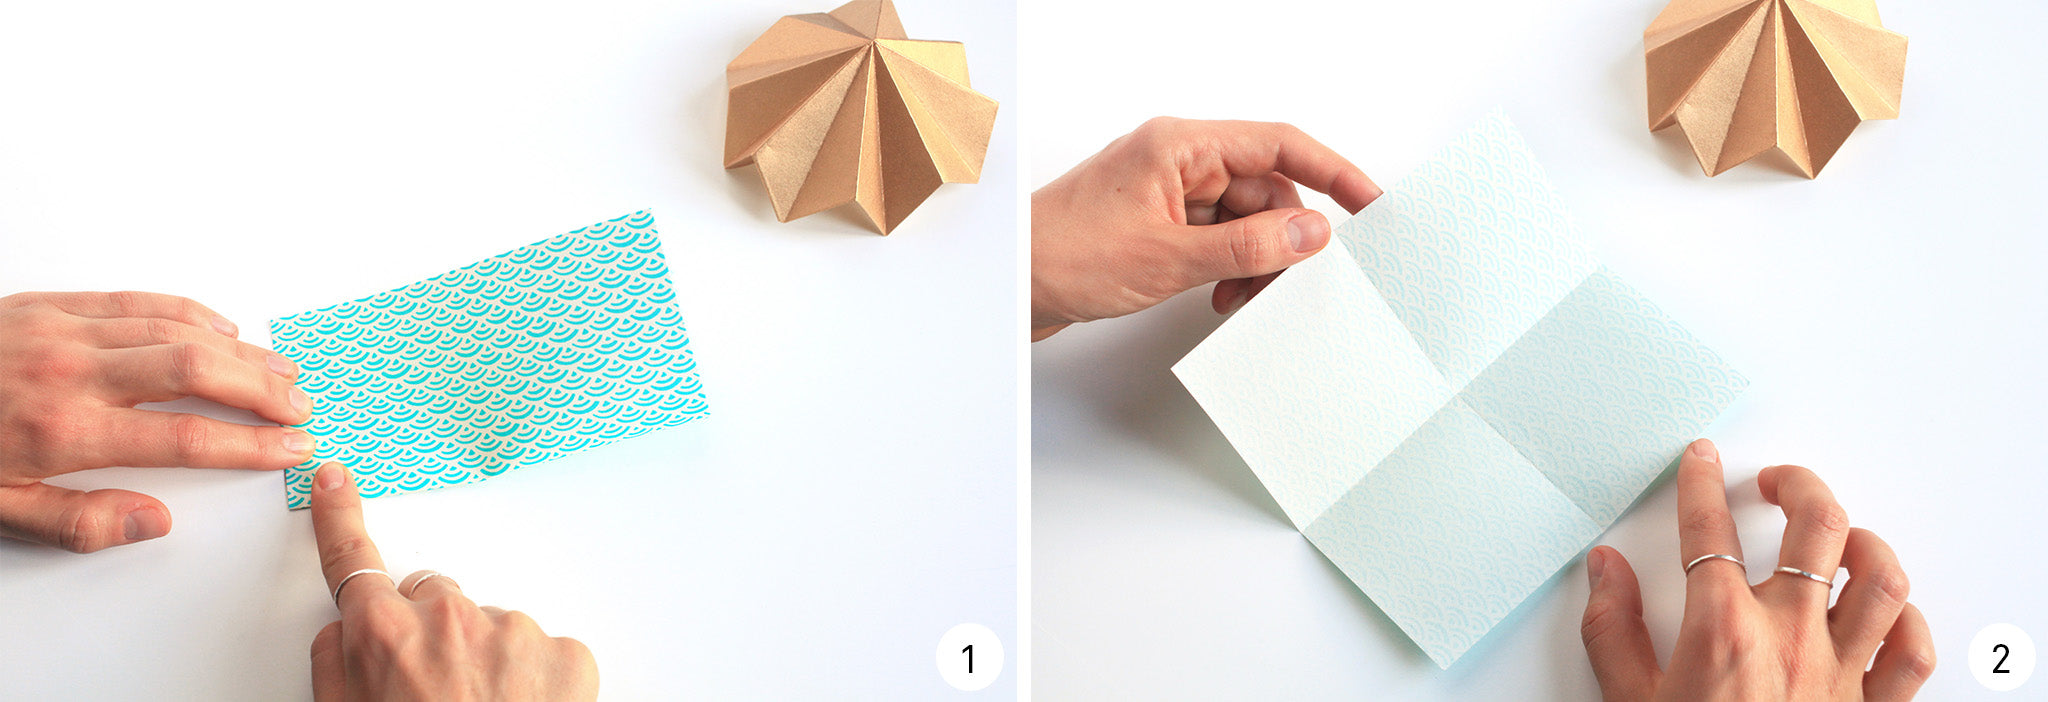
We will start by folding the two modules which will subsequently form our tassel!
NB: In order to obtain two modules that fit together perfectly , be sure to follow steps 13 and 16 carefully.
- Take a first square of paper, white side facing you. Fold it in half to mark a first median. Open your fold then mark a second median.
- Unfold everything and turn your square of paper over.
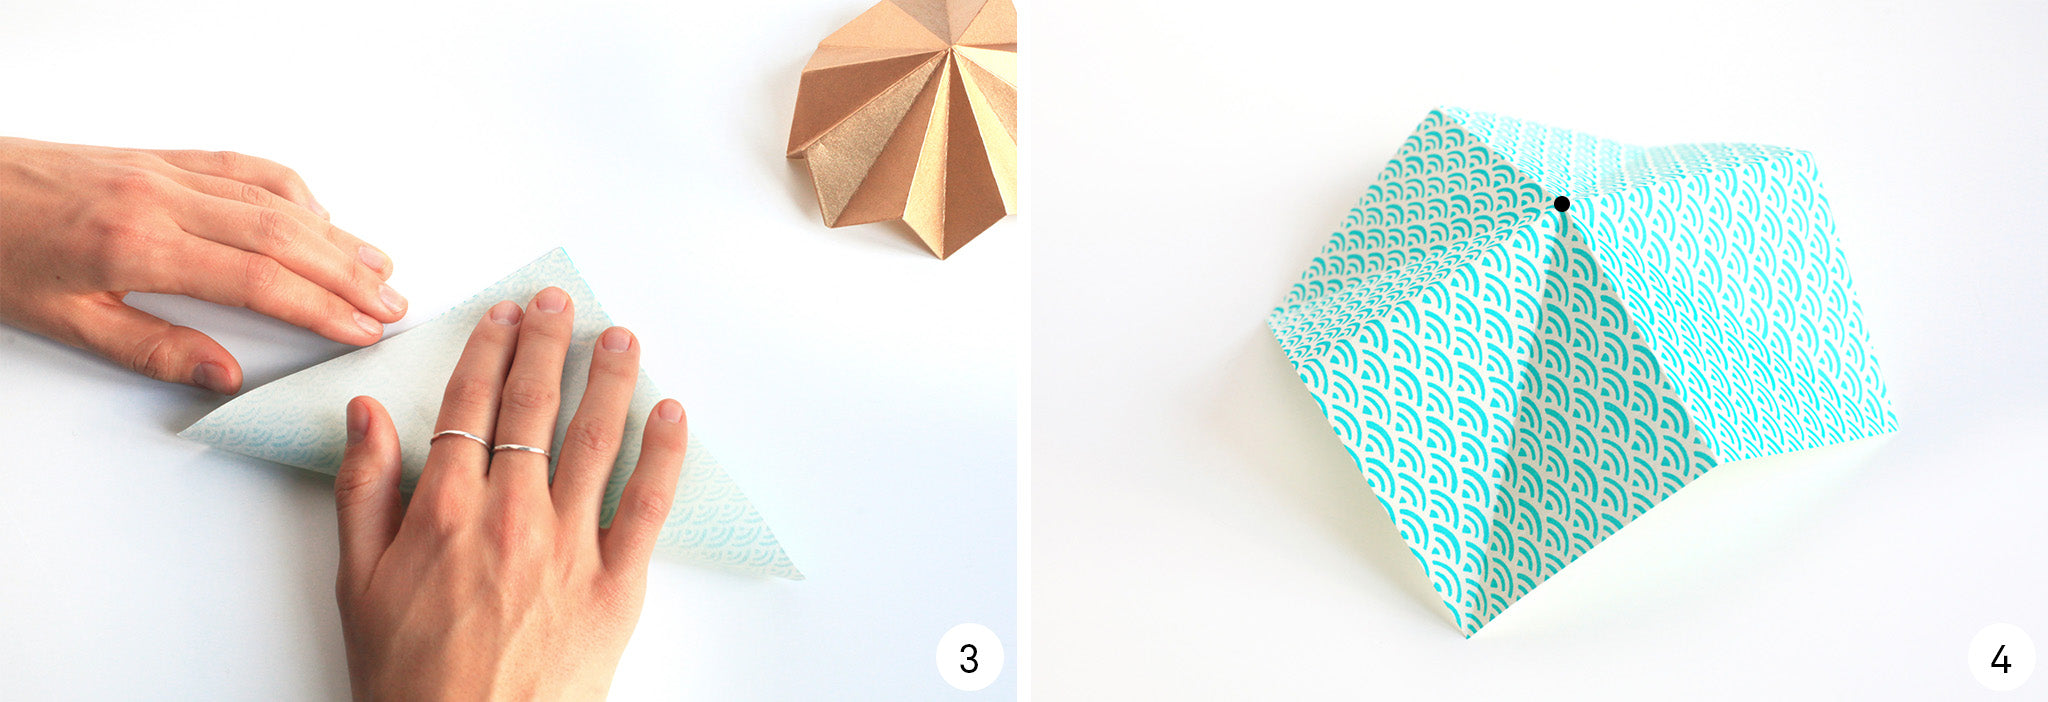
- This time place your square of paper, printed side towards you, then fold diagonally to mark a first diagonal. Open your fold then mark a second diagonal.
- Open your fold. Place your hand under the fold and push the center point upwards, so that your fold forms like a small mountain.
- Using the folds of the medians and diagonals made previously in steps 1 to 4, fold the shape obtained on itself towards its center as in the photo, folding the folds inwards. This must form naturally. Flatten your square.
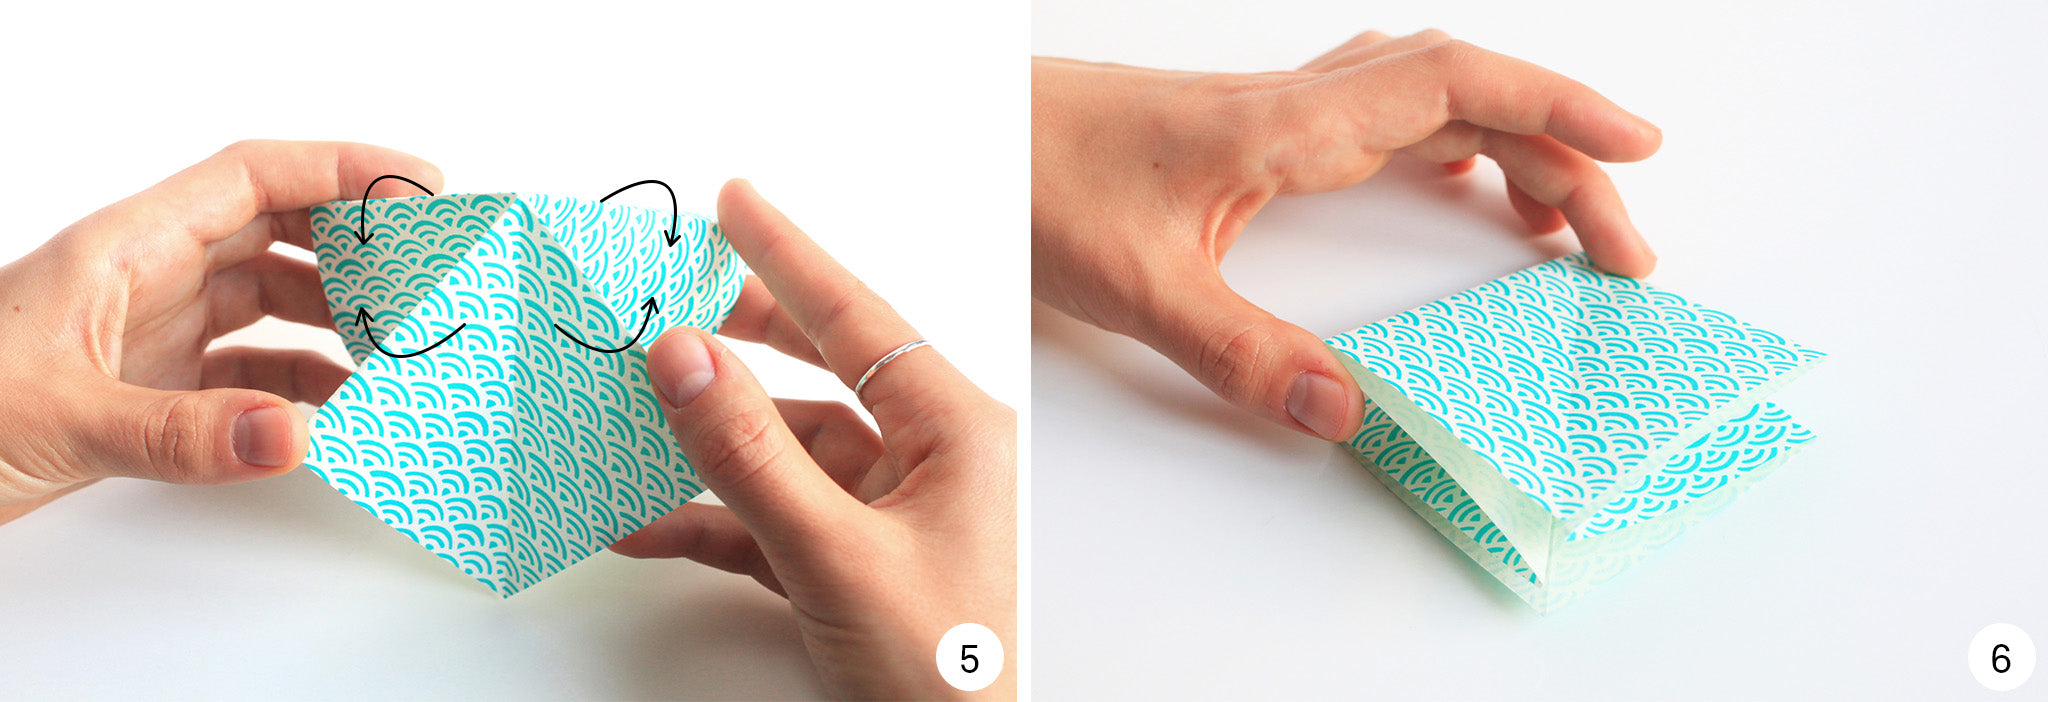
- You get a square shape. Place the open side of the fold down.
- With the tip of the fold facing upwards, fold the left flap along the central fold (dotted line in the photo).
- Repeat step 7 for the right pane.
- Turn your fold over and repeat steps 7 and 8 for the other side of the fold. You get this, a “diamond” shape.
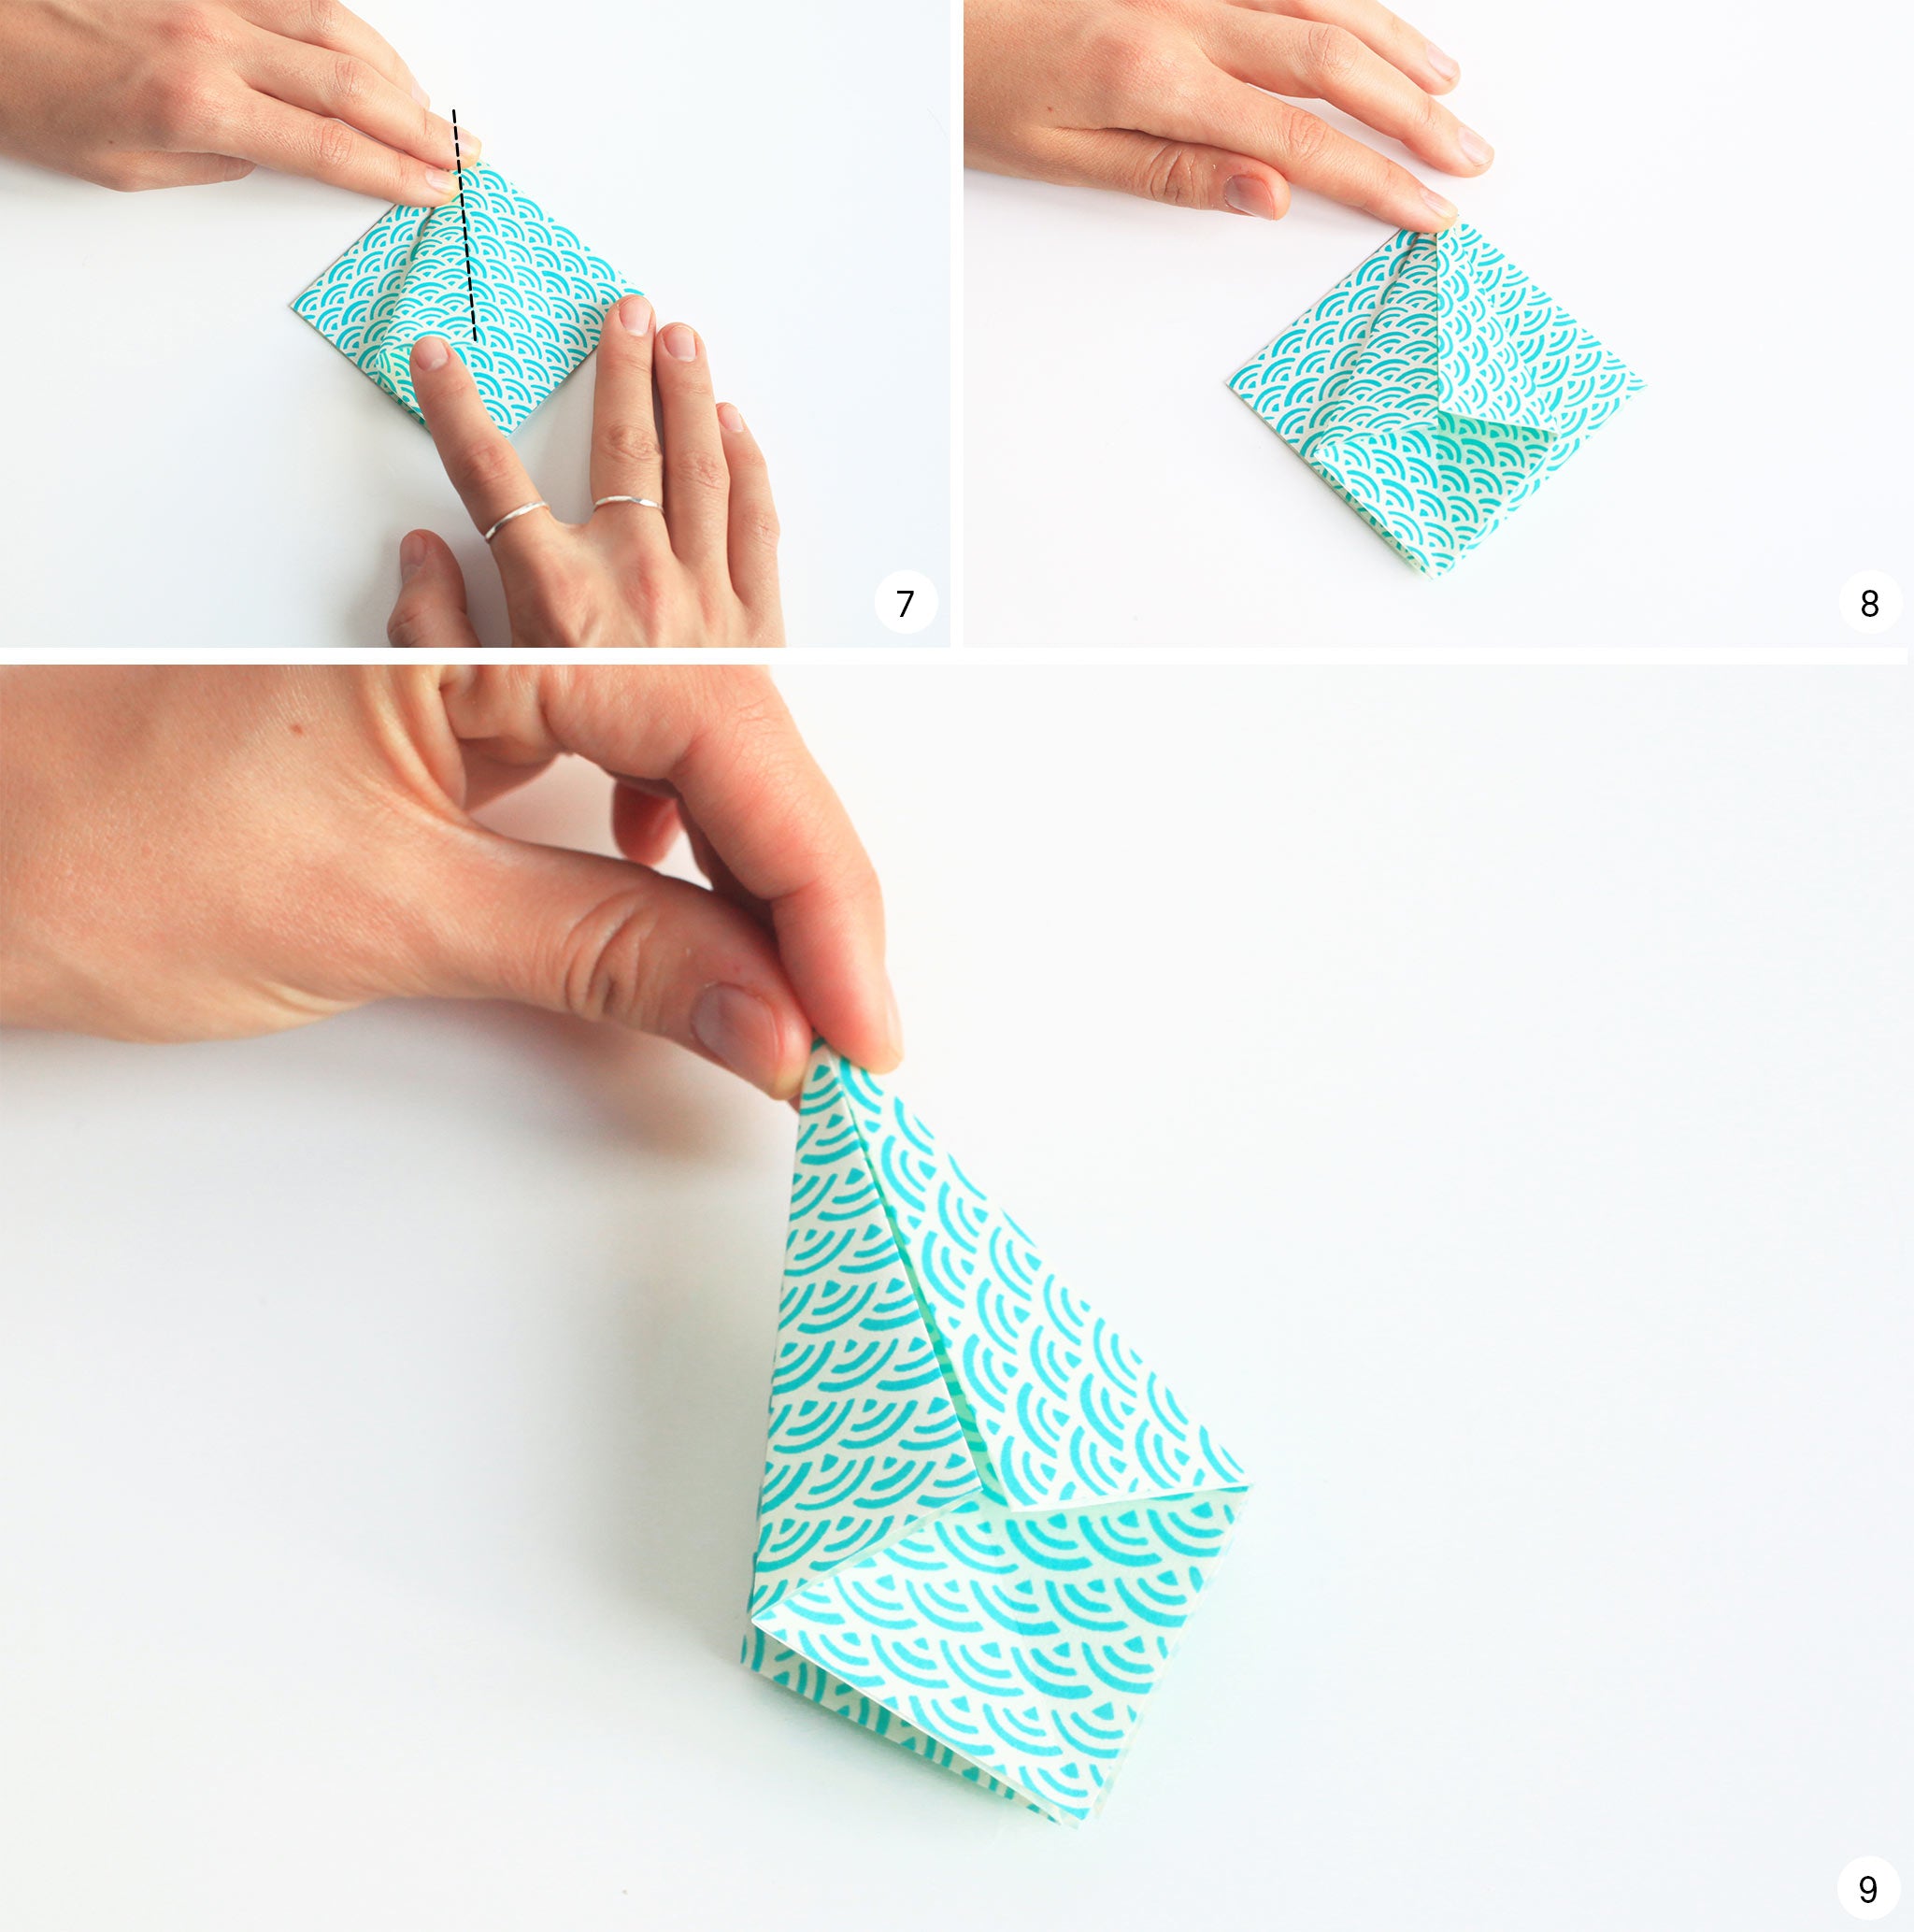
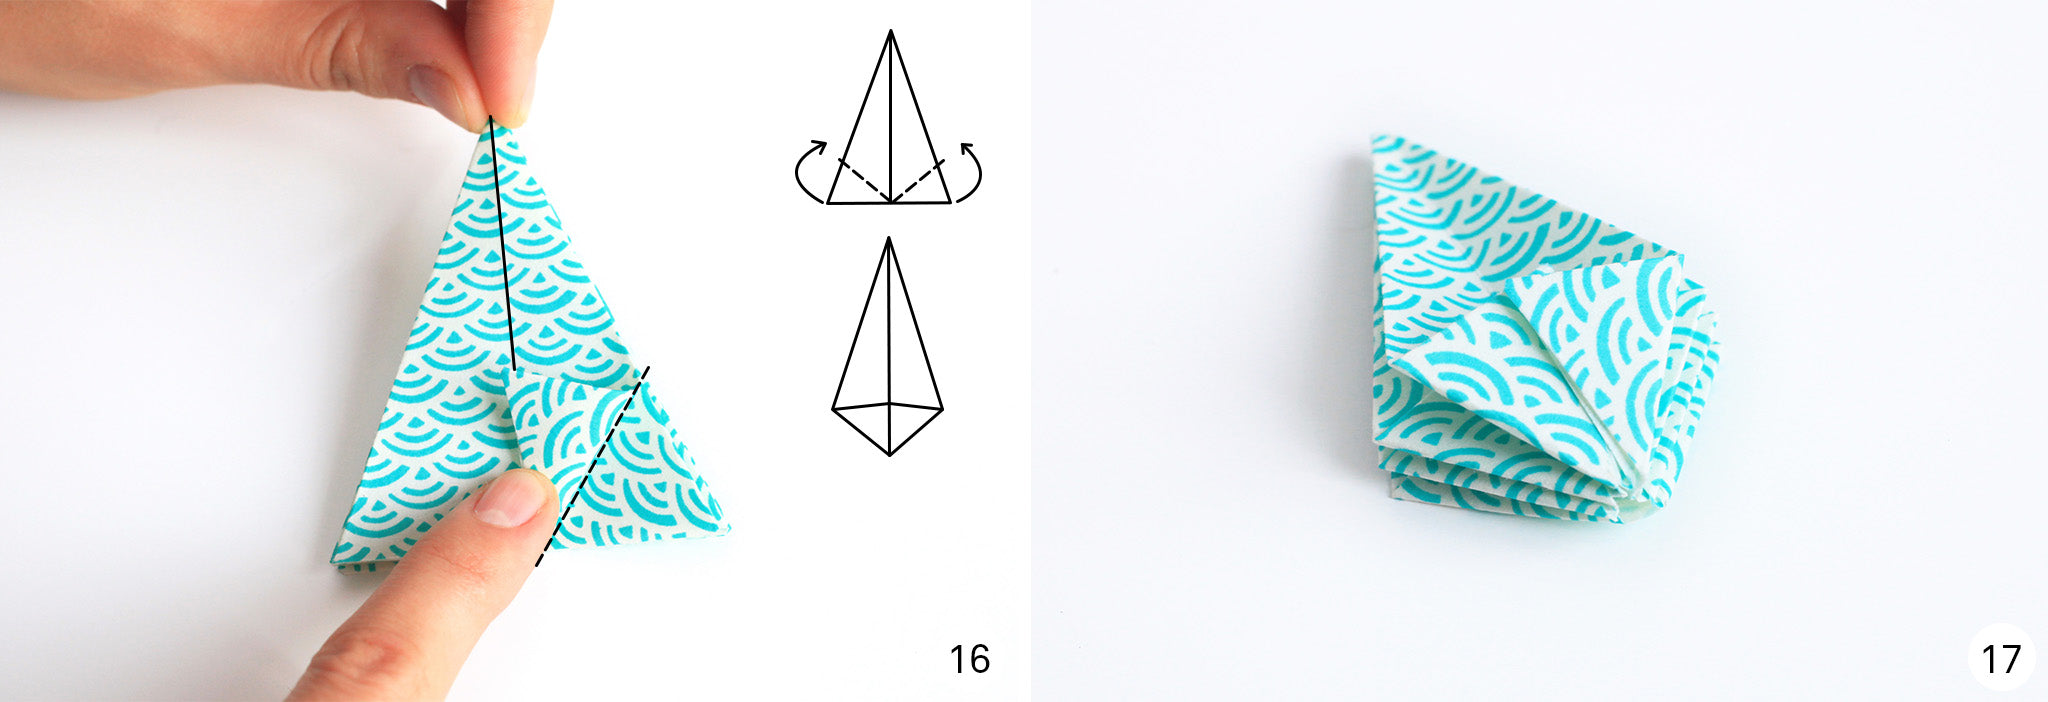
- Take your pair of scissors to cut the bottom triangle.
- Once cut you get a triangle shape.
- Open your entire fold.
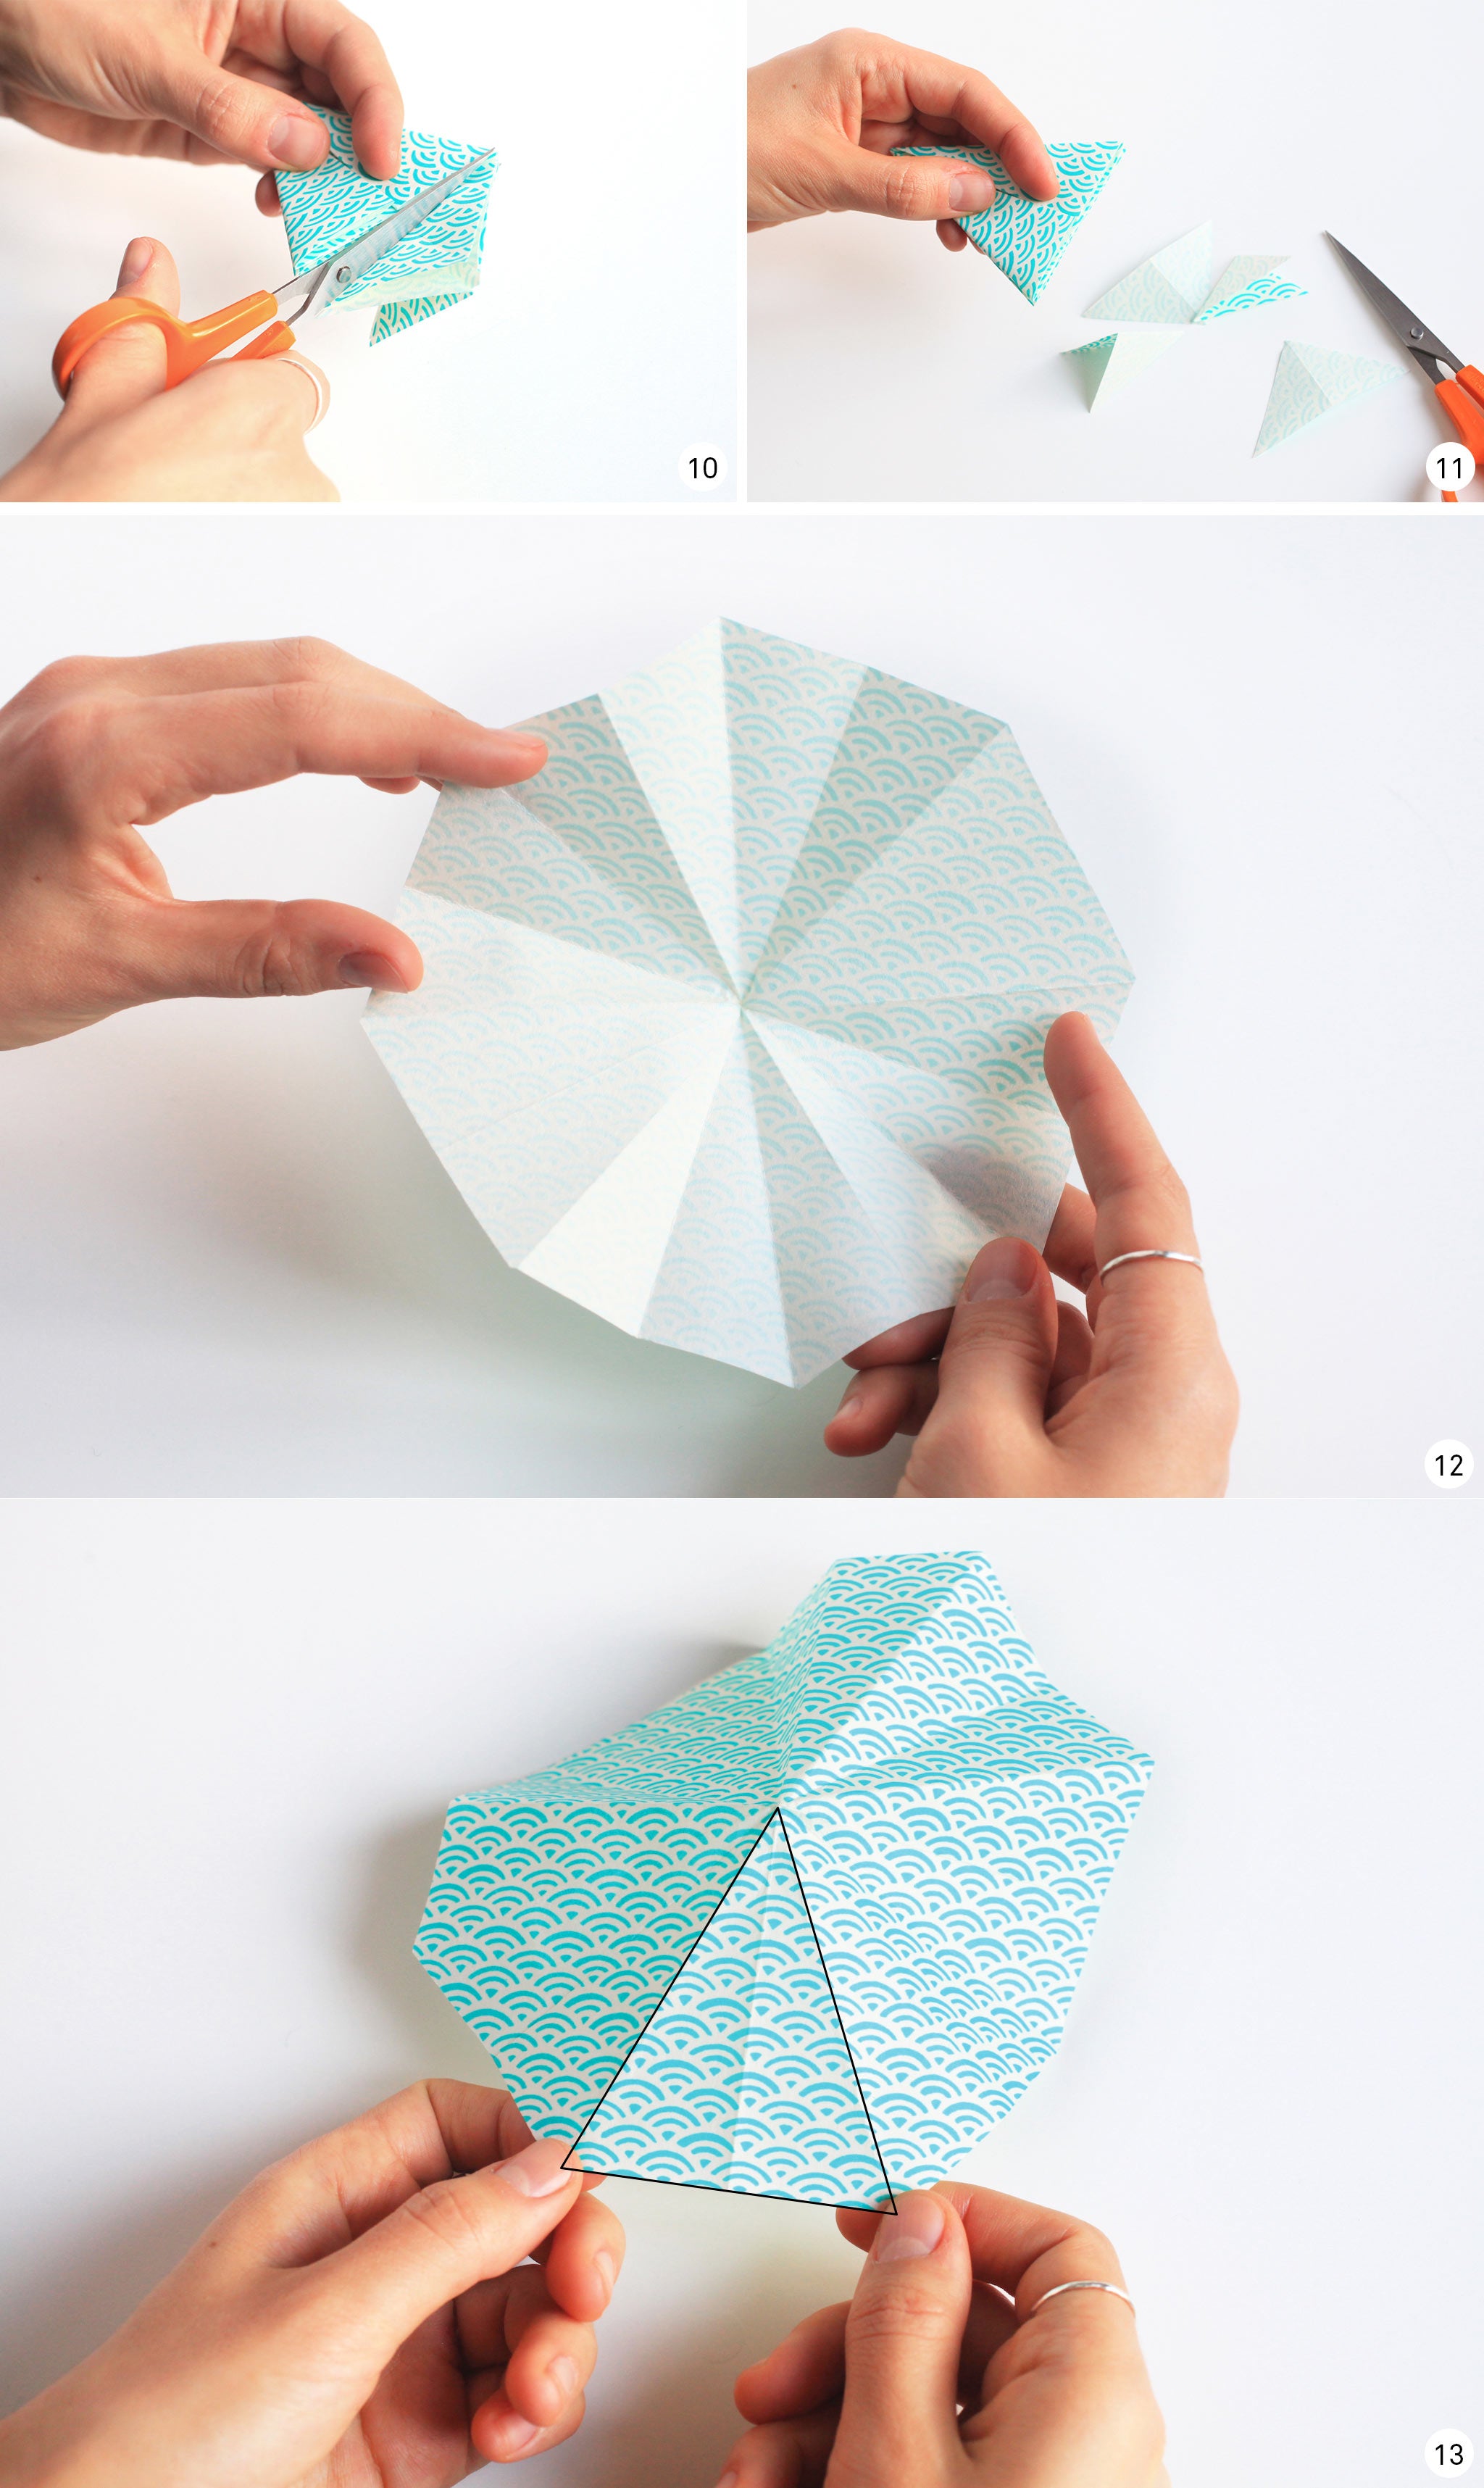
- Identify a triangle-shaped face and point it towards you.
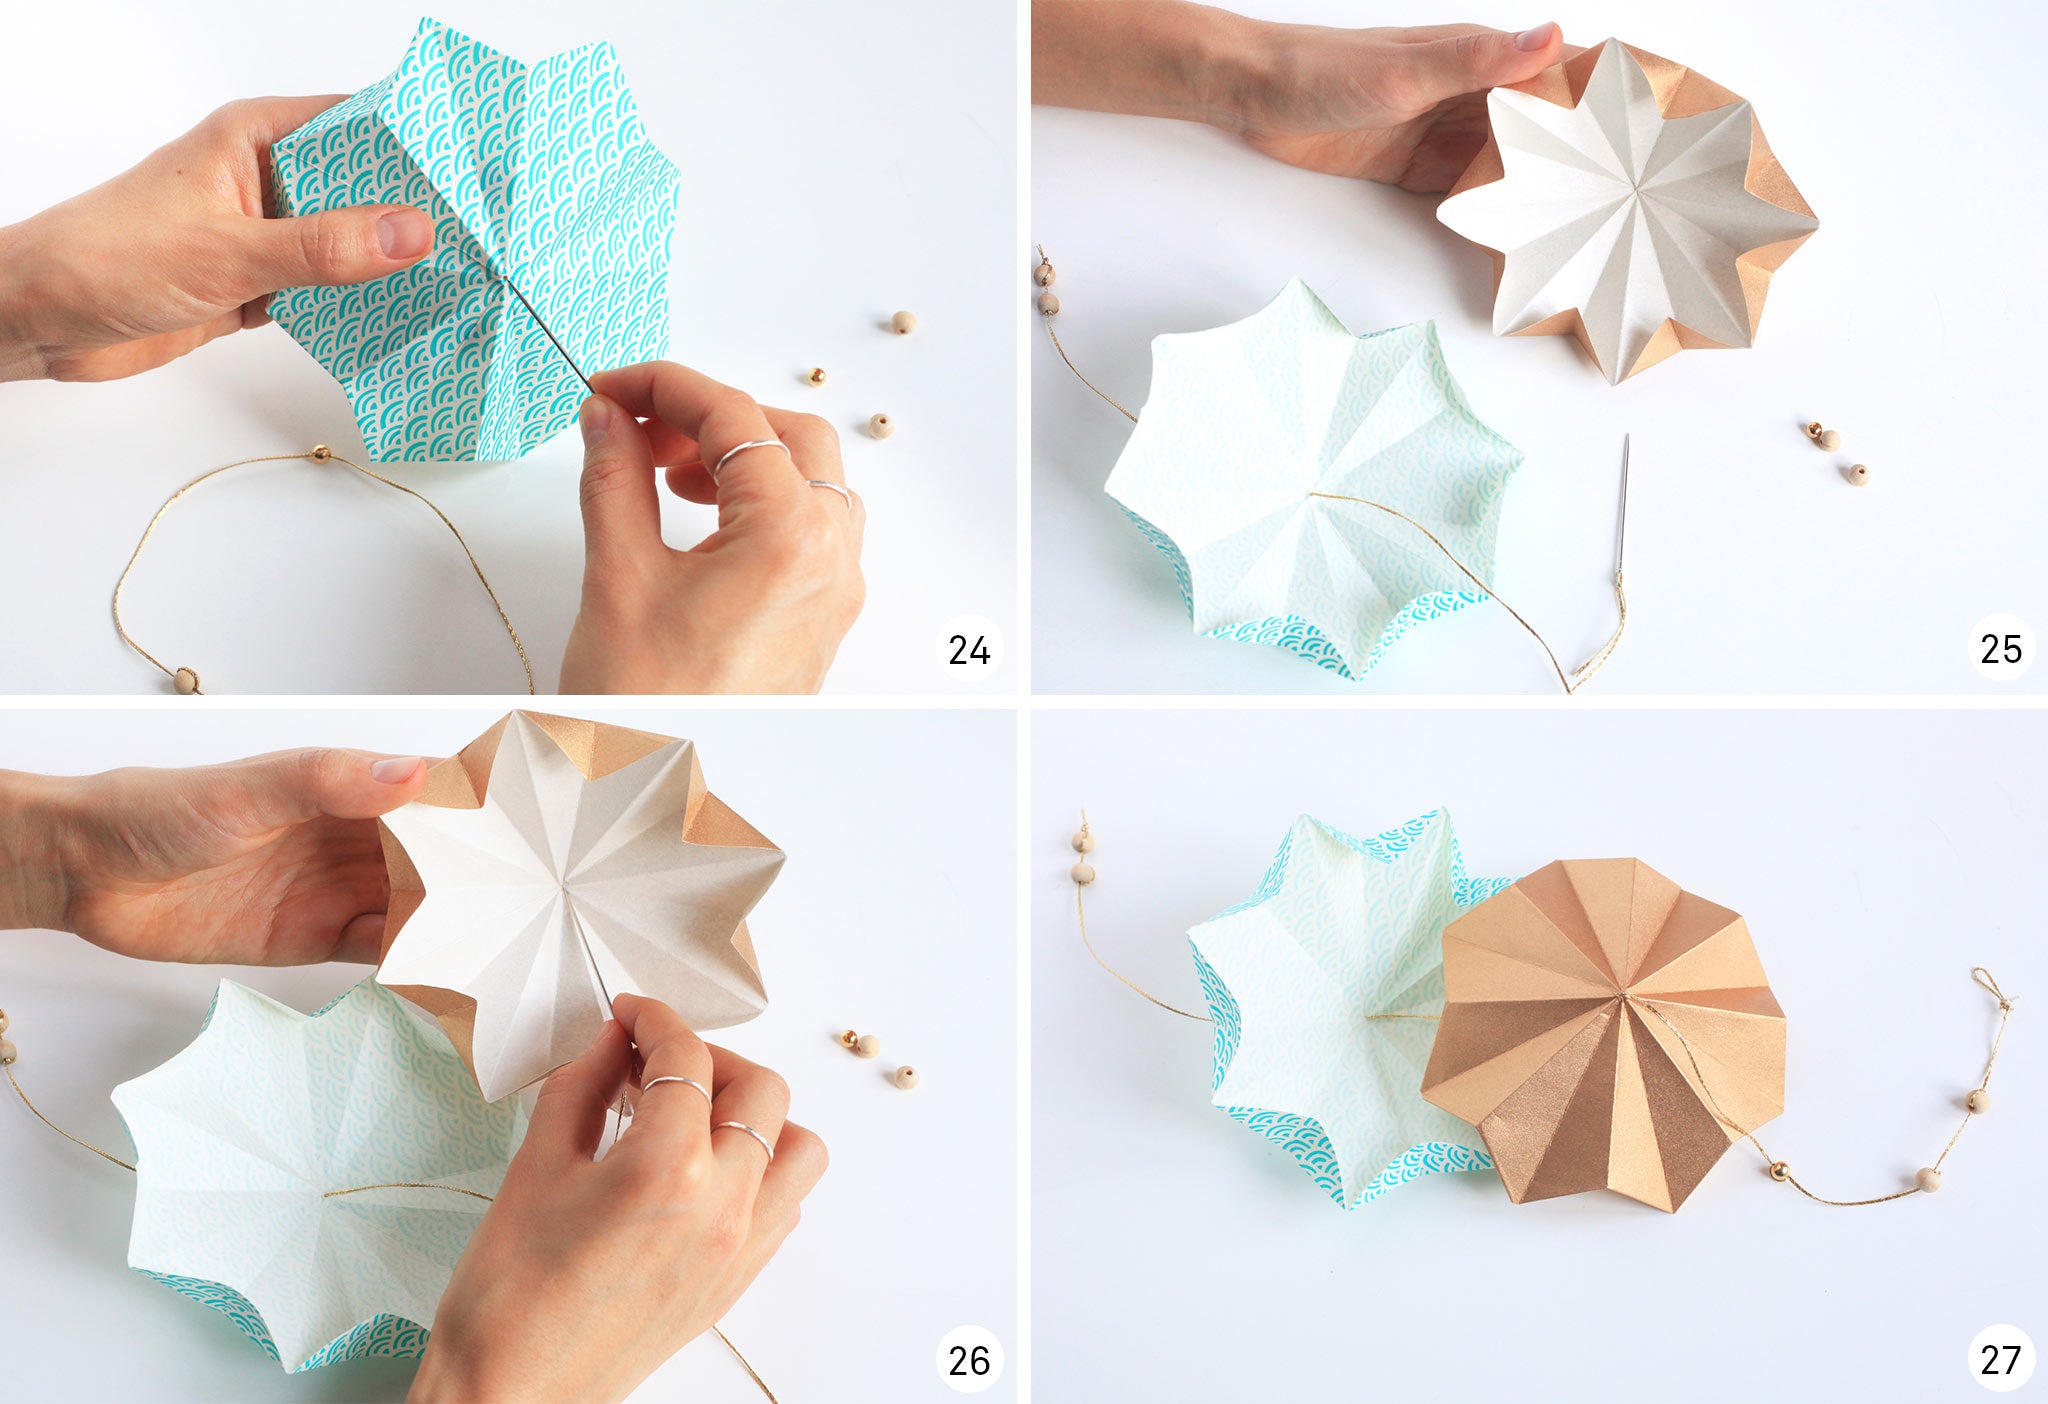
- Keep it facing you then mark the existing folds to obtain four accordion folds...
- ...in order to obtain this.
- From this accordion triangle, fold down the right and left points, aligning yourself along the center line.
- You get an accordion diamond shape.
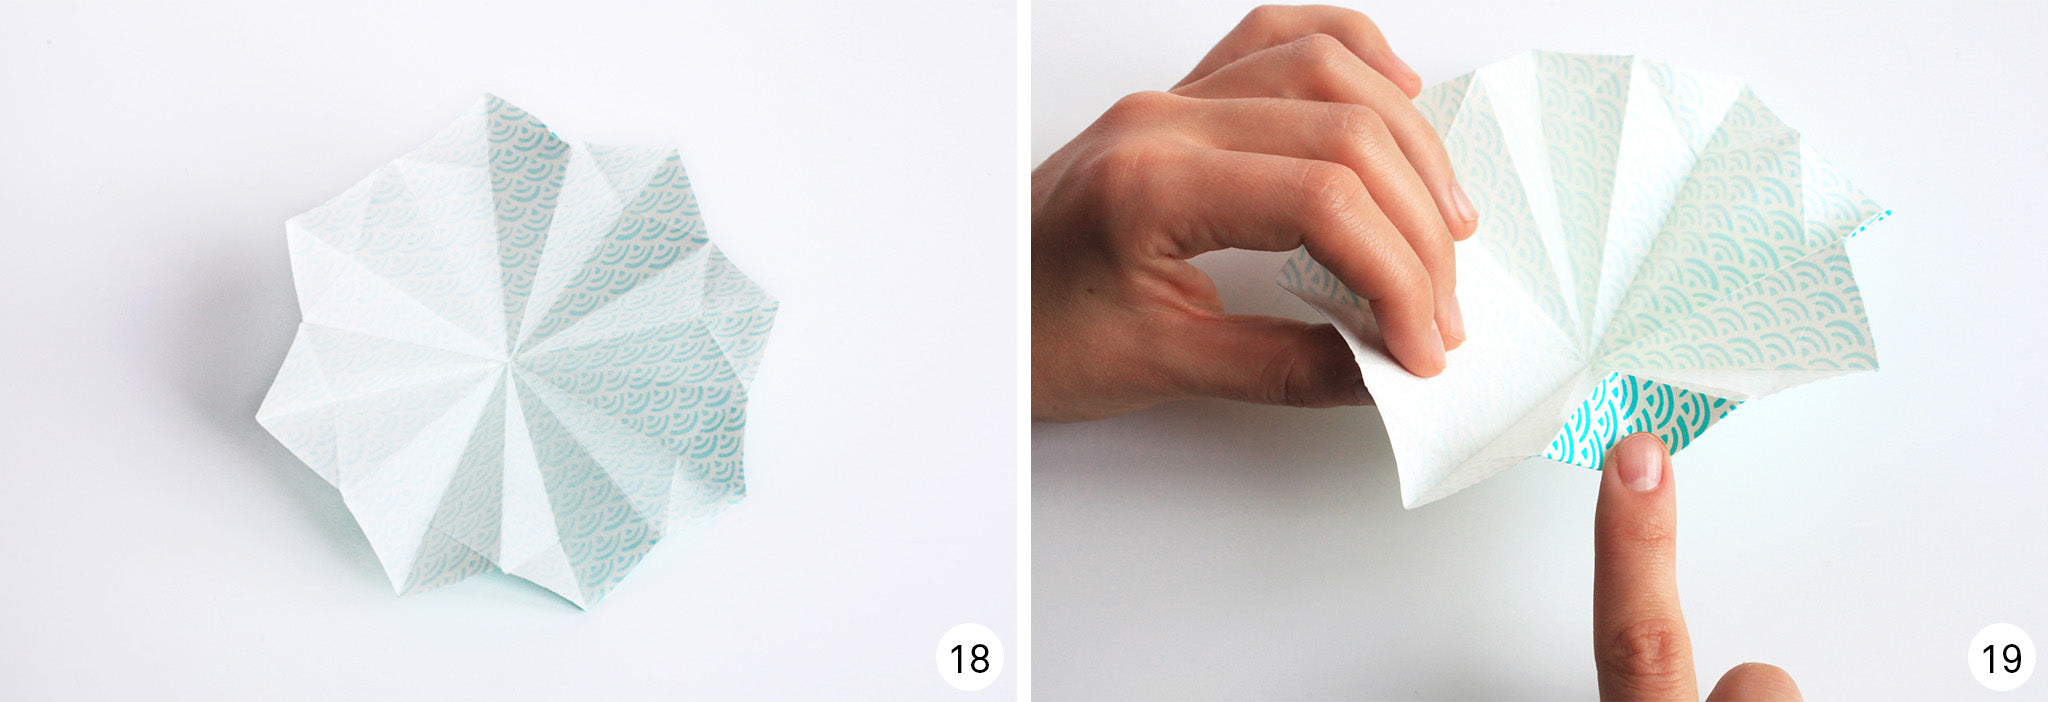
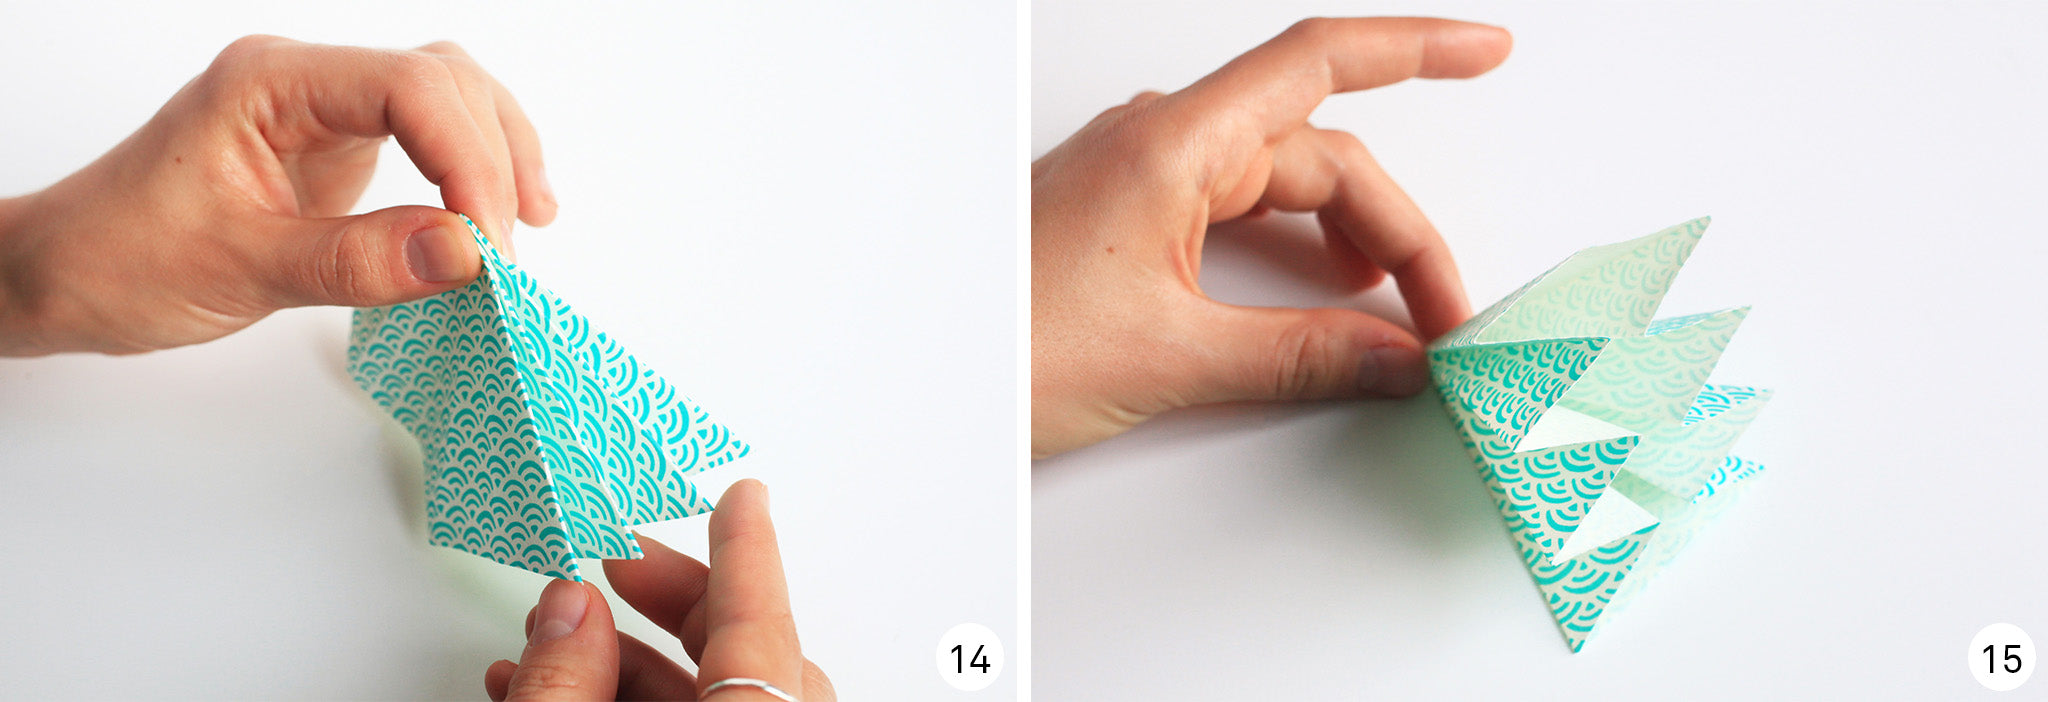
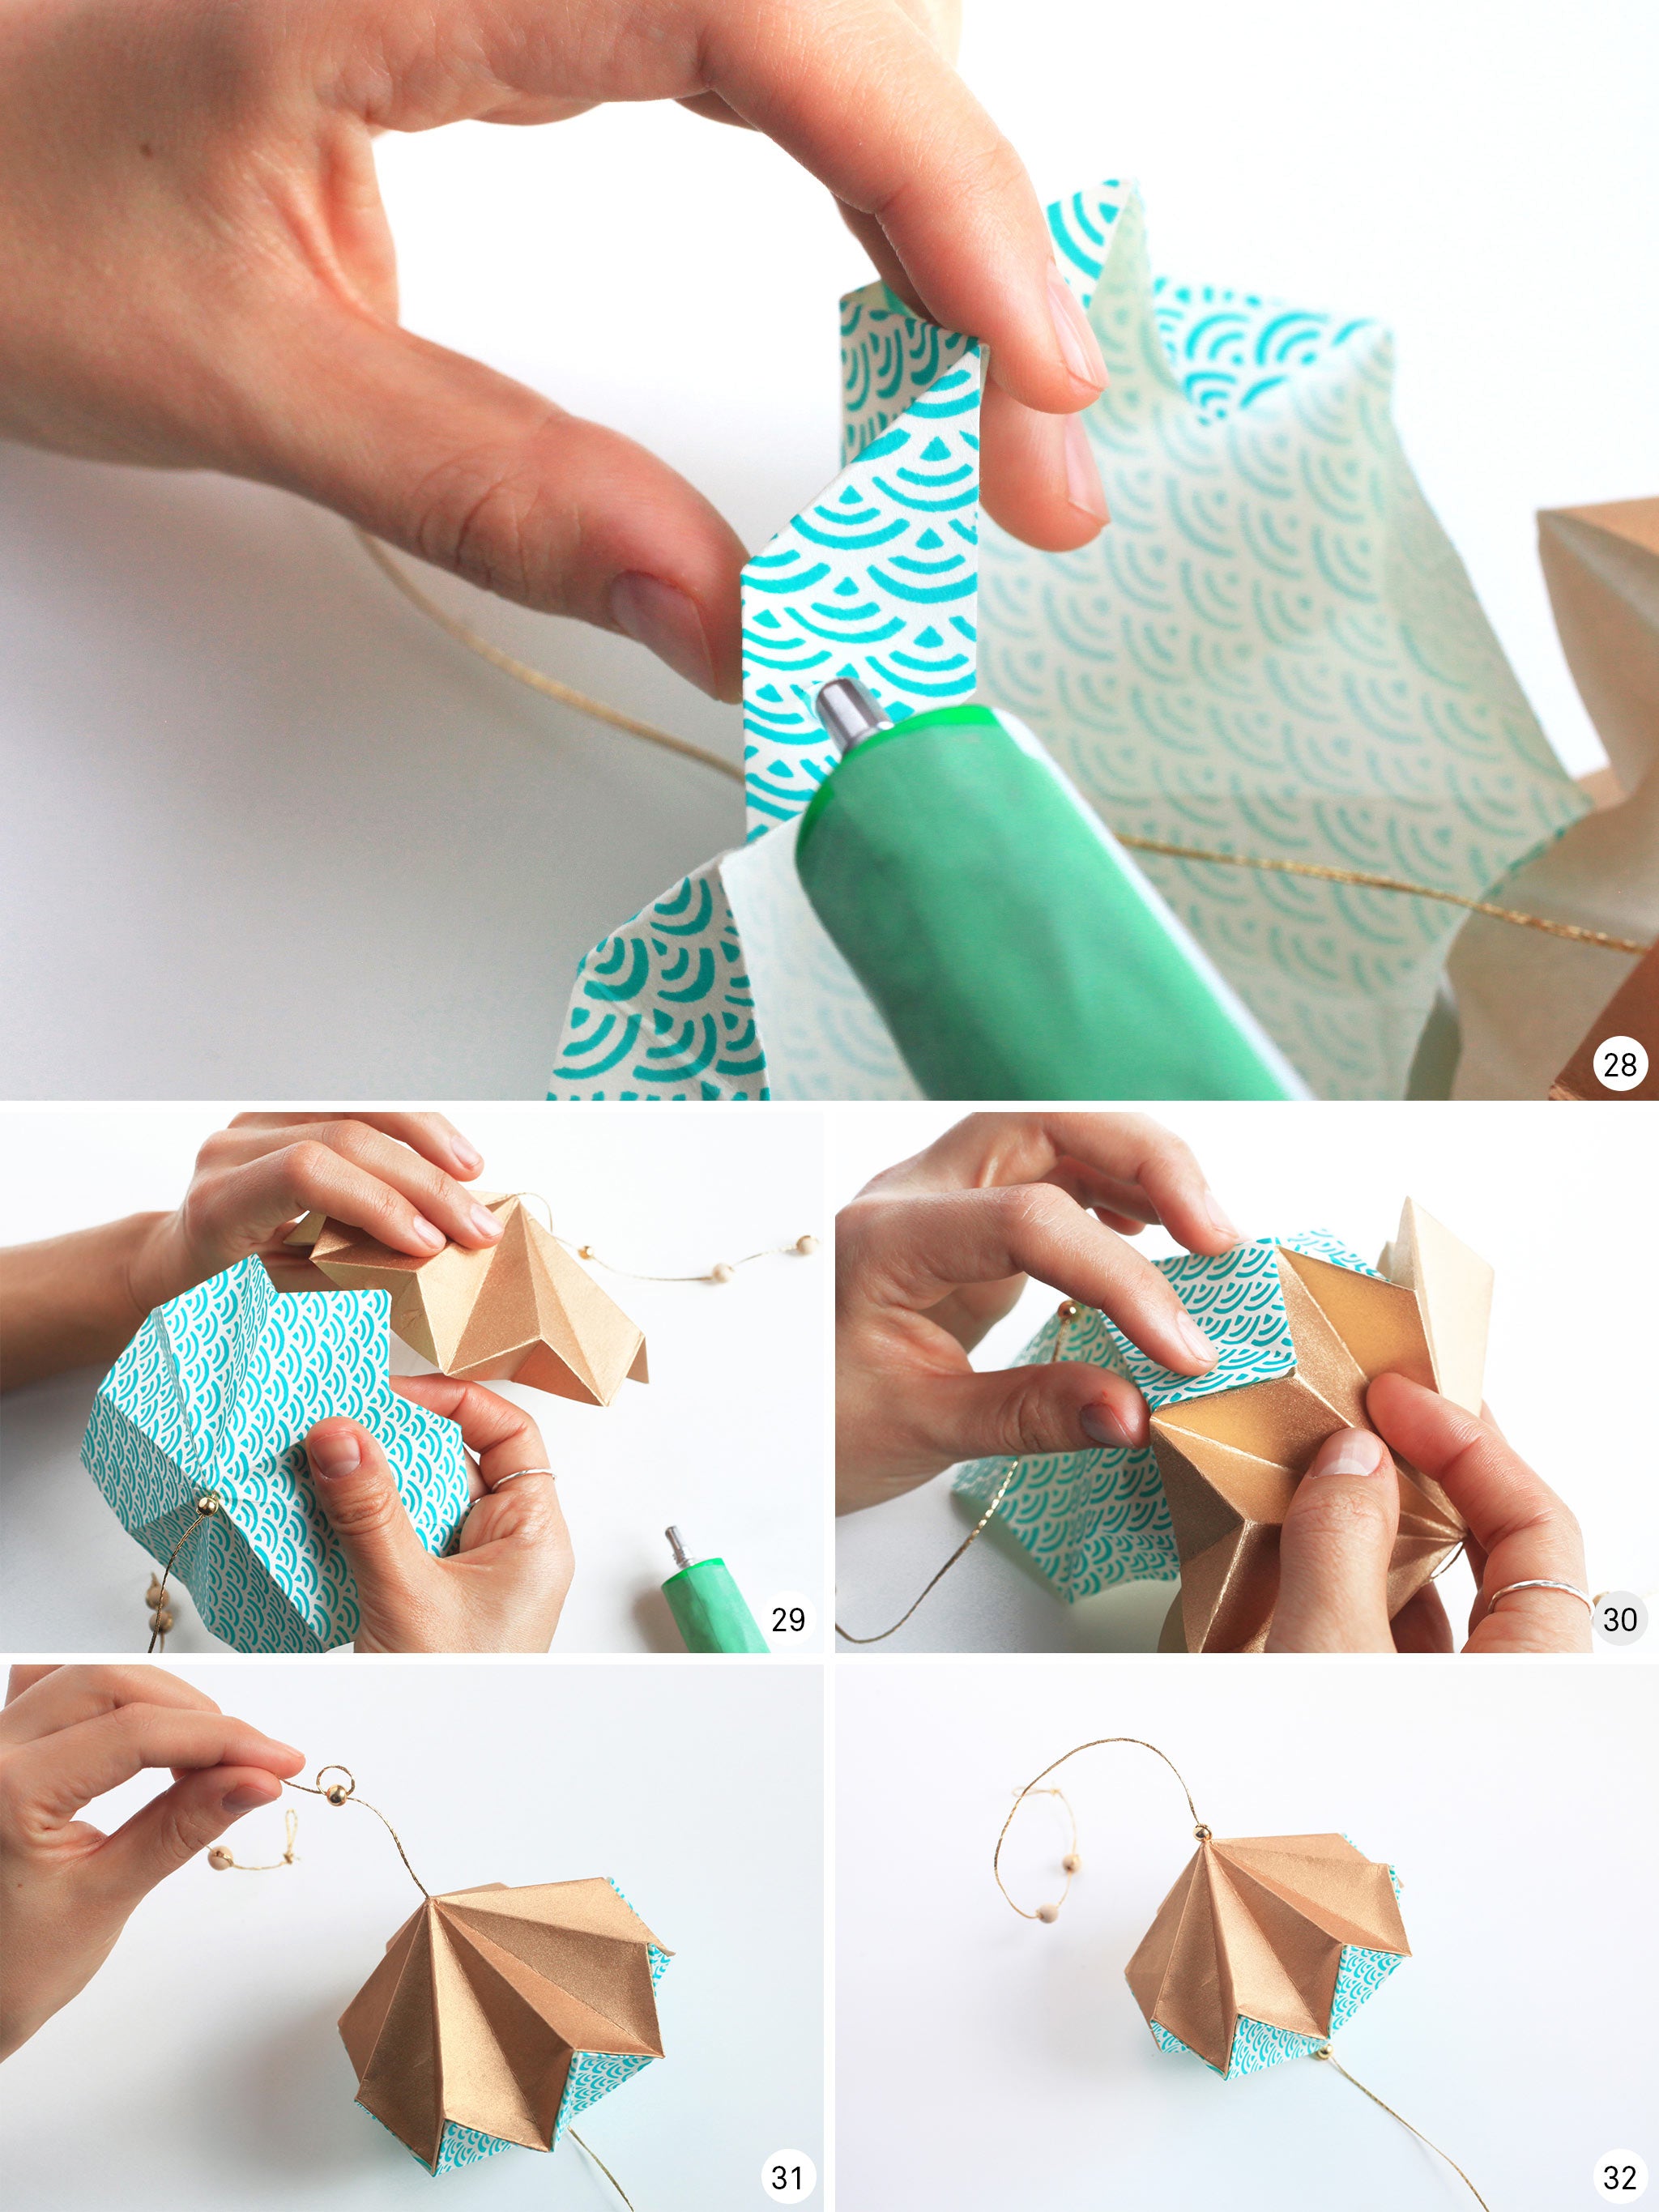
- Unfold your entire fold and place it, white side towards you.
- Fold the angles formed in step 16 by pushing them towards the inside of the fold.
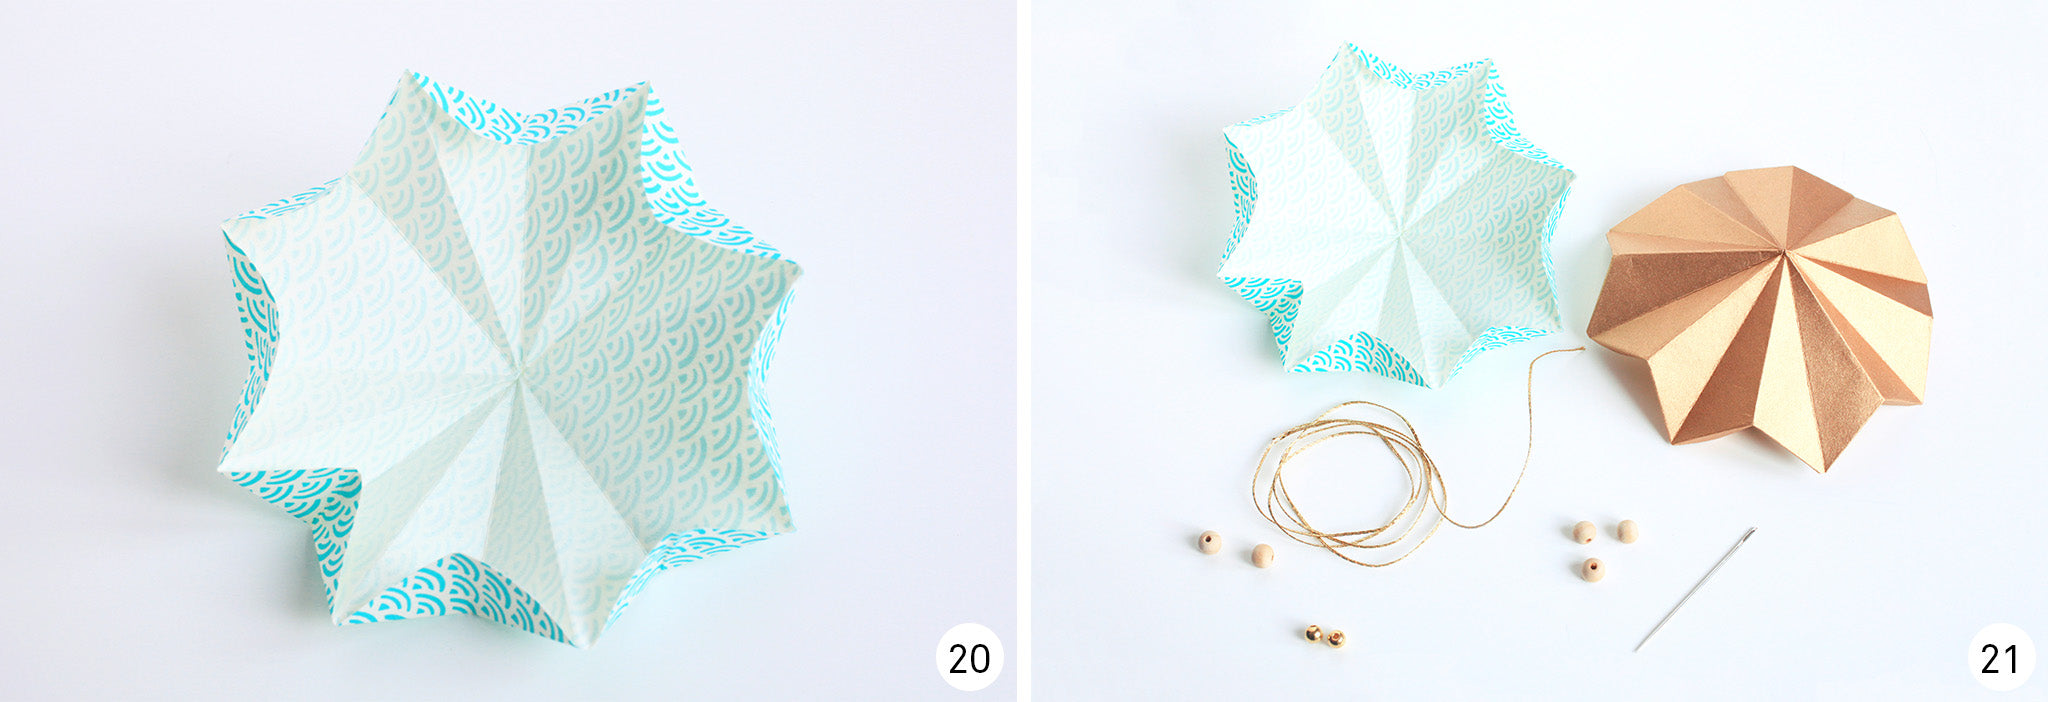
- Your first module is now complete! Repeat steps 1 to 19, above, on your other square of paper to form the second module of the tassel.
- Once the two modules are made, equip yourself with five beads, around 1m of wire and gel glue.
We will now move on to assembling the two modules to form the tassel and mount it on wire!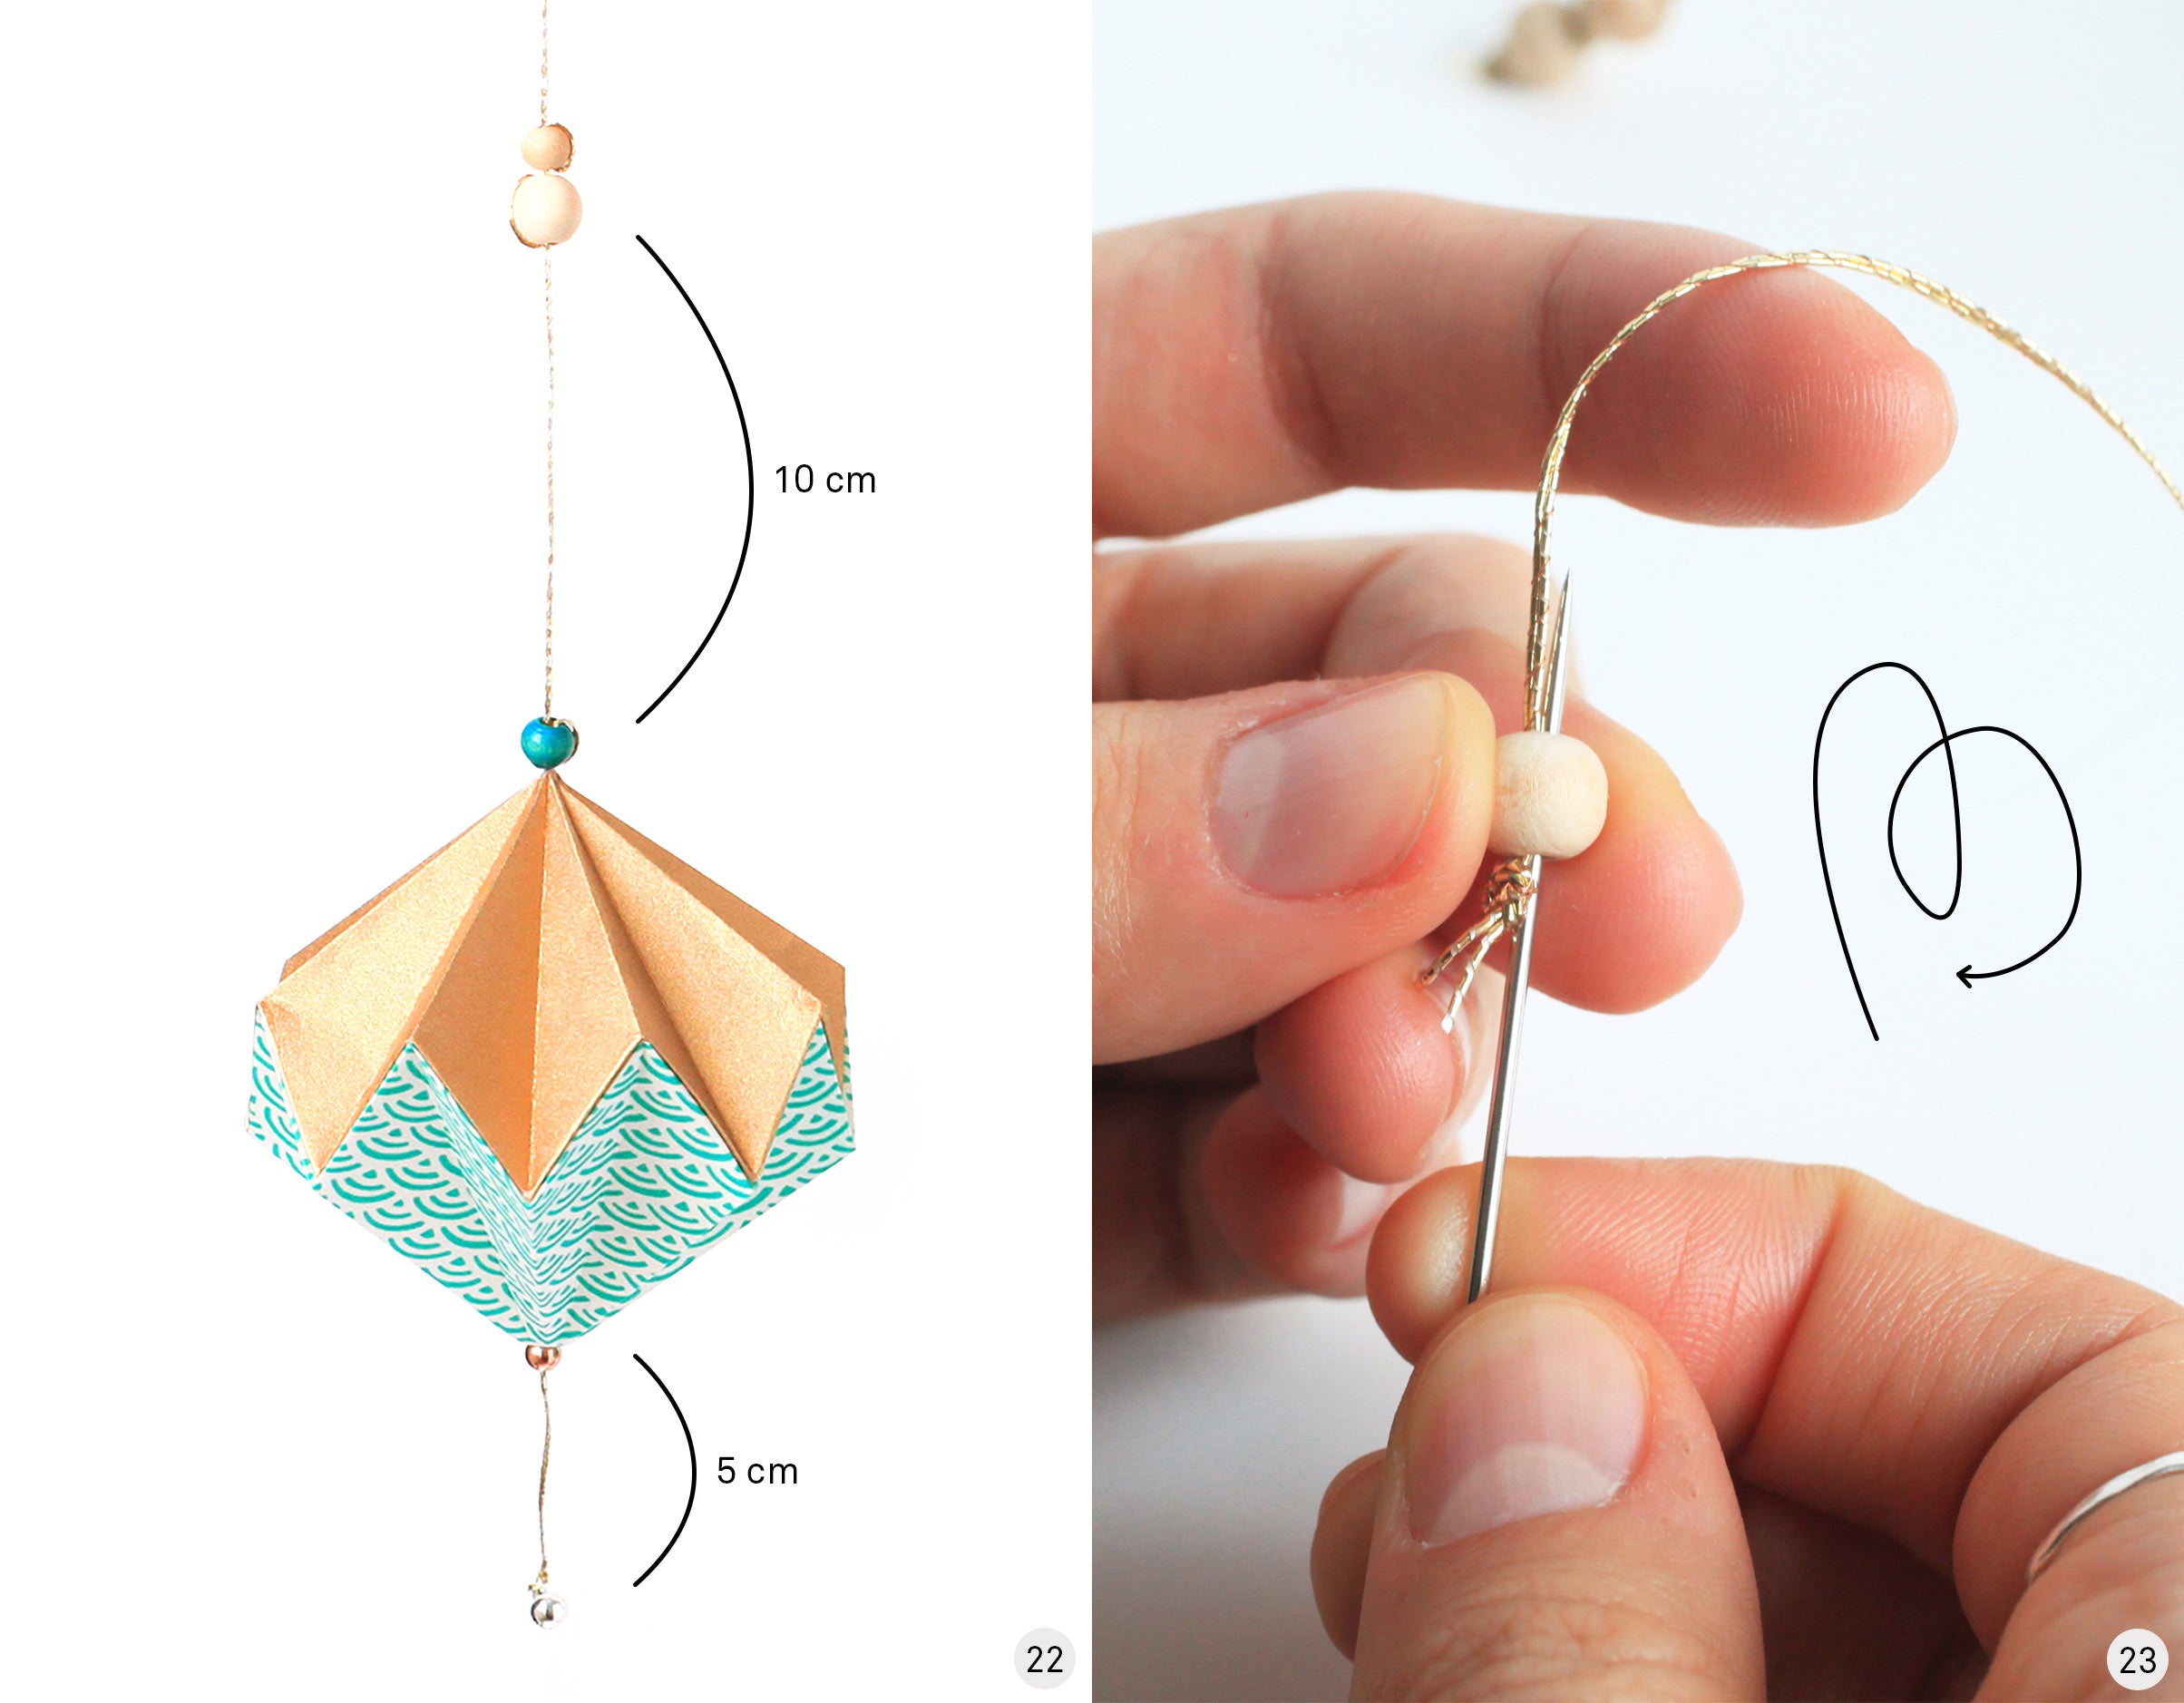
- The assembly begins at the bottom of the garland with the bell. Tie the bell to the end of the thread by making a double knot then pass the thread through the needle.
- Thread a bead then pass through the bottom of the bead a second time to create a loop that blocks the bead. This will support the origami 5cm from the bell (see step 22).
- With the printed side facing you, pass the needle through the center of the first fold.
- Grab the second fold.
- With the white side facing you, pass the needle through the center of the second fold.
- You get this. Continue placing beads on top of the origami to complete your garland (see step 22).
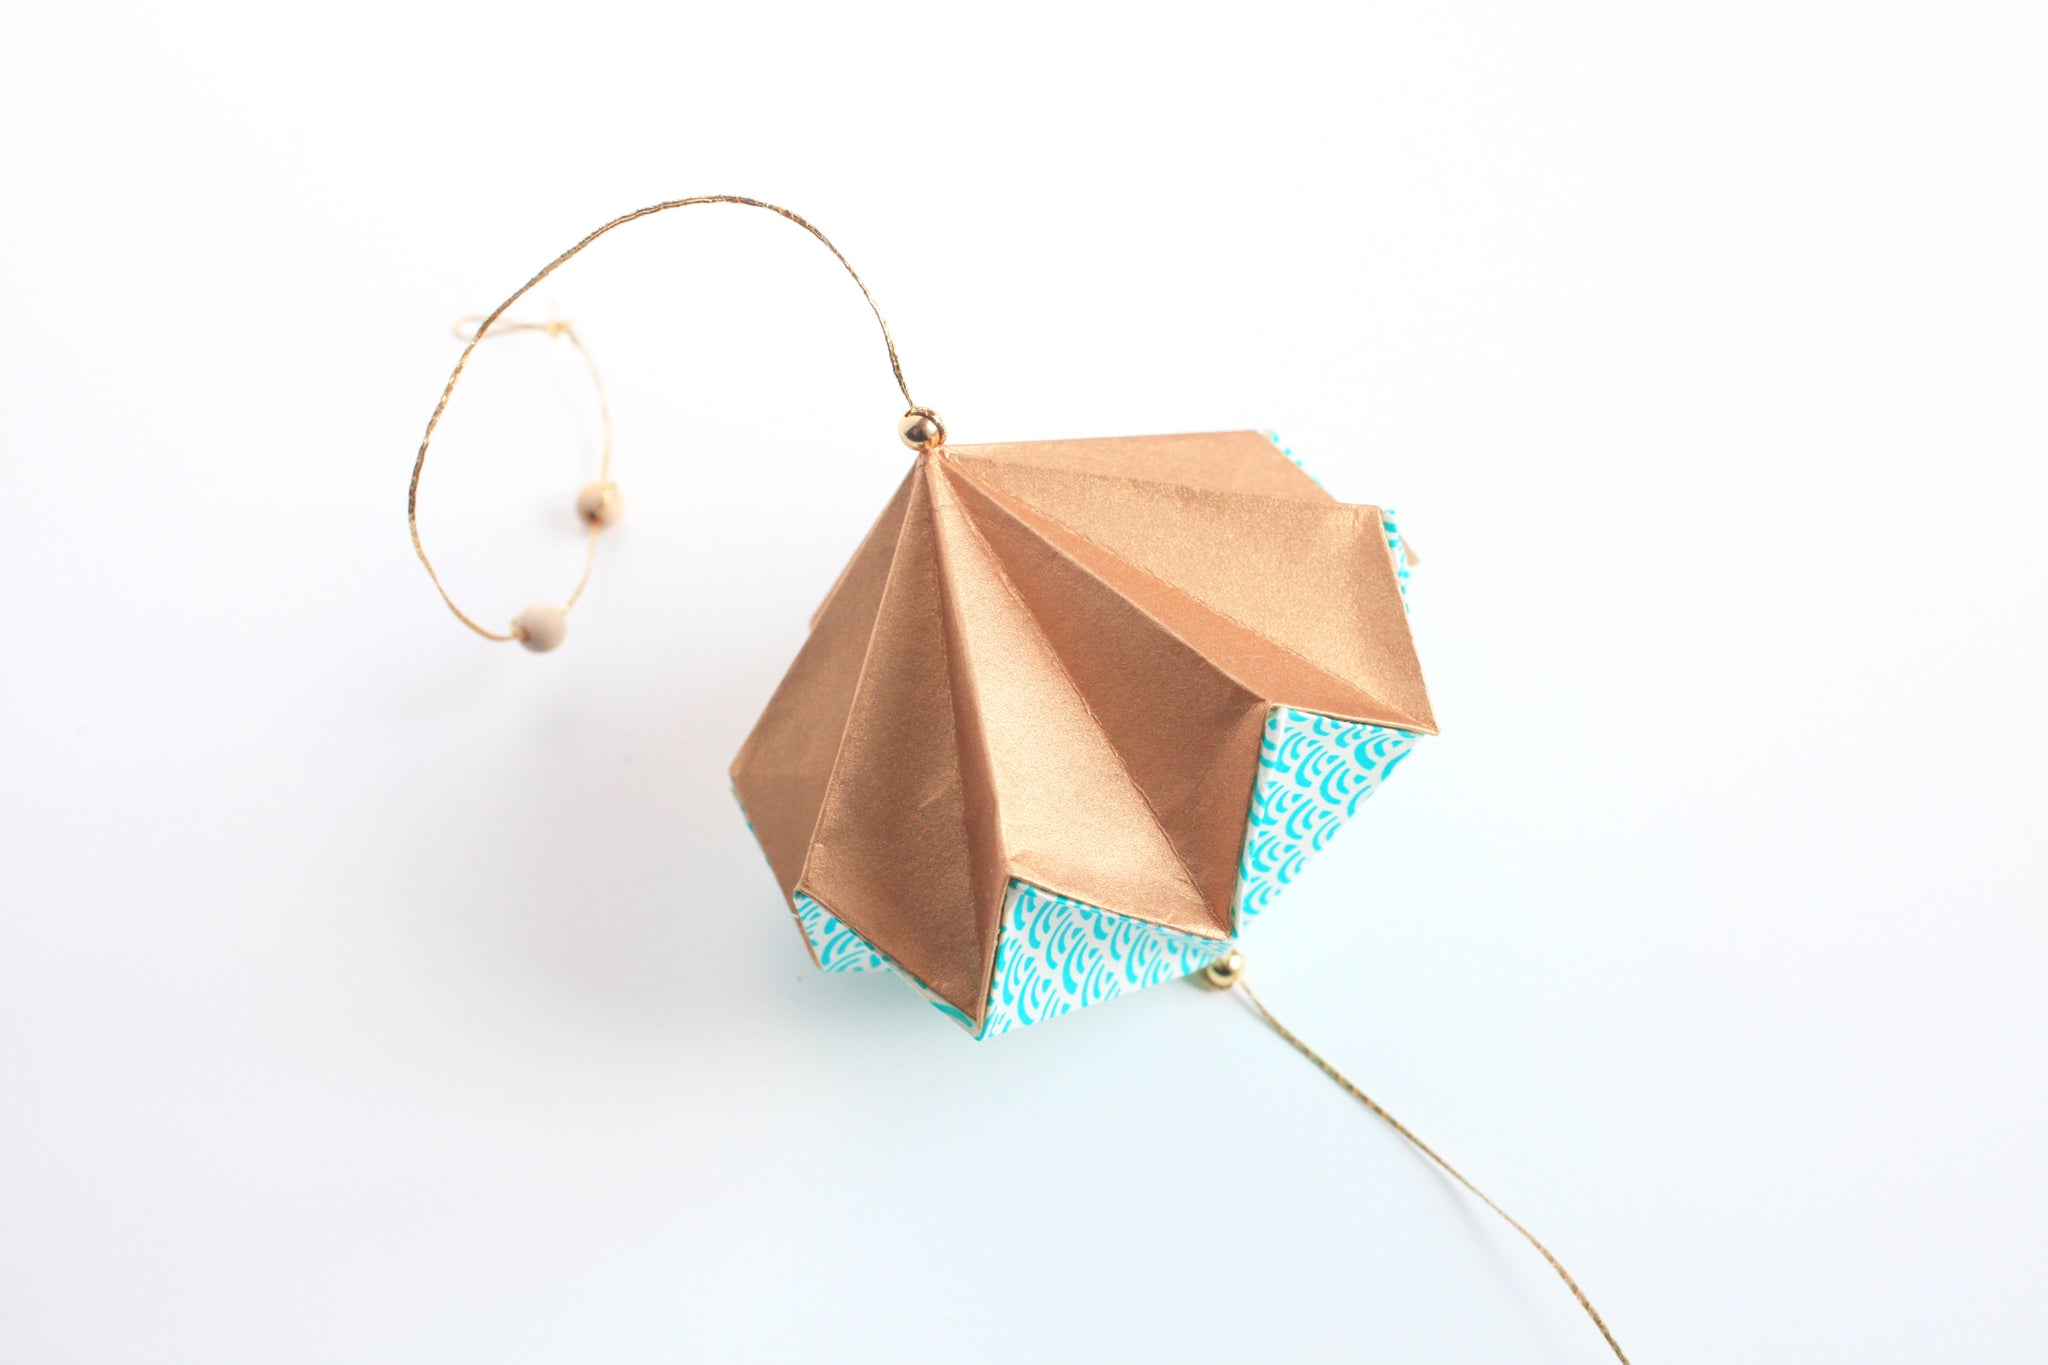
- Glue each small folded corner in step 19. CAUTION - To facilitate assembly, apply contact adhesive to both modules. You can use a small clean cloth to remove excess glue.
- Join the two modules of the tassel by fitting the angles together. Make sure to fit and glue each angle well, before moving on to the next angle.
- Be sure to fit each angle together.
- Drag a bead...
- ... and attach it to the top of your tassel, then thread the desired number of beads, leaving a space of 15cm. Finish with a loop to finish off the tassel.
Your origami tassel is now complete!
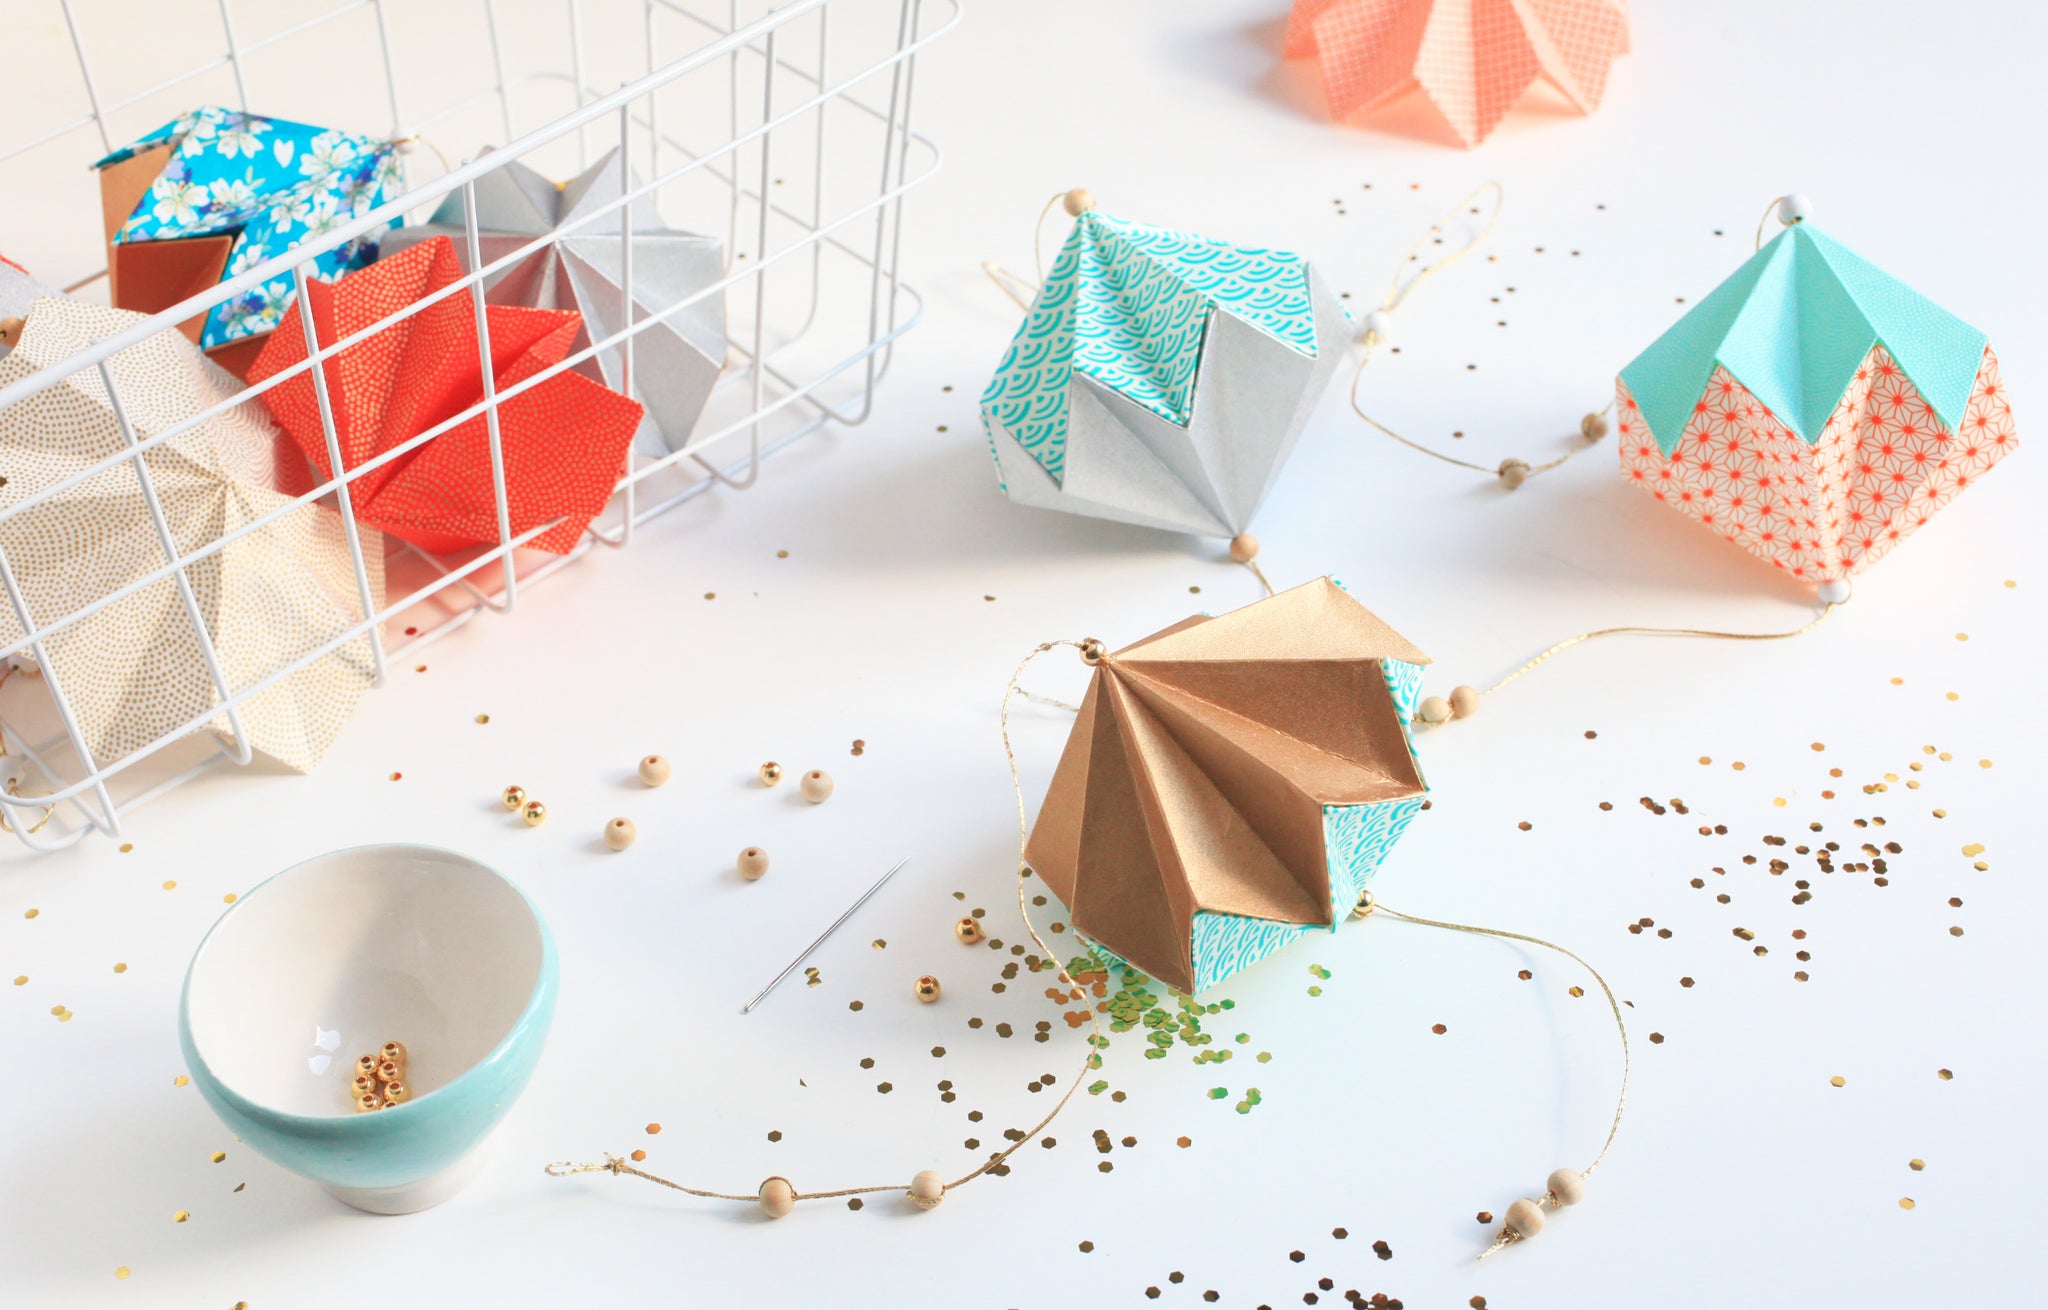
We also offer this folding in the form of creative kits which bring together all the explanations, step by step, as well as the necessary materials to make pretty clusters of five tassels. They are available in store and on the e-shop, “ Pampilles Kit ” section!
See you soon for new creative posts,
Adeline
Have you ever made origami tassels?


LE BLEVENEC > Merci pour votre message Brigitte ! Nous n’avons pas de tutoriel spécifique pour ce moment précis de la confection de la pampille. C’est effectivement une étape un peu plus « délicate » mais cependant, pas impossible à réaliser :) Nous vous conseillons d’y aller petit à petit, en encollant les angles les uns après les autres (et en veillant à bien les faire coïncider) mais pas tous les angles de la pampille d’un coup.
Nous espérons que cette réponse pourra vous aider et vous apporter un peu plus de clarté sur ce tutoriel !
Bonjour, j’ai suivi vos conseils pour la création de la pampille….tout va bien jusqu’au collage qui reste une étape très difficile à réaliser correctement. Auriez-vous un tuto de cette étape à me transmettre ? Merci. Cordialement. Brigitte
CLAIRE > Bonjour Claire ! Pour ce qui est du pliage du cube en origami, nous préférons indiquer dans nos explications d’utiliser une baguette (ou tout autre objet fin allongé) pour mettre en volume le cube car cela dépend du papier utilisé :) En effet, il est possible de souffler dans le pliage quand le papier utilisé est fin et léger mais pour ce qui est de notre papier japonais sérigraphié, il est préférable d’utiliser un outil pour le mettre en volume.
Pour ce qui est du pliage du lotus, il ne manque pas une étape, comme cela est indiqué dans les notes du pliage du lotus p.148 de ce même livre, « utilisez de préférence un papier japonais (papier souple et résistant) ou un textile pour éviter de déchirer votre forme en cours de réalisation » :) En effet, il faut utiliser un papier qui possède une bonne tenue pour la réalisation de ce pliage.
Origami comme par magie : pour déployer le cube p 68 il suffit de souffler dedans.
Impossible de réaliser la fleur de lotus avec du papier ordinaire. Ne manquerait il pas une étape ?
DÉBORAH > Bonjour Déborah ! Non. Ce pliage n’est pas présent dans notre livre « L’Origami comme par Magie ». Si besoin, le sommaire du livre est présent dans les photos de sa fiche produit (https://adelineklam.com/products/livre-l-origami-comme-par-magie). N’hésitez pas si vous avez d’autres questions :)
Leave a comment