


TUTO Crepe Paper Flower: Daffodil
Harbingers of sunny days, daffodils adorn our gardens shortly before the arrival of spring! In order to benefit from their light all year round and thus brighten up an interior, I wanted to offer you a tutorial for making cheerful and bright daffodils out of crepe paper!

Constant like the stars / Which on the Milky Way sparkle, / In a line they stretched endlessly / Along the edge of the bay: / I saw ten thousand of them at a glance, / Who danced waving the head.
Translation of an extract from the famous poem “The Daffodils” by William Wordsworth (1815)

To make your daffodils out of crepe paper, you will need:
- 180g/m² crepe paper in the colors of your choice
> You can select, for example, several shades of green, from light to dark, for the stem and foliage of your daffodils as well as yellow and orange for the petals and the center of the daffodil, or even white or pink!
> For the weight, we recommend relatively thick crepe paper so that your flowers have a certain hold.
- several thin metal stems of approximately 20cm in length depending on the quantity of flowers desired (1 stem corresponds to 1 flower)
- flower pistils , preferably in light yellow and green hues
- green floratape (or florist's tape) , ideally in a medium green
- fast setting and drying glue
- a pair of precision scissors
To make a crepe daffodil, we will:
- Prepare the cutouts of the different elements of our flower.
- Prepare the daffodil stem.
- Make the trumpet, mount it on the rod and give it its final shape.
- Assemble the petals to the stem and the trumpet.
- Finish dressing the stem then cut out and assemble the daffodil leaves together.
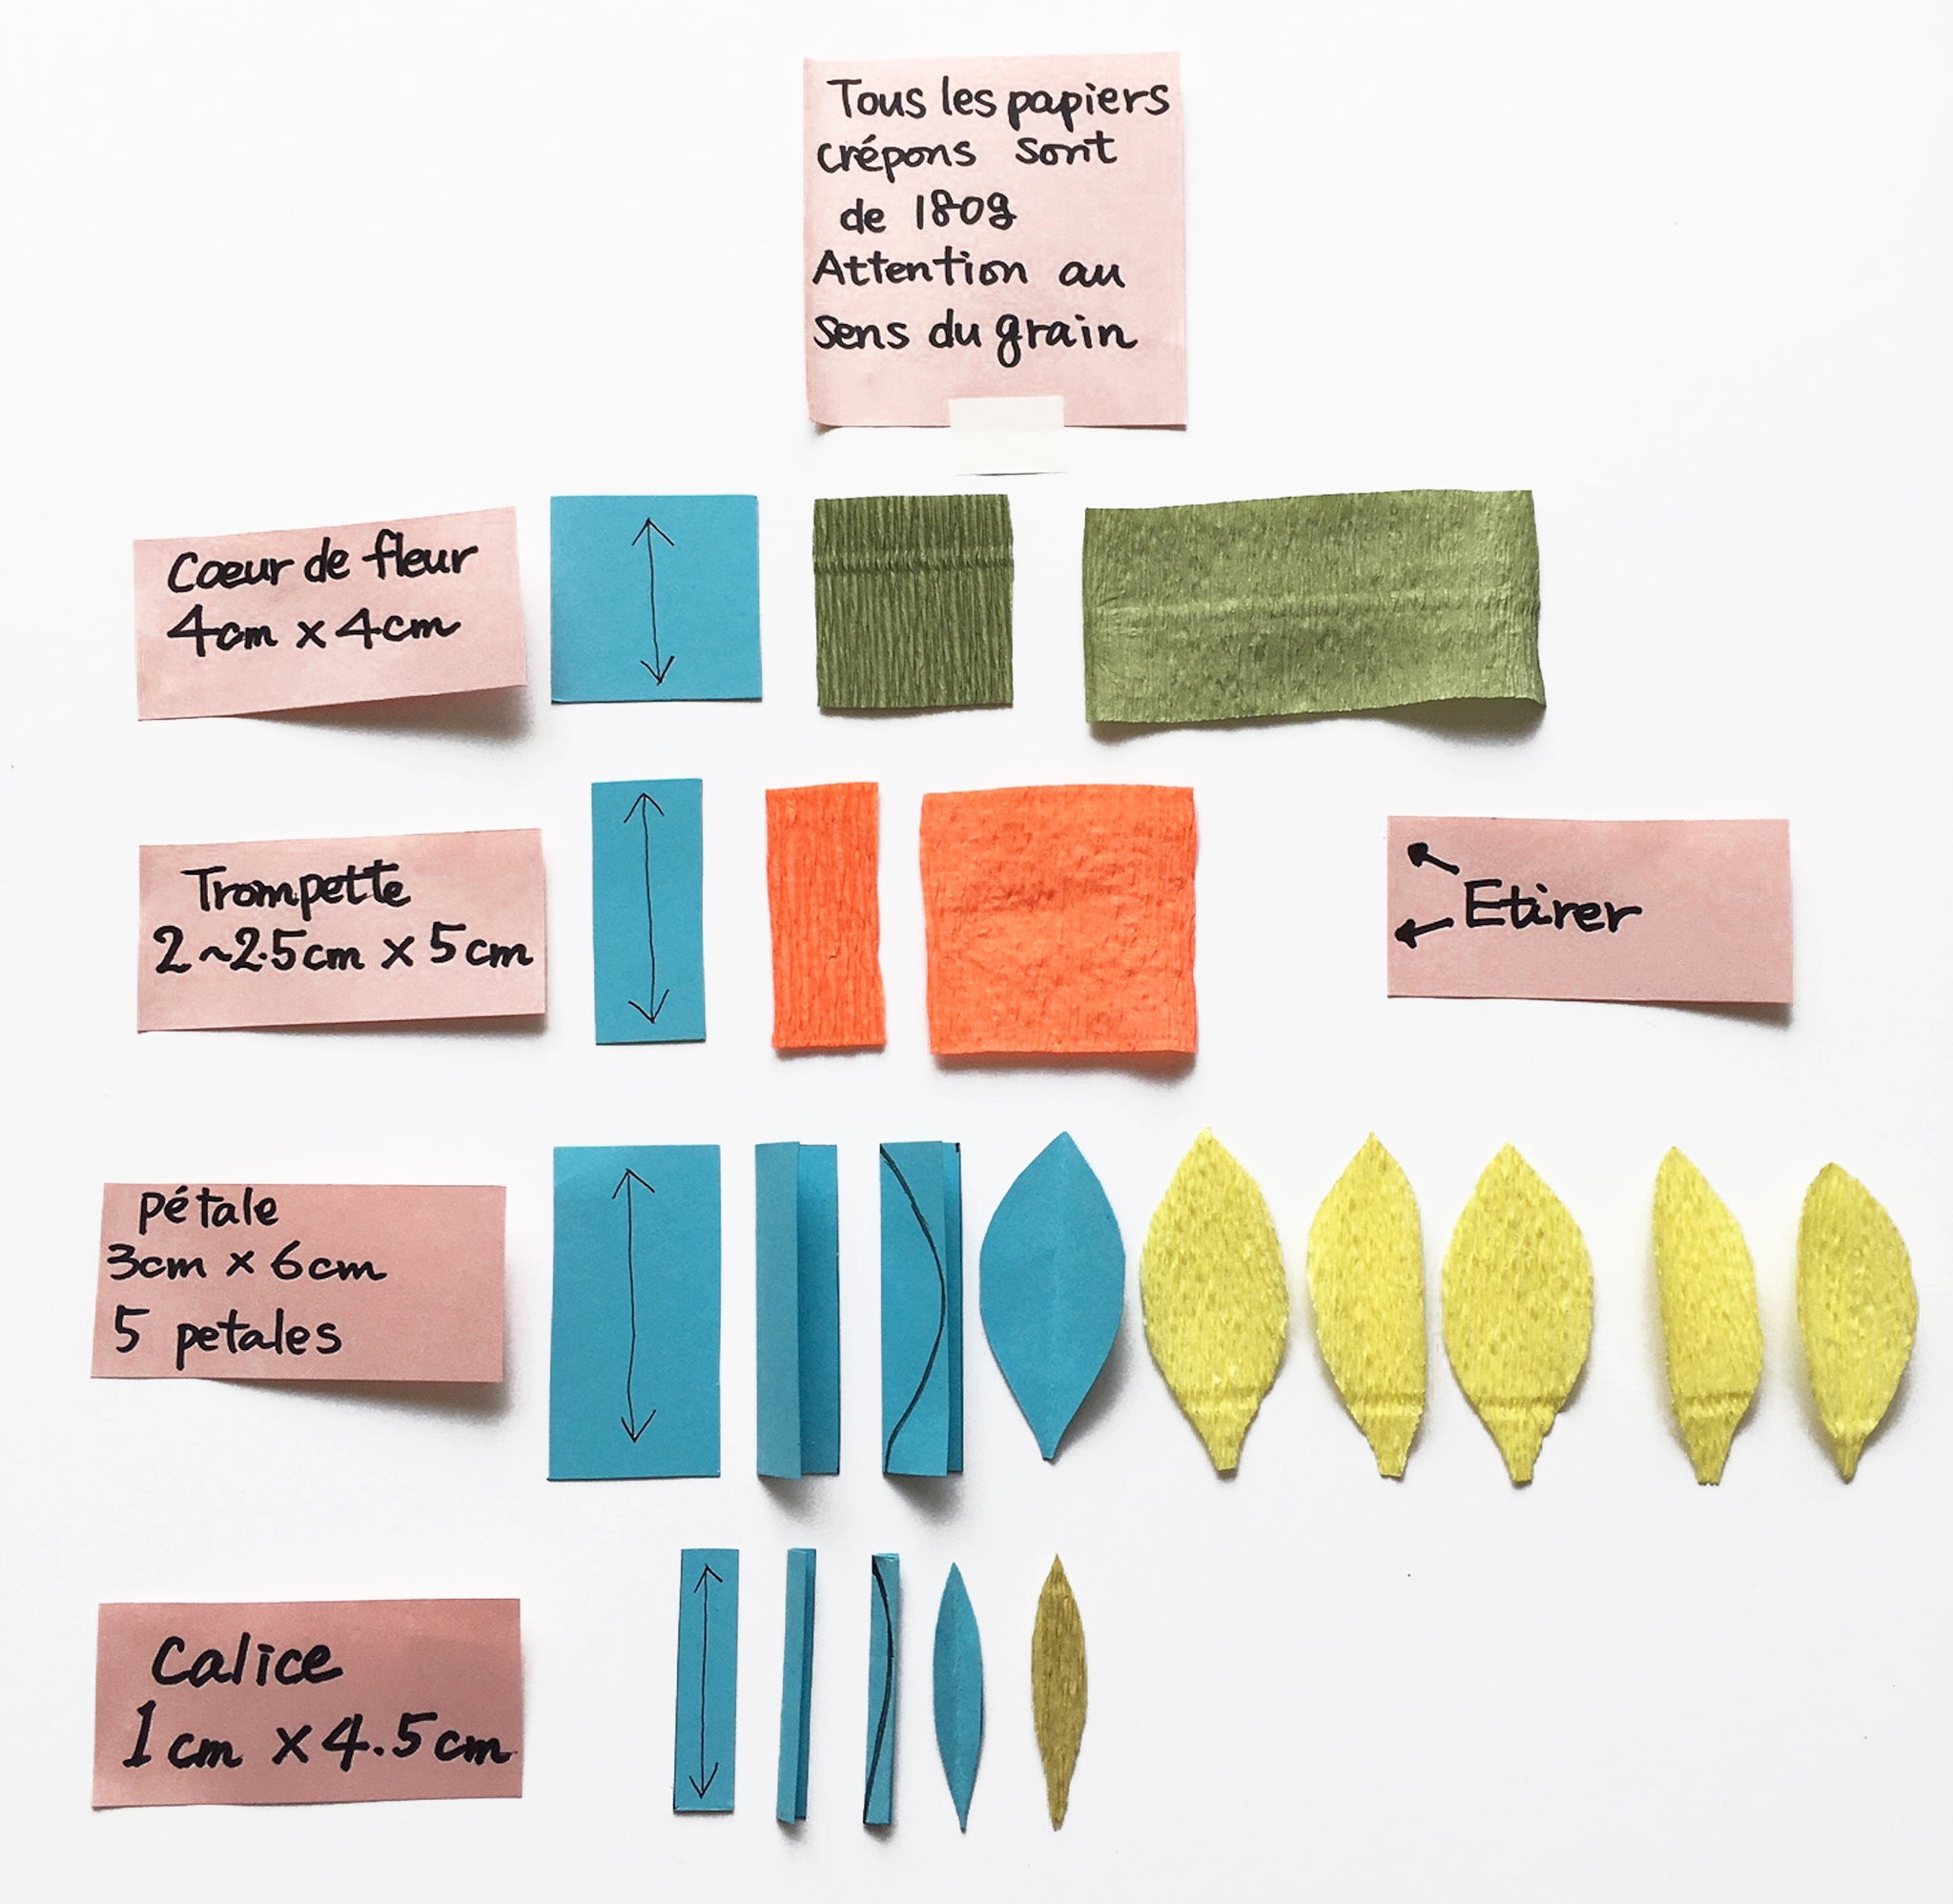
Firstly, in order to simplify the assembly of the flower, I advise you to prepare the cutouts of the different parts of your daffodil. For a daffodil, you will need to cut:
- 1 square of crepe, here green, 4cm by 4cm for the center of your flower , at the level of the pistils. Then stretch your rectangle horizontally.
- 1 rectangle of crepe, here orange, approximately 2/2.5cm wide by 5cm long for the trumpet . Then stretch your rectangle horizontally.
- 5 rectangles of crepe, here yellow, 3cm wide by 6cm long for the petals of your flower . To make the cut, fold your rectangle in half, vertically and cut out a half-moon shape, as shown in the photo. Repeat this step 4 more times.
- 1 rectangle of crepe, here light green, 1cm wide by 4.5cm long for the chalice . To make the cut, fold your rectangle in half, vertically and cut out a slightly curved half-moon shape, as shown in the photo.
ATTENTION ! You must pay careful attention to the direction of the weft of your crepe paper. This must be positioned vertically. 
- We will first make the stem of the daffodil which will serve as a base for the rest.
Detach a few pistils, approximately 3-4, from your bundle. Cut a strip of floratape a little longer than your metal rod. - Leave half of the pistils protruding and hold it to the stem by pinching with your fingers. Take the floratape and place it in this location. Wrap the floratape along your stem, rolling it under your fingers while stretching the floratape. This manipulation is explained in our video “TUTO – The spring bouquet” , starting at 0:35 seconds of the video.
- Take your square of green crepe, made previously, and place it around your stem, at the level of the pistil as shown in the photo. Apply glue to your crepe square and wrap it around the stem.
- You get your stem+pistils.
- It's the trumpet's turn. Place your crepon rectangle with the weft horizontal.
- Apply glue along one edge and join it to the other edge.
- You get a hit.
- Gently spread and bend one side of the tube outward to begin forming the trumpet.
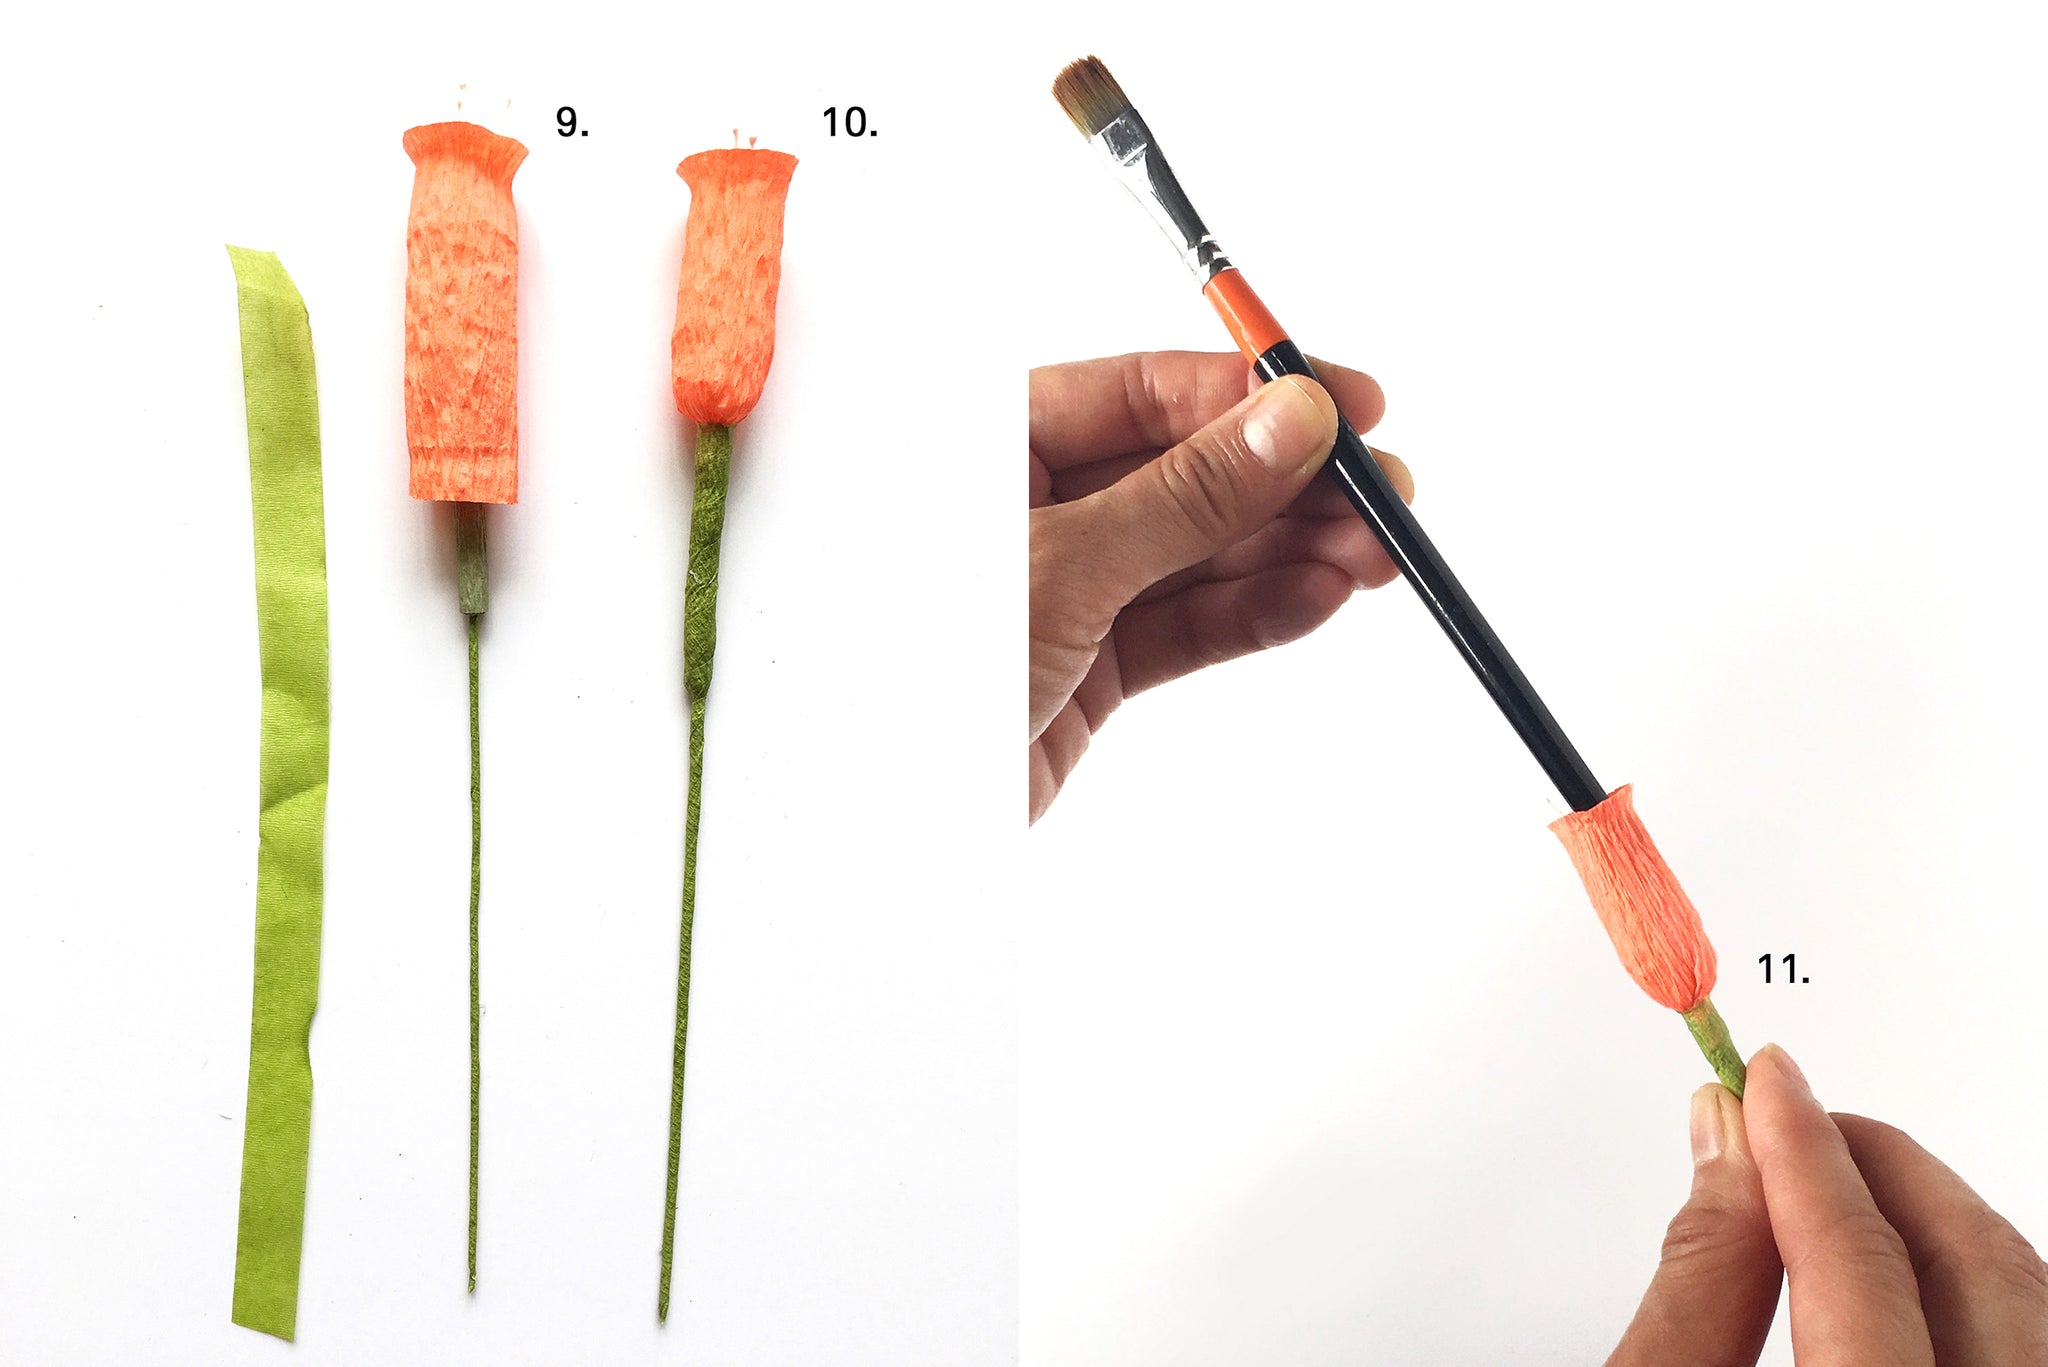
- Thread the trumpet onto the stem, as shown in the photo, leaving the pistils slightly protruding. Cut a strip of floratape a little longer than your metal rod.
- Squeeze the bottom of the trumpet and roll the floratape from the bottom of the trumpet to the bottom of the stem to thicken it.
- Using a brush or pencil, round the bottom of the trumpet to give it more volume.

- Take your 5 petals. Stretch them slightly to bend them. Apply a dab of glue to the base of each petal.
- Glue a first petal to the base of the trumpet, as shown in the photo, just at the base of it.
- Glue the other 4 petals in this way, all around the trumpet.
- Cut a strip of floratape a little longer than your metal rod.
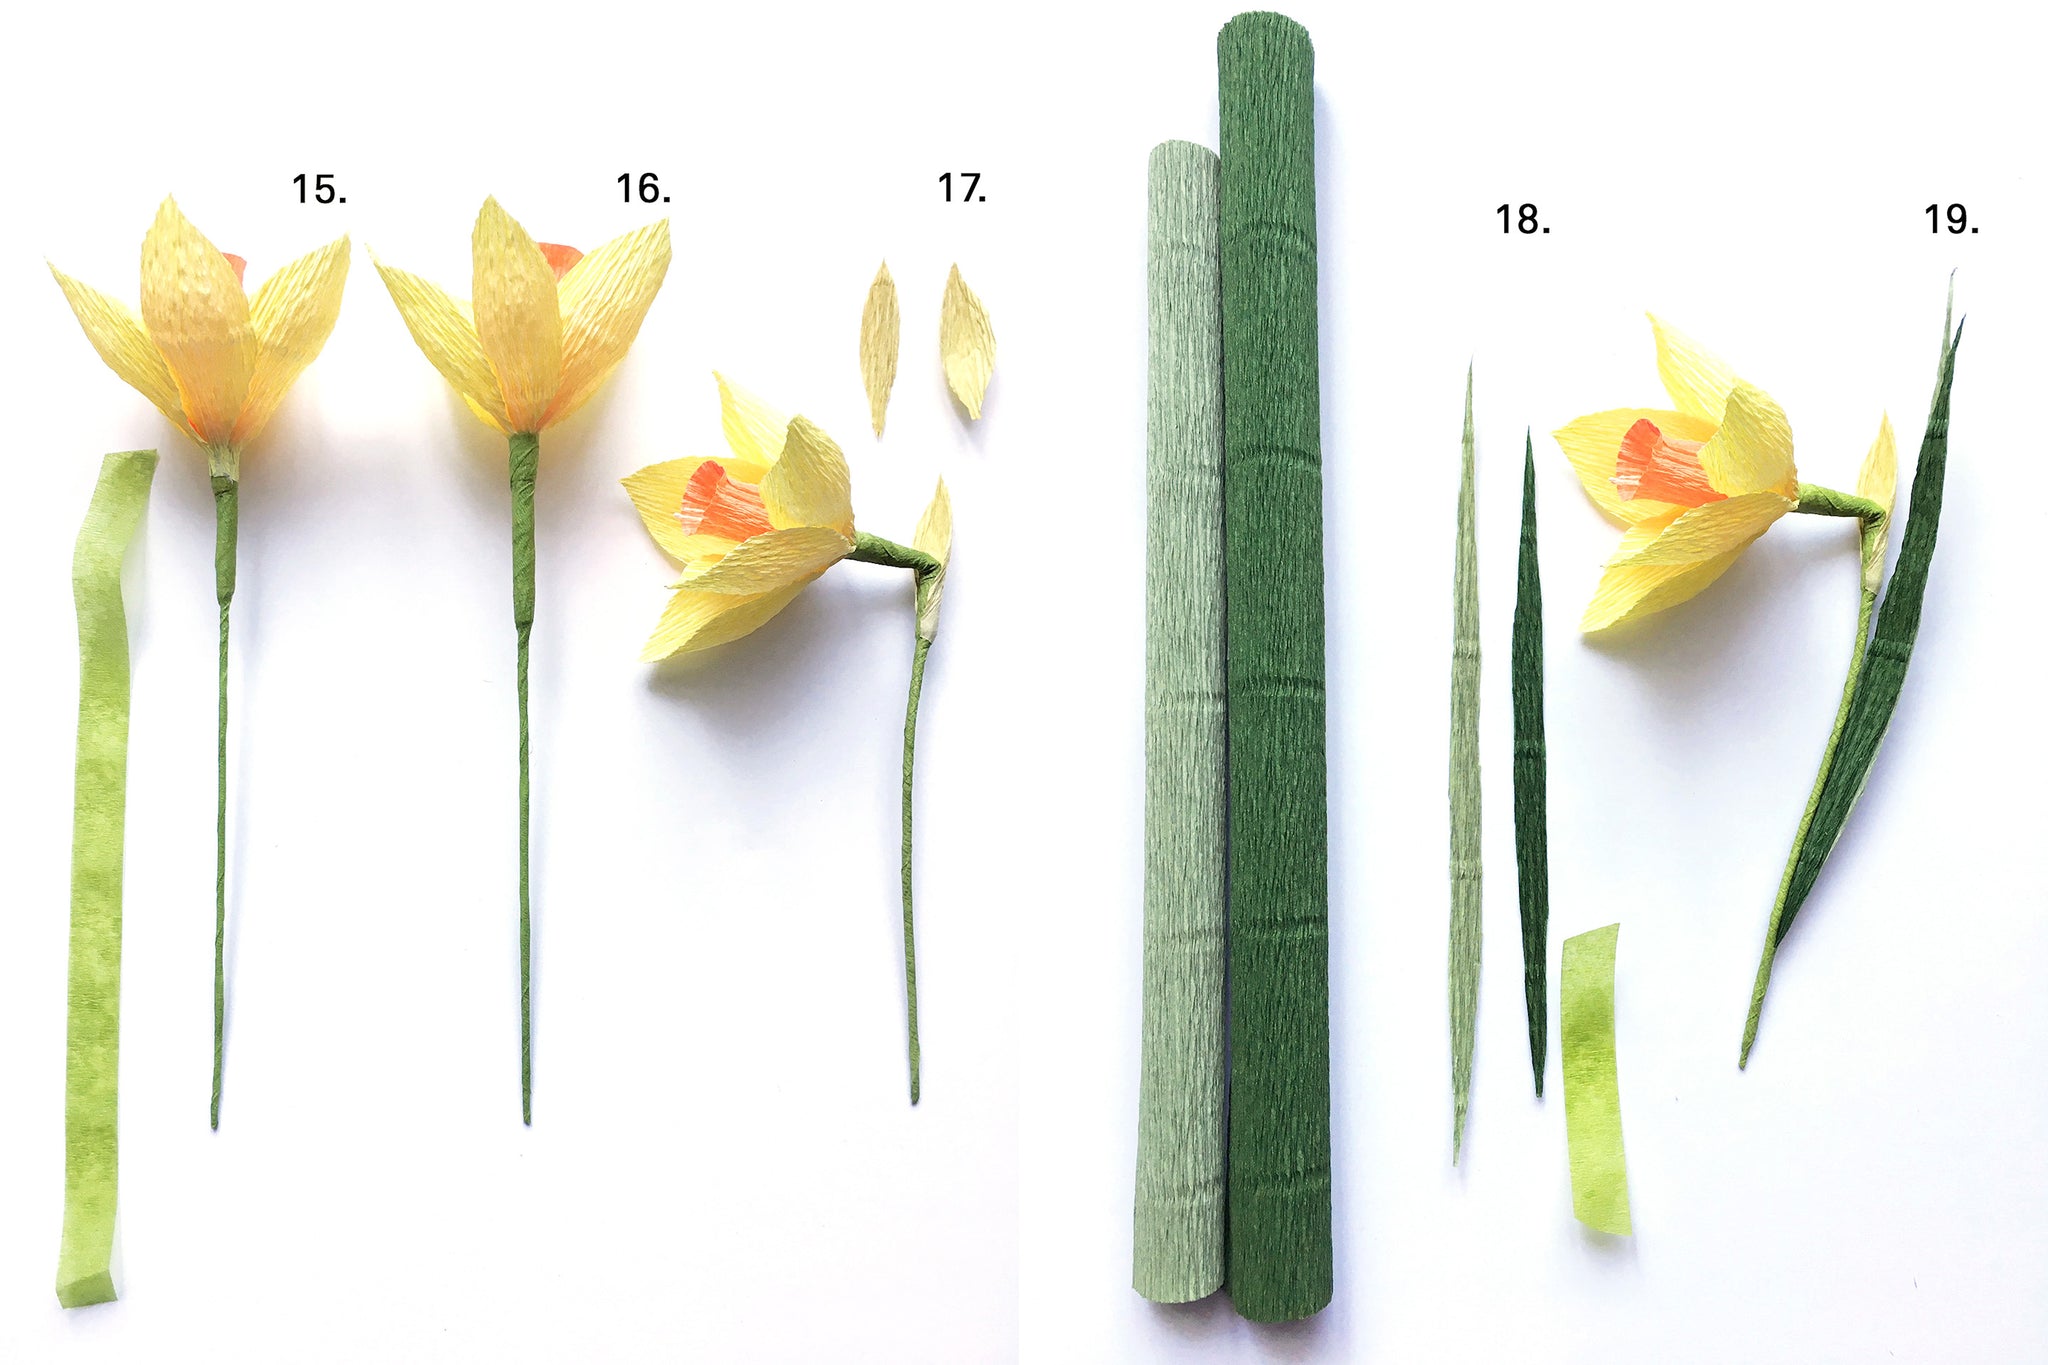
- Wrap the floratape along the stem, from the bottom of the petals to the bottom of the stem.
- Bend the stem, as shown in the photo. Take your small rectangle of light green crepe, the chalice. Stretch it slightly to bend it. Apply a dab of glue to the base of the chalice. Place it a few millimeters from the fold, as shown in the photo. Hold the chalice with a small piece of floratape.
- From your sheets of green crepe paper, cut thin pieces of paper in the shape of blades of grass to make the leaves of your daffodil. Apply a dab of glue to the base of the leaves.
- Place it at the bottom of the rod, as shown in the photo. Hold the leaves in place using a small piece of floratape.


And There you go ! You have made a pretty daffodil!

In order to make a pretty bouquet of colorful daffodils, do not hesitate to vary the shades of your crepe papers: off-white, pale and bright yellow, orange, coral and pink for the petals and the trumpet of the flower and more or less dark shades of green for the leaves.
This tutorial, as well as all the necessary creative supplies, are now available in our “Crepon Daffodil Bouquet Kit” kit which will allow you to make a generous bouquet of daffodils.

Thanks to our dear Eriko for this flowery tutorial! If you want to get your fill of nature and marvel at the multitude of flowers in her garden, don't hesitate to visit her Instagram account @toureaueriko !
I hope you enjoyed this spring DIY. I'll see you soon for new creative inspirations around paper!
Take good care of yourself in the meantime,
Adeline
Do you like daffodils?


TONIA > Thank you so much for your lovely comment !
Thanks for the tutorial, your work is amazing
IZABEBELA > Merci à votre pour votre petit mot :) Nous sommes ravis d’apprendre que ce tutoriel vous a semblé simple et accessible !
Merci pour ce tutoriel, le bouquet est magnifique. C’est assez facile à réaliser.
Leave a comment