


Japanese Garden TUTORIAL
At the start of September, I wanted to offer you a quick and simple tutorial for creating your own little Japanese garden in order to bring you a little calm and serenity in the middle of the tumult of the start of the school year.

Inspired by Zen Buddhism, the dry garden or karesansui designates a type of garden which is characterized by its sobriety but above all by its absence of water. It is then most often represented by drawings, shapes traced in the sand or gravel which make up this type of space or by stones or moss elements skillfully placed on the ground. Small in size, dry gardens are generally found within the grounds of Buddhist temples.

It is a type of garden that invites contemplation and not strolling. Indeed, these are not gardens that we pass through physically but that we travel through mentally, with our own eyes. Stripped of natural elements, flowers or plants subject to seasonal changes, the karesansui are as if frozen in time, as if it had no influence over them.

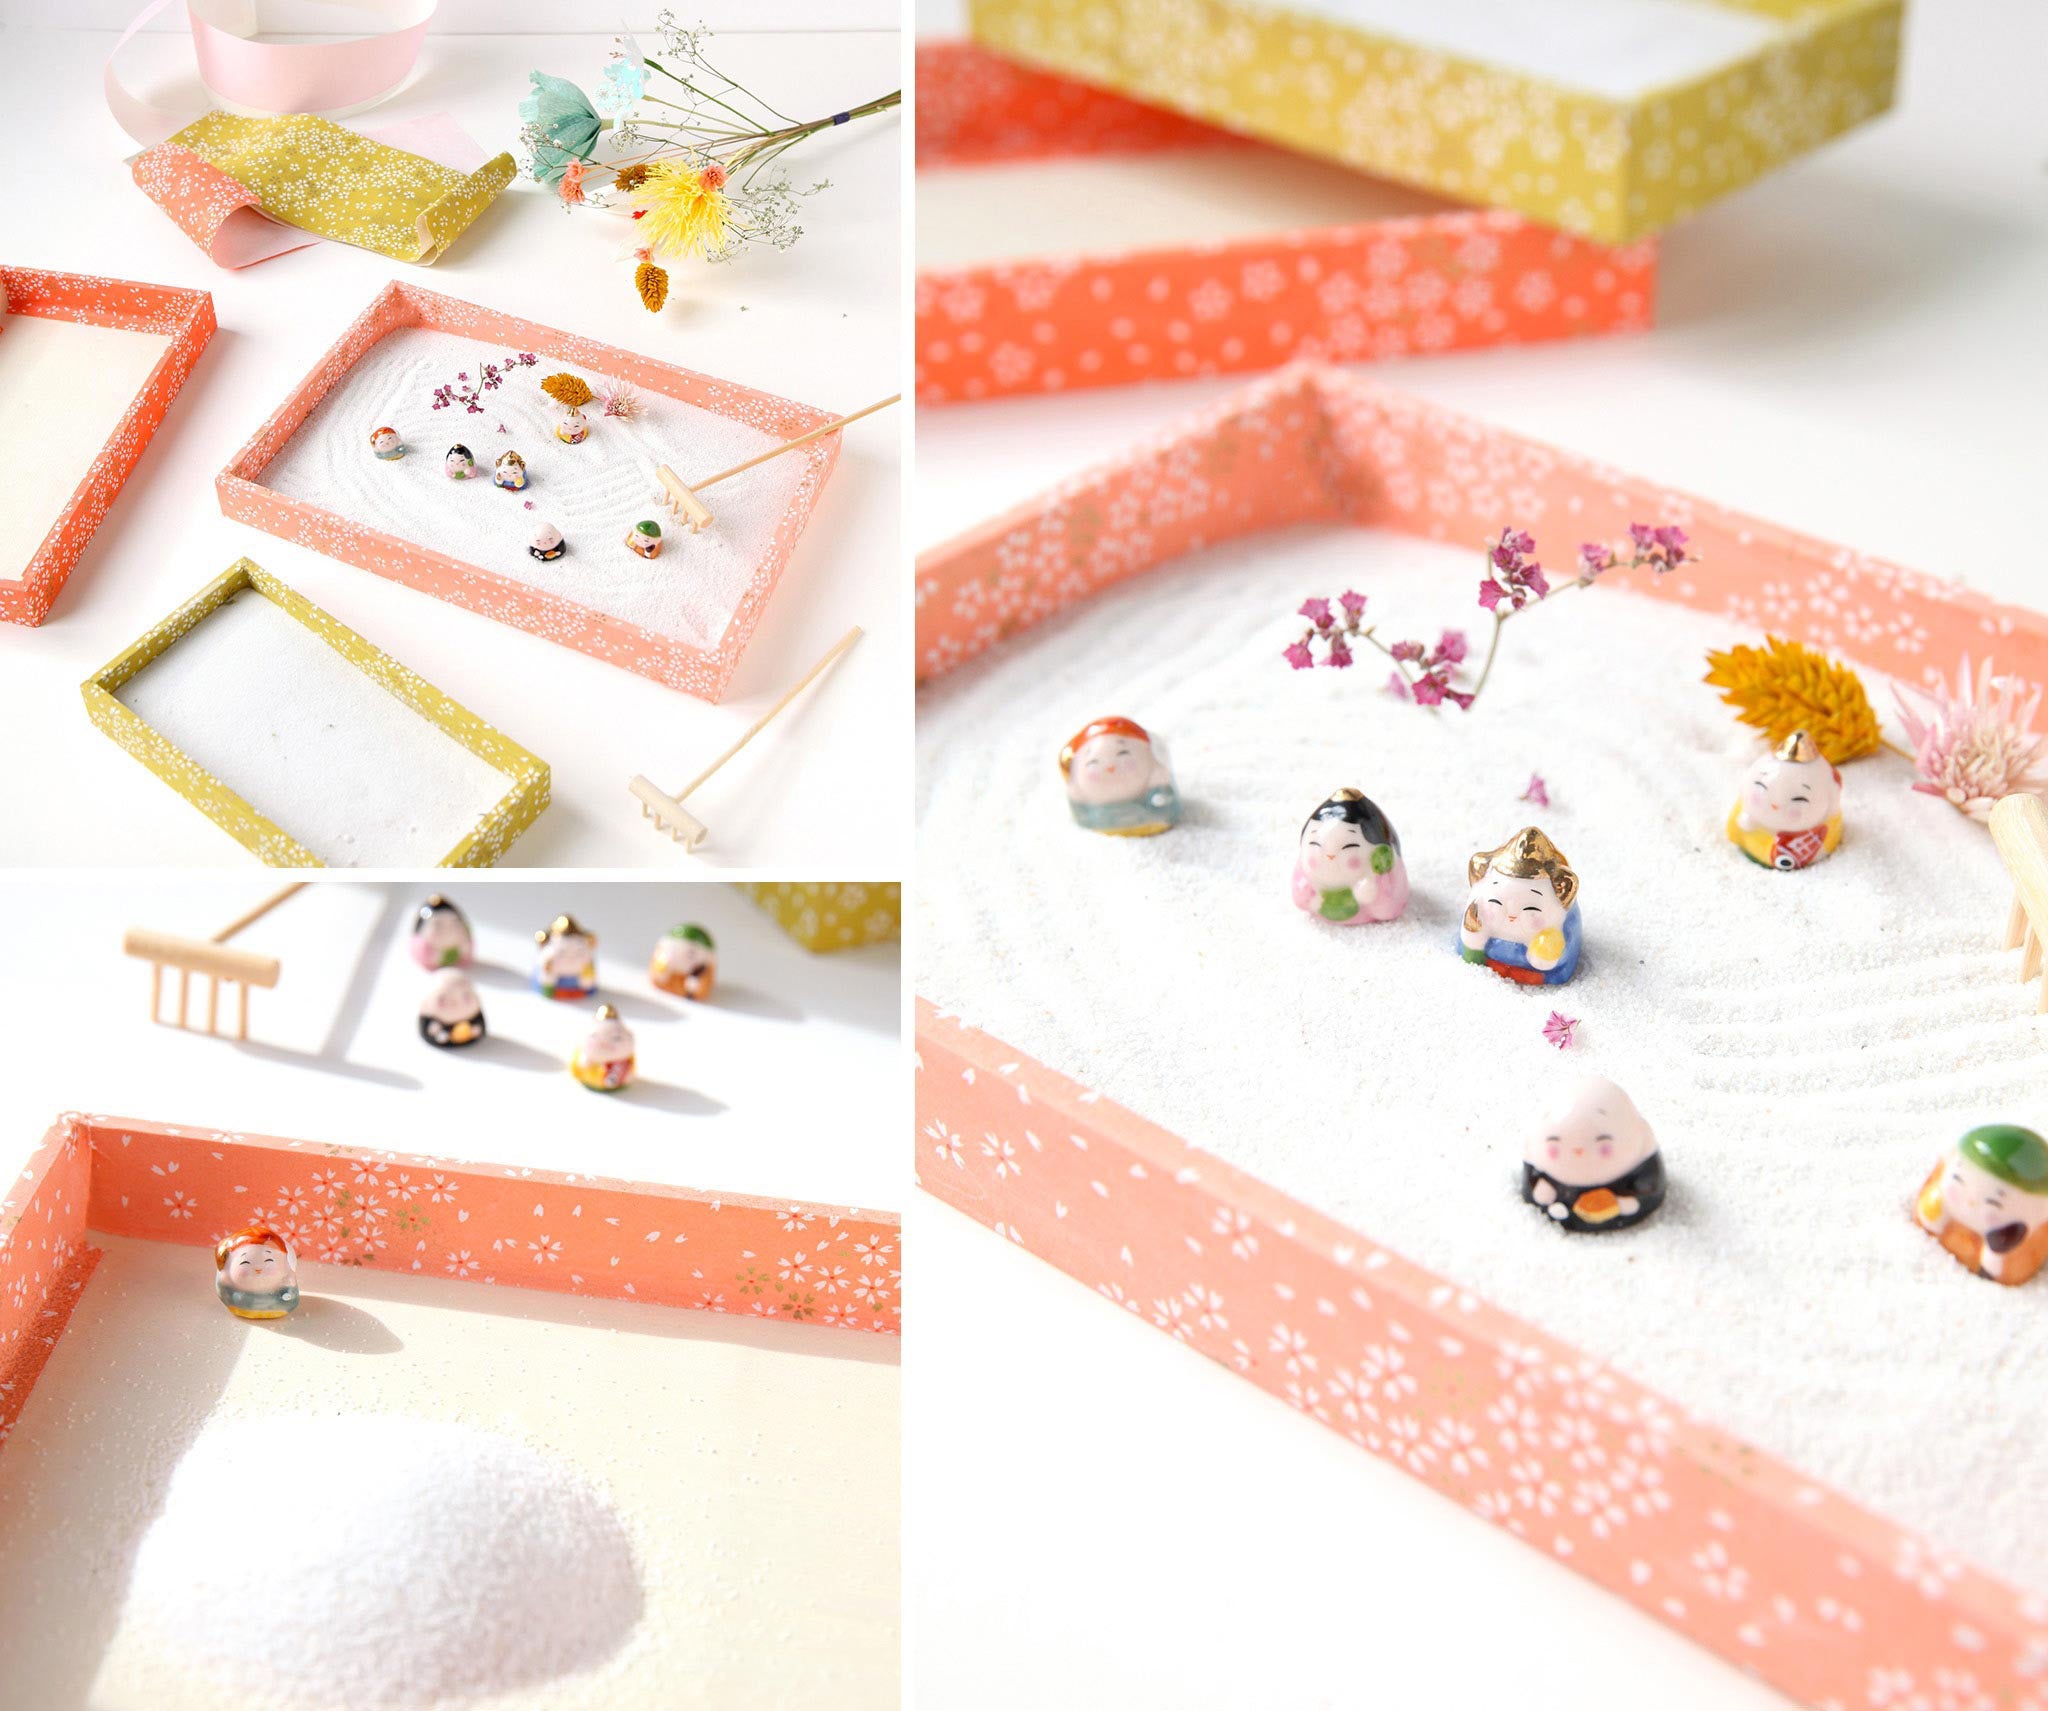
Today, I am sharing with you this little creative project inspired by the simplicity of Japanese dry gardens. Here, nothing very complicated: a small wooden tray covered with Japanese paper which demarcates the space of the garden, fine white sand to fill it, a few sprigs of dried flowers to bring a little nature (and color) to the Together, some little Japanese-inspired charms and a small rake to trace shapes in your garden.

In order to create your Japanese garden, you will need:

To make the tray:
For the decoration of the Japanese garden:
- small ceramic charms - For this article, we have chosen adorable figurines representing the 7 Deities of Happiness in Japan
- fine white sand
- a few sprigs of dried flowers
- a small wooden rake
To create your Japanese garden, here is what I recommend:
To begin, you will need to customize one or more wooden trays with Japanese paper. Depending on the model chosen, here are the pieces of Japanese paper to cut using a cutter and a cutting ruler:
-
for the small tray > 2 strips of 20cm in length by 8cm in width (for the largest sides) and 2 strips of 10cm in length by 8cm in width (for the smallest sides)
- for the medium tray > 2 strips of 24cm in length by 8cm in width (for the largest sides) and 2 strips of 15cm in length by 8cm in width (for the smallest sides)
- for the large tray > 2 strips of 28cm in length by 8cm in width (for the largest sides) and 2 strips of 19cm in length by 8cm in width (for the smallest sides)
Once your pieces of paper are cut out, using the brush: apply white glue to your pieces of Japanese paper. Then place them delicately on your wooden trays and push out any air bubbles with the edge of your hand. Then let it dry for a short half hour.
Now let’s move on to the decoration! Fill your tray with sand, the idea being to have a good layer of sand so you can trace patterns without touching the bottom of the tray. Then arrange your various small elements on the sand as you wish: two or three sprigs of dried flowers planted in the sand, a few adorable grigris, a small wooden rake and voilà, your Japanese-inspired dry garden is ready!

When I imagined this little Japanese garden, I really wanted to place these adorable figurines, chubby and smiling, which represent the 7 Japanese Deities of Happiness (or shichifukujin ): Bishamonten, Benzaiten, Ebisu, Daikokuten, Fukurokuju, Jurôjin and Hotei which are linked to the Japanese celebration of the new year.

I hope this article has inspired you with a little sweetness this back to school! I will see you very soon for new creative articles inspired by Japanese culture.
See you soon,
Adeline
Does this tutorial inspire your future creations?
Tell us more below in the comments!


MARCHETTI > Bonjour Annie :) Ils ne sont malheureusement pas en stock pour le moment dans notre boutique et sur notre e-shop car ils sont actuellement indisponibles auprès de notre fournisseur. Je vous invite donc, si le souhaitez, à vous inscrire à l’alerte de retour en stock par e-mail sur les fiches produits de chaque divinités qui vous intéresse.
bonjour,
7 Divinités Japonaises du Bonheur (ou shichifukujin) : Bishamonten, Benzaiten, Ebisu, Daikokuten, Fukurokuju, Jurôjin et Hotei qui sont liés à la célébration japonaise de la nouvelle année.comment faire pour trouver les
merci
annie marchetti
Leave a comment