


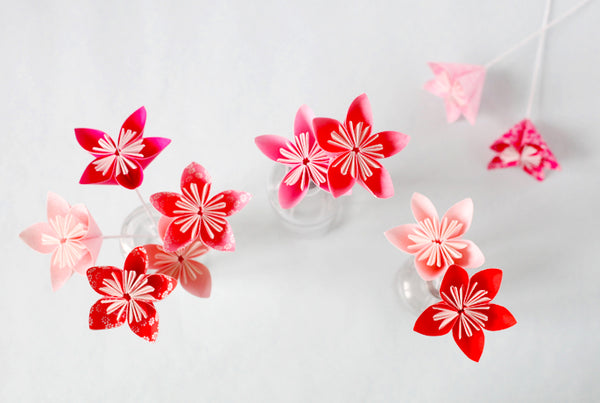
DIY origami flowers
What if we made ourselves a bouquet of paper flowers for fun? For the nice surprise of offering flowers outside of official holidays... To a close friend, her grandmother? his mom ? his fiancee ? ...But for oneself seems good to me too!
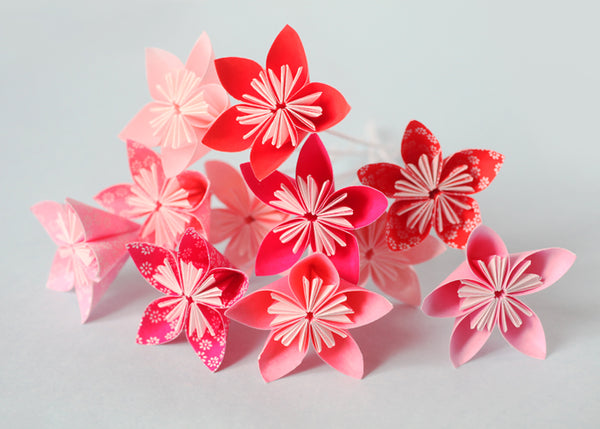
When I discovered this folding, more than two years ago, I immediately said to myself that it would be very successful. I then tested it and very quickly wanted to offer it in lots of different paper combinations.
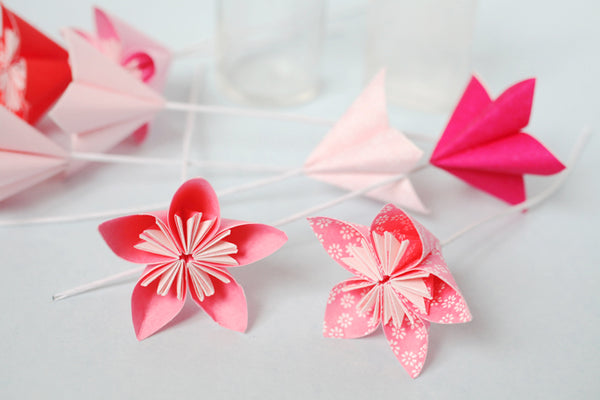
What makes a flower valuable is often the aesthetics of its center. The pistils of this one, very stylized, give a graphic and drawn side to the flower. That's why I love him so much.
- 5 squares of paper 6x6cm per flower,
- as well as glue
- and a thick support rod .
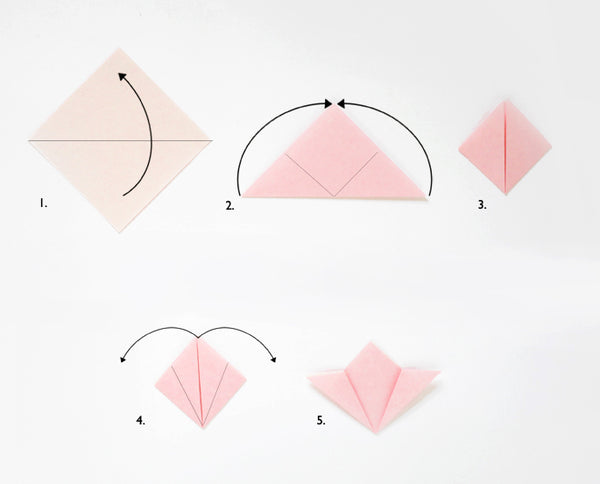
- Take a square of paper, white side facing you. Fold it in half diagonally.
- Fold to bring the side points over the top point.
- You get this.
- Fold as shown.
- You get this.
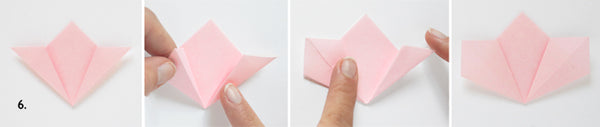
- Spread the left tip by sliding your finger inside and flatten to form a diamond. Repeat on the right side.
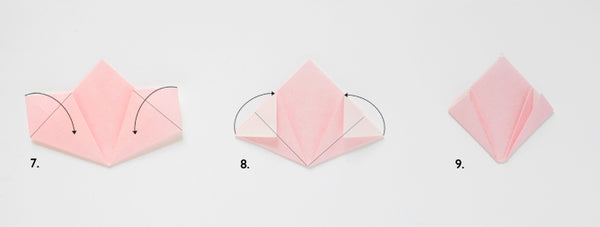
- Fold the ends of the sides like this.
- Then fold inwards.
- You get this.
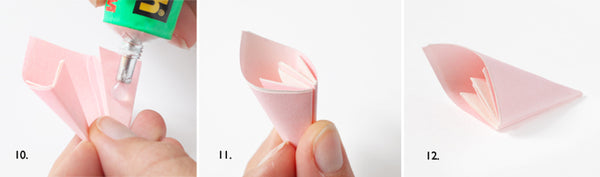
- Place a dot of glue as in the image. Place another dot of glue on the opposite side, on the opposite side.
- Bend the figure so as to close the petal. Maintain this while the glue sets.
- You have just finished your first petal!
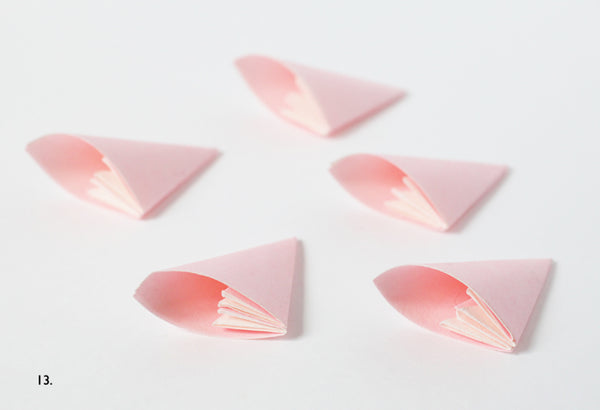
- Make 4 more petals so that you have 5 petals in total.

- Place a dot of glue on the side of a petal.
- Assemble it with a second petal on which you will also have placed a dot of glue beforehand.
- Assemble the 5 petals in this way. Place a dot of glue on each petal located at the ends...

- ...and assemble to close your flower. You can slip it onto the end of a rod and secure everything with a dot of glue.


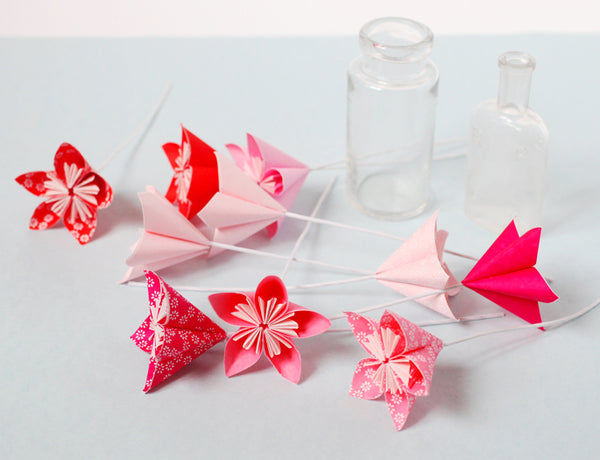
If you want to learn how to create a bouquet, together at the boutique, we organize workshops which will allow you to leave with a bouquet of Japanese paper flowers in the colors of your choice, made by you under our caring gaze!
Find all the dates of our workshops here .
You can find, here , different origami flower bouquet kits, in different range of colors.
Looking forward to meeting you there!
Adeline.


GARNIER : Merci pour votre petit mot :) Quelle bonne idée pour offrir un joli bouquet coloré (et durable !)
STEPHANIE : Elles sont disponibles sur notre e-shop à cette adresse : https://www.adelineklam.com/collections/loisirs-creatifs/products/lot-de-10-tiges-papier-epaisses-de-50cm
c’est super simple pour un résultat super jolie!
Moi je l’ai fait pour la fête des mères.☺️👍🌸
Bonjour pouvez-vous me dire ou avez-vous trouvé les tiges car le prof de techno de ma fille leur a demandé de faire vos fleurs?
Leave a comment